Manage a Routing Control
Routing controls often need updated or changed to meet the varying needs of a contact center's daily activities. When the need arises, a designated Humanify Portal user with access to Routing Controls can edit any of the ten routing control types, as described below, to get the necessary results.
Routing Control types:
- Date/Time – Used to set a specific date and time for a planned messaging task to start.
- Date/Time Range – Used to set a specific date and time for a planned messaging task to start and end.
- Number – Used for creating intelligent routing decisions such as the longest call in queue.
- Percentage – Used for percentage allocation to a different provider or number.
- Schedule – Used to set up both normal and special schedules.
- Switch – Used to control access to special routing services.
- Switch or Default – Used to control access to special routing services.
- Table – Used to control access to special routing services.
- Text – Used for entering a phone number to forward a call to after hours.
- Throttle – Used for throttling call volume to different queues.
Accessing the Manage Control Interface
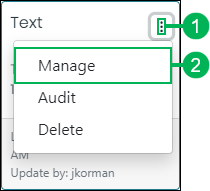
Locate the control you need to manage and access the Manage Control interface by doing the following:
- Click the Actions button.
- Select Manage to access.
Using the Manage Controls Interface
The Manage Control interface differs for each type of control. Click on a control type linked below for additional details on how to manage each specific type:
- Manage a Date/Time Control
- Manage a Date/Time Range Control
- Manage a Number Control
- Manage a Percentage Control
- Manage a Schedule Control
- Manage a Switch Control
- Manage a Switch or Default Control
- Manage a Table Control
- Manage a Text Control
- Manage a Throttle Control