Create a Routing Control
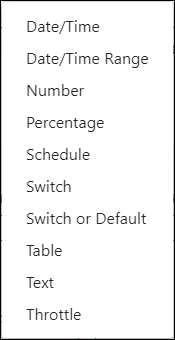
Routing controls are used to route inbound and outbound calls at a contact center, and many controls are often needed to handle the daily workload. Using the Routing Controls feature makes the process of creating routing controls easy and allows users to create as many controls as needed. Within the Routing Controls tool, there are several control types available. Control types include:
- Date/Time – Used to set a specific date and time for a planned messaging task to start.
- Date/Time Range – Used to set a specific date and time for a planned messaging task to start and end.
- Number – Used for creating intelligent routing decisions such as the longest call in queue.
- Percentage – Used for percentage allocation to a different provider or number.
- Schedule – Used to set up both normal and special schedules.
- Switch – Used to control access to special routing services.
- Switch or Default – Used to control access to special routing services.
- Table – Used to control access to special routing services.
- Text – Used for entering a phone number to forward a call to after hours.
- Throttle – Used for throttling call volume to different queues.
Creating a Control
Start the process for creating a new control by doing the following:
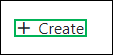
- Click the Create button to reveal a drop-down menu for selecting the type of control to create.
- Select the type of control you wish to create from the menu.
- Configure the new control from the Create Control interface that now displays.
Configuring the New Control
The Create Control interface differs depending on which type of control you are creating. Click on a control type linked below for additional details on how to configure each specific type:
- Configure a New Date/Time Control
- Configure a New Date/Time Range Control
- Configure a New Number Control
- Configure a New Percentage Control
- Configure a New Schedule Control
- Configure a New Switch Control
- Configure a New Switch or Default Control
- Configure a New Table Control
- Configure a New Text Control
- Configure a New Throttle Control