Configure a New Switch Control
The Switch control allows a user to turn or off specific features within a call flow. It is commonly used for the following types of scenarios:
- Turn on/off messages provided to a caller during certain situations, such as inclement weather or emergency situations
- Turn on/off message high periods of high call volume
This topic covers how to configure a new Switch control after creating.
Creating a Switch Control
To add a new Switch control, refer to the Create a Routing Control topic. Follow the instructions in that topic to add a new Switch control.
Using the Create New Switch Control Interface
Configure the new control by completing each section below:
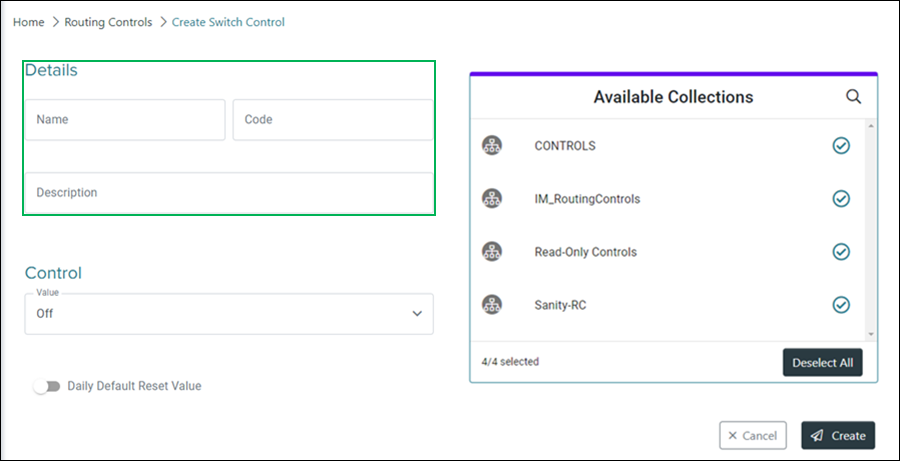
Enter Control Details

Name – Enter a name for the control in this field.
Code – Enter a unique code to represent the control in this field.
NOTE:
The Code field can no longer be edited after initially adding the control.
Description – Enter a brief description to help identify the purpose or intent of the control.
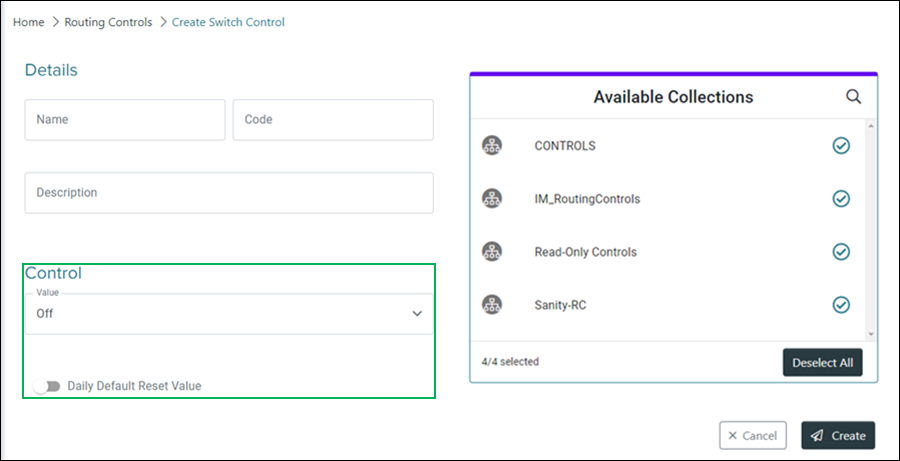
Configure Control Settings

Value – Select a value of either On or Off.
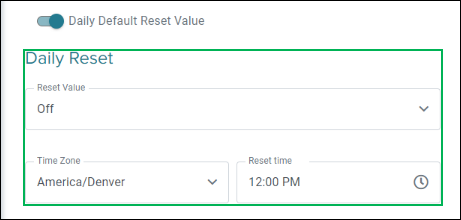
Daily Default Reset Value – Slider used to enable a daily reset for the control value. Enable this option if you need to reset the value at a specific time each day. When enabled a Daily Reset section displays, allowing you to configure the reset value.
Configure Daily Reset

Reset Value – Select a value of either On or Off. The value selected in the Value field will reset to the value selected in this field at the specified time.
Time Zone – Drop-down menu for selecting the time zone for the control.
Reset Time – Allows for the entry or selection of a time for the daily reset. Selecting this field displays the Time Selection Menu.
NOTE:
Use the Time Selection Menu to select a time:
Hour Selector – Enter or select the hour. Use the up and down arrows to select the previous or next hour.

Minute Selector – Enter or select the minute. Use the up and down arrows to select the previous or next minute.

AM / PM Selector – Select PM or AM for the time of day.

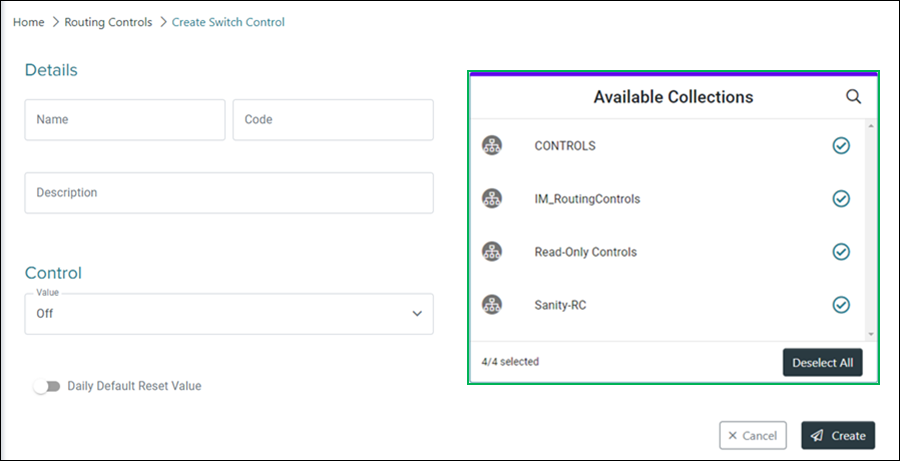
Assign Collections

Search Icon – Clicking the magnifying glass icon displays the Search field. Enter text in this field and click the Magnifying Glass icon to search for a specific collection or collections that are available for assignment to the control.

Selection Indicators – When a collection is selected for assignment, this circle displays a check.


Select/Deselect All – Clicking this button either selects or deselects all available collections.
NOTE:
Collections can only be assigned during the initial creation of the control. If changes are needed to collection assignment, you must create a new control.
Completing the Control Creation
Finish creating the new control by clicking the Create button, or click the Cancel button to cancel the operation.

NOTE:
If canceling the operation, a Confirm Navigation panel displays. Click Leave Page to confirm canceling. To close the panel and return to the previous task, click Stay on Page.
