Features of the Users Page
The Users page consists of all features needed for locating and working with all contact center (agent and supervisor) and non-contact center users. These features include:
- Use search, filters, and sorting to locate a specific user or users
- Switch between card and list views
- Using the Actions menu
- Perform specific tasks for a user
Using the Users Page Features
Refer to the descriptions below to learn more about each feature.

Search Filter – Enter text into this field to filter users based on specific text.
Status Filter – Select a status to filter which users are displayed on the page.
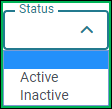
- Active – Displays only active users when selected.
- Inactive – Displays only inactive users when selected.
NOTE:
If no status filter option is selected, the page displays all users both active and inactive.
Record Count – Displays the total number of users currently displayed on the Users page out of all available.
NOTE:
Using filters on the page can change the record count numbers.
User Type Filter – Allows for the selection of the type of users displayed on the Users page.
- Agents – Displays only agents when selected.
- Supervisors – Displays only supervisors when selected.
- Users – Displays only users when selected.
Export Button – Exports all user data displayed on the page.
NOTE:
When exporting page data, all data is included in the export. This includes any cards (or records) that are currently not displayed on the page.
Page View Toggle – Click this icon to switch the page between card and list views.
- List View – Click this icon to view users in a list format.

- Card View – Click this icon to view users in a card format.

User Card – A card that displays the following information about each user on the Users page:
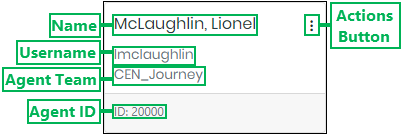
- Name – Displays the last and first name of the user.
- Username – Displays the username of the user.
- Agent Team – Displays the name of the team an agent is assigned to. (Agents only.)
- Agent ID – Displays the ID for users that are agents. (Agents only.)
- Actions Button – Displays a menu for accessing the following actions to perform for a user:
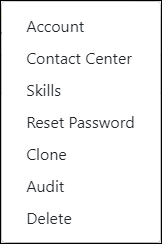
- Account – Opens the Edit Account interface for editing a user's account information. (See Edit User Account Information for more information.)
- Contact Center – Open the Contact Center interface for editing a user's agent information. (Agents only.) (See Edit User Contact Center Information for more information.)
- Skills – Opens the Assign Skills interface for assigning or un-assigning skills for the agent. (Agents only.) (See Manage Skill Assignment for an Agent for more information.)
- Reset Password – Opens the Reset Password interface for resetting a user's password. (See Reset a User Password for more information.)
- Clone – Opens the Clone User interface for creating a new user based on similar account or contact center attributes. (See Clone a User for more information.)
- Audit – Opens the Audit User interface for viewing a history of changes made to the user. (SeeAudit a User for more information.)
- Delete – Opens the Delete User Confirmation dialog box allowing for the deletion of a user that is no longer needed. (See Delete a User for more information.)
NOTE:
The options available on this menu vary based on the user type and their role within the contact center. Some options will only display for users that are agents or supervisors.
Loading Additional Users Page Data
The Users page can initially display up to 50 user cards (records). If more than 50 users exist, you can have the page load more by clicking the Load more button located below the cards. Once clicked, the page will continuously load more cards as you scroll.
NOTE:
The Load more button only displays if more than 50 cards are available.
