Clone a User
Humanify Portal simplifies the process of creating a new user with the use of the Clone User function found on the Users page. Using this function to create a user allows some of the base user's settings to copy over to the new user.
NOTE:
If cloning a contact center user (agent or supervisor), the following settings are copied
- Skill assignments
- Collection assignments
- Precision queues attributes and attribute values
If cloning a non-contact center user, the following settings are copied from the source user:
- Collection assignments
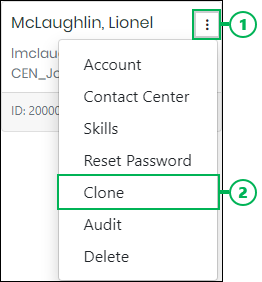
Accessing Clone User
Locate a user to clone and do the following:
- Access the Actions menu for the base user by clicking the Actions button.
- Select the Clone option to access the Clone User interface.
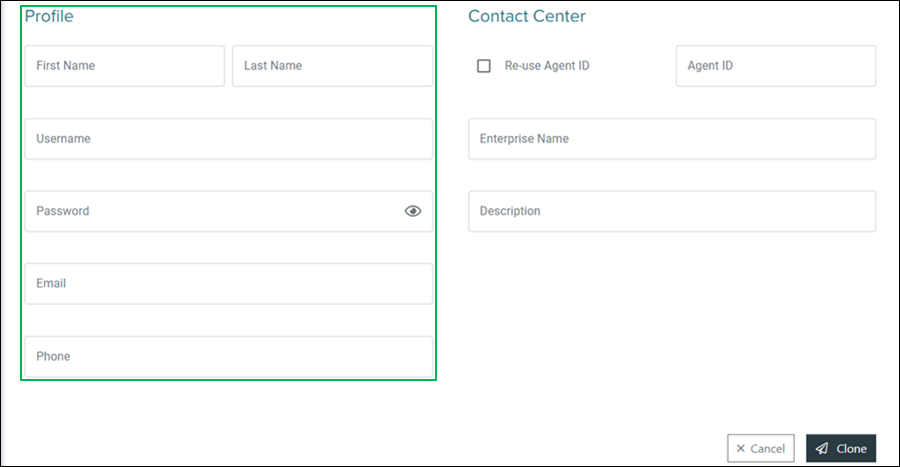
Cloning a User
The Clone User interface varies based on the type of based user type selected to clone and will display only relevant fields and options.
Completing the Profile Section
The Profile section is available for all users and is used for the entry of the user's basic information.
First Name – Field for entering the user's first name.
Last Name – Field for entering the user's last name.
Username – Enter a username for the user in this field. This is used by the user to sign into Humanify Portal. See the topic Sign Into Portal for additional information about the username and how to sign in.
NOTES:
- The First Name, Last Name, and Username fields for agents and supervisors support the use of the following ASCII characters:

- Due to a restriction in Active Directory, the Username field must also contain a combination of alphanumeric characters. It must also contain at least one alphabetic character.
- The last character of the Username field may not be a period (.).
Password – Enter a password for the cloned user in this field. You can also leave this field blank to have Humanify Portal automatically generate a password.
NOTES:
Reveal the hidden characters by clicking the Reveal Hidden Characters icon.

Reveal Hidden Characters
If the Password field is left blank, a password is automatically generated for the user. The generated password is as follows:
- <First Character of First Name in Uppercase> + <First Character of Last Name in Lowercase> + <Phone Number> + !!
- An example generated password for an agent named Tim Smith, with the phone number 555-123-0001, would be: Ts5551230001!!
If the first character of the First Name and Last Name fields contain any special characters, the password fails to automatically generate. In this case, enter the password manually.
There is also an Active Directory policy in place that requires the password to contain at least one alphabetic character.
Email – Field for entering a business email address assigned to the user. A notification is sent to this email address upon cloning the new user.
Phone – Field for entering the user's personal phone number used to contact the user.
Completing the Contact Center Section
The Contact Center section only displays for contact center users (agents or supervisors). The information entered in this section is used in relation to the contact center.
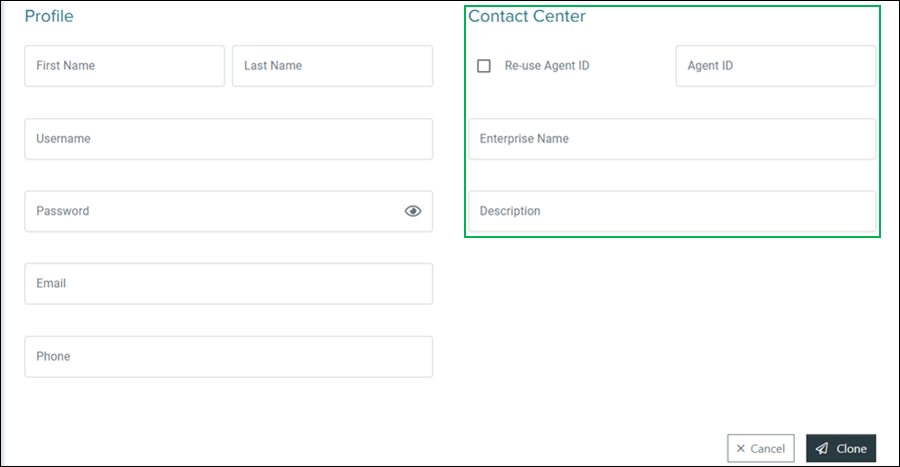
Re-use Agent ID – If this option is enabled, the agent ID from another agent can be entered for this user. Doing this removes the agent ID from the agent that it was originally assigned to, and they are no longer an agent user.
Agent ID – Field for entering the agent's agent ID.
Enterprise Name – Field for entering the name assigned to the agent within the Cisco Configuration Manager.
NOTES:
The Enterprise Name is automatically generated based on the Last Name and First Name fields (LastName_FirstName). This field only supports the use of the underscore (_) and period (.) special characters with the following exceptions:
- If the first character of the Last Name field is any special character, it is removed when the Enterprise Name is generated.
- Any unsupported special characters are also removed when the Enterprise Name is generated, regardless of character position.
If the first character of the First Name field is any supported special character, it remains when the Enterprise Name is generated.
Description – Field for entering the description of the agent used within the Cisco Configuration Manager.
Completing the Clone User
Finish creating the new user by clicking the Clone button, or click the Cancel button to cancel the operation.

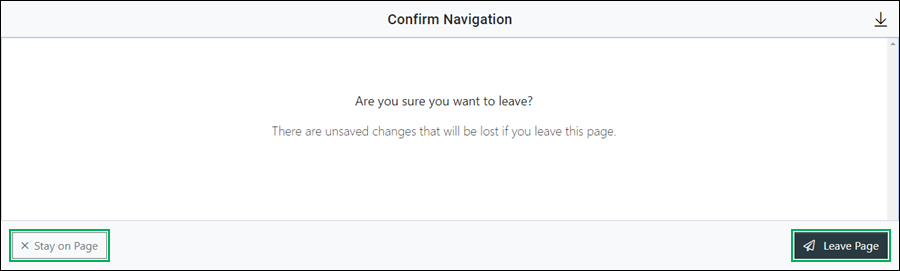
NOTE:
If canceling the operation, a Confirm Navigation panel displays. Click Leave Page to confirm canceling. To close the panel and return to the previous task, click Stay on Page.
Upon clicking Clone, Humanify Portal automatically creates a default password for the new user and sends an email notification for their new account. The user must initially sign in using this default password.
NOTE:
The default password will be a combination of the following:
- First Name Initial (upper case) + Last Name Initial (lower case) + Phone Number + !!
For example, a user named Jane Doe with the phone number 555-555-1234 will have a default password of "Jd5555551234!!".
After signing in with the default password, Humanify Portal will require the user to change their password. When the user has changed their password, it can then be used to sign into other applications that share the username and password, such as Jabber.