Topic Updated: April 01, 2025
Add a New Routing Control
Routing controls are used to route inbound and outbound calls at a contact center, and many controls are often needed to handle the daily workload. Using the Routing Controls tool makes the process of creating routing controls easy and allows users to create as many controls as needed.
Within the Routing Controls tool, there are several control types available. Control types include:
- Date/Time – Used to set a specific date and time for a planned messaging task to start.
- Date/Time Range – Used to set a specific date and time for a planned messaging task to start and end.
- Number – Used for creating intelligent routing decisions such as the longest call in queue.
- Percentage – Used for percentage allocation to a different provider or number.
- Schedule – Used to set up both normal and special schedules.
- Switch – Used to control access to special routing services.
- Switch or Default – Used to control access to special routing services.
- Table – Used to control access to special routing services.
- Text – Used for entering a phone number to forward a call to after hours.
- Throttle – Used for throttling call volume to different queues.
Adding a New Control
Add a new control to the Routing Controls page by doing the following:
Click the Menu button located at the top of the Routing Controls grid.

- Select the Add New Control option.
- On the Create Control dialog box, do the following:
- Enter a name for the new control into the Control Name field. (Limit: 50-characters and can include hyphens.)
NOTE:
The Control Code field automatically generates as text is entered into the Control Name field.
- Change the generated text in the Control Code field, if desired.
- Enter a brief description for the new control into the Control Description field.
- Place or remove a check next to each collection to associate or disassociate it with the new control in the Collection Assignment section. For additional information about collections, see Working with Collections.
NOTE:
Options to quickly select or deselect all collections are available above the list.
- Deselect All – Removes the check from all collections listed below.
- Select All – Adds a check to all collections listed below.
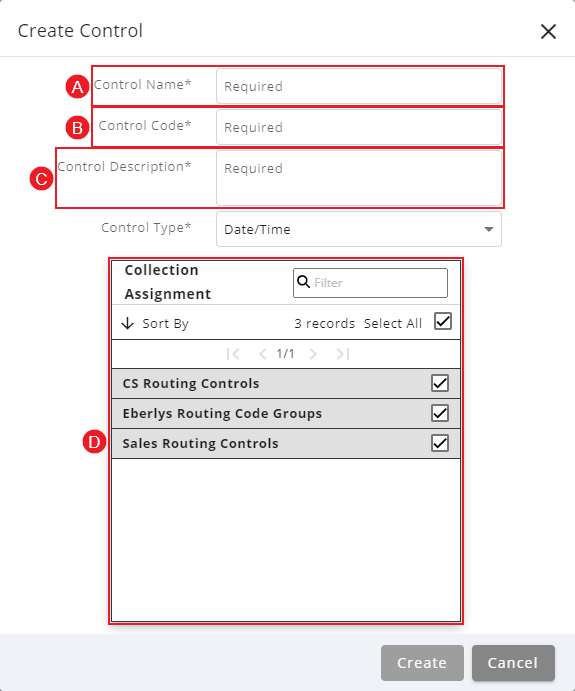
- Select the type of control desired from the Control Type drop-down menu.

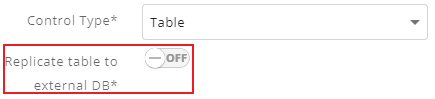
NOTE:
The Replicate table to external DB option displays when the selected Control Type is set to Table. With this option set to YES, the routing control table is created on an external database instead of the Portal database. This allows the table control to function quicker in some cases.
- Click on the topic listed below to see additional details for configuring the selected control type:
- Configure a New Date/Time Control
- Configure a New Date/Time Range Control
- Configure a New Number Control
- Configure a New Percentage Control
- Configure a New Schedule Control
- Configure a New Switch Control
- Configure a New Switch or Default Control
- Configure a New Table Control
- Configure a New Text Control
- Configure a New Throttle Control
- Click the Create button to save the new control, click the Cancel button to cancel the operation.
See Also
Copyright © 2025 Cisco. All rights reserved.
![]()
![]()
![]()