Topic Updated: April 01, 2025
Configure a New Date/Time Control
The Date/Time control allows a user to set a specific date and time for a routing task to begin. It is commonly used for enabling planned messaging.
This topic covers how to configure a new Date/Time control after adding.
Adding a Date/Time Control
To add a new Date/Time control, refer to the Add a New Routing Control topic.
Configuring the New Date/Time Control
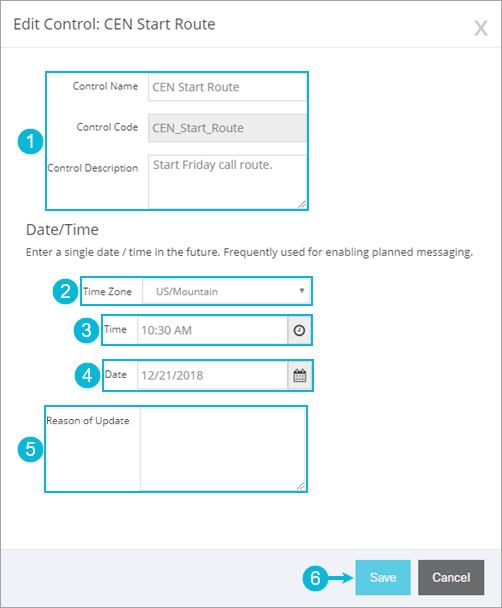
To configure a new Date/Time control:
- Edit the Control Name and Control Description fields as needed.
NOTE:
The Control Code field can no longer be edited after initially adding the control.
- Select a time zone by clicking the drop-down menu located next to Time Zone.
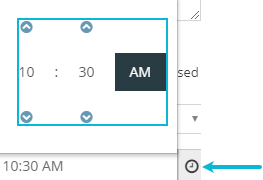
- Enter a time for the control to start in the Time field.
NOTE:
Alternatively, click the Clock button to reveal a dialog that allows for the selection of the time. Click the arrows to adjust the time, and click AM or PM to swap between AM or PM.
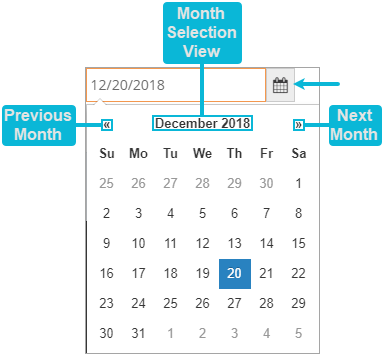
- Enter a date for the control to start in the Date field.
NOTE:
Alternatively, click the Calendar button to reveal a dialog that allows for the selection of the date. Click the arrows to switch the selected month. Clicking the Month/Year at the top of the calendar changes to the month selection view.
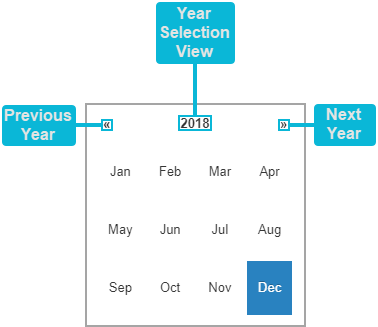
The month selection view allows for quick selection of a month. Use the arrows to navigate through the selected year or click the year to change to the year selection view.
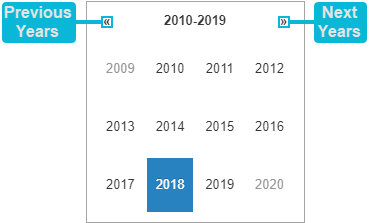
The year selection view allows for the quick selection of a year. Use the arrows to navigate between the years displayed.
- Click the Save button to save any changes made to the control or click the Cancel button to cancel the operation.
NOTE:
If canceling the operation, click the Continue button to confirm.

A success confirmation displays in the upper right corner upon successfully creating a new control. The message disappears after a few seconds.

See Also
Copyright © 2025 Cisco. All rights reserved.
![]()
![]()
![]()