Topic Updated: April 01, 2025
Configure a New Table Control
The Table control is commonly used to for adding a list of contact numbers into a call flow.
This topic covers how to configure a new Table control after adding.
Adding a Table Control
To add a new Table control, refer to the Add a New Routing Control topic.
Configuring the Table Control
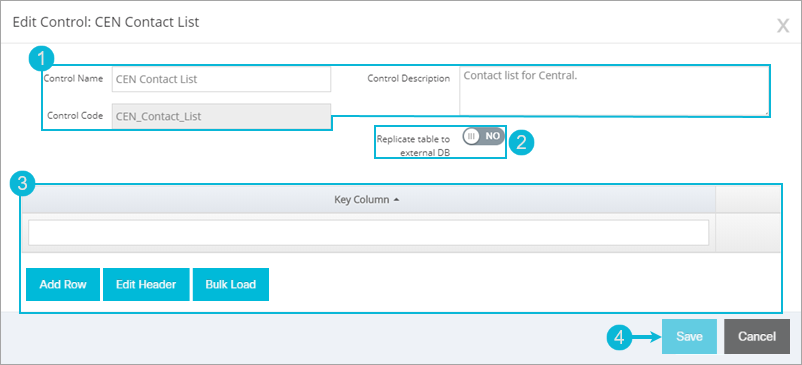
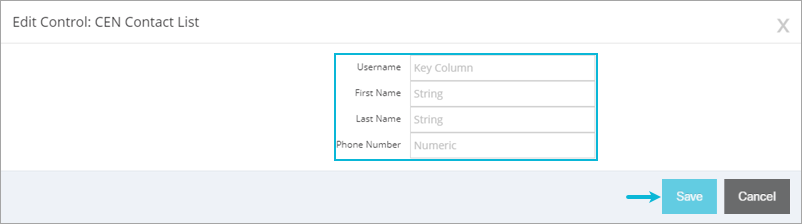
To configure a new Table control:
- Edit the Control Name and Control Description fields as needed.
NOTE:
The Control Code field can no longer be edited after initially adding the control.
- Enable or disable the Replicate table to external DB option by setting it to the ON or OFF position.
NOTE:
With the Replicate table to external DB option set to YES, the routing control table is created on an external database instead of the Webex CCE Administration Portal database. This allows the table control to function quicker in some cases.
When enabled, a Manual Data Sync button displays for Routing Control Administrator users. Clicking this button will sync the table control data to the internal database.

- Create the table and add any data needed for the table control. Refer to the Creating a Table or Using Bulk Load to Create a Table sections below for assistance with creating a table.
- Click the Save button to save any changes made to the control or click the Cancel button to cancel the operation.
NOTE:
If canceling the operation, click the Continue button to confirm.

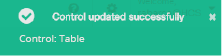
A success confirmation displays in the upper right corner upon successfully creating a new control. The message disappears after a few seconds.
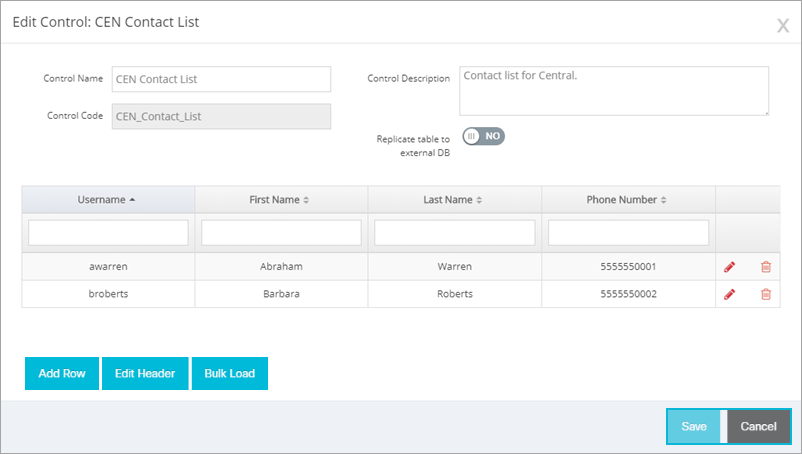
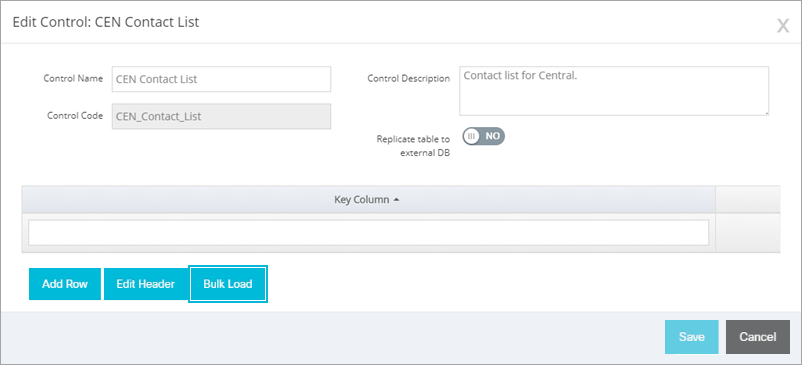
Creating a Table
This section shows how to create a table and add data to it.
NOTE:
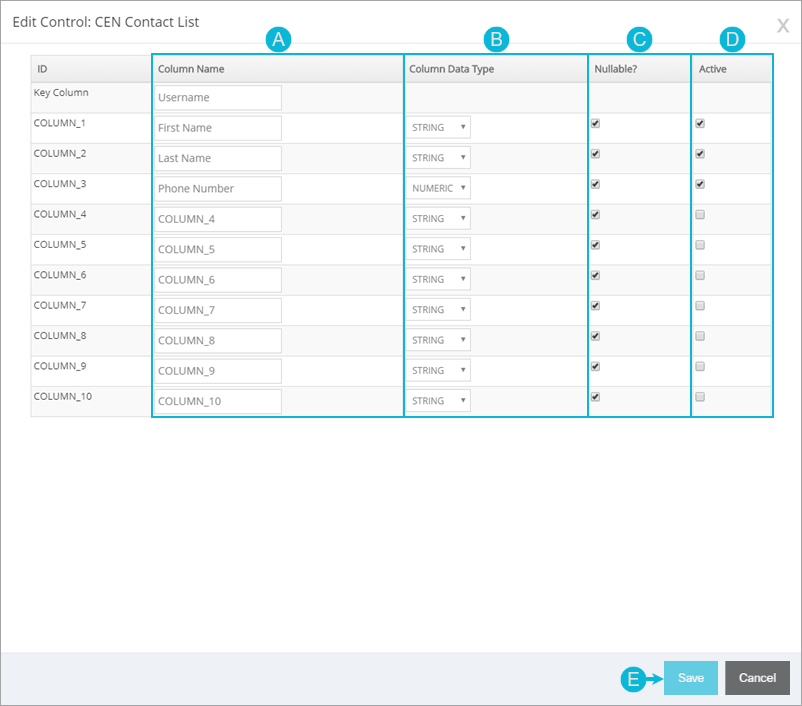
By default, the table consists of a single column named Key Column. This column is only a placeholder and can be renamed.
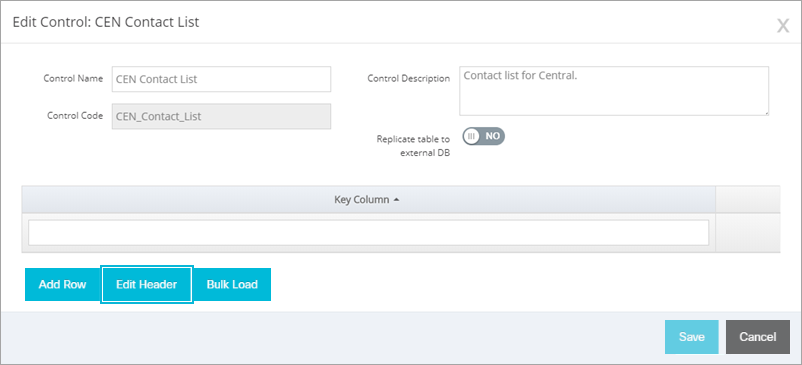
- Click the Edit Header button to add and enter names for the table's column headers.
- Name, configure, and activate each column needed for the table by doing the following:
- Enter a name for each column under the Column Name column.
- Choose the type of data to be entered in each column by clicking the drop-menus under Column Data Type and select one of the following for each column:
- BOOLEAN – Allows for a Yes or No selection.
- DATE – Allows for the selection of a date.
- NUMERIC – Allows for the entry or selection of any number. (40 characters maximum.)
- STRING – Allows for the entry of any character. (40 characters maximum.)
NOTE:
Each table control has the following limitations:
Support for a maximum of 10 columns
The sum of all column lengths cannot exceed 5000 characters (5100 characters including the Key Column)
Key Column value length is limited to a maximum of 100 characters
- Remove the check from the boxes under the Nullable? column for any fields that require data to be entered. Leave the box checked if the table can accept empty fields
- Choose which columns are active by placing a check in the boxes under the Active column. Remove or leave the box unchecked to deactivate a column.
- Click the Save button to save any changes made to the table or click the Cancel button to cancel the operation.
NOTE:
Each table control can have a maximum of 10 columns.
NOTE:
If canceling the operation, click the Continue button to confirm.
A success confirmation displays in the upper right corner upon successfully configuring the header. The message disappears after a few seconds.

- Click the Add Row button to begin entering table data.

- Enter the data for this row to include in each available field labeled with the previously created header names, and then click the Save button to continue or click the Cancel button to cancel the operation.
NOTE:
If canceling the operation, click the Continue button to confirm.
A success confirmation displays in the upper right corner upon successfully saving the row. The message disappears after a few seconds.

- Click the Save button to save any changes made to the control or click the Cancel button to cancel the operation.
NOTE:
If canceling the operation, click the Continue button to confirm.
A success confirmation displays in the upper right corner upon successfully creating a new control. The message disappears after a few seconds.
Using Bulk Load to Create a Table
This section shows how to create a table and add data using the Bulk Load feature.
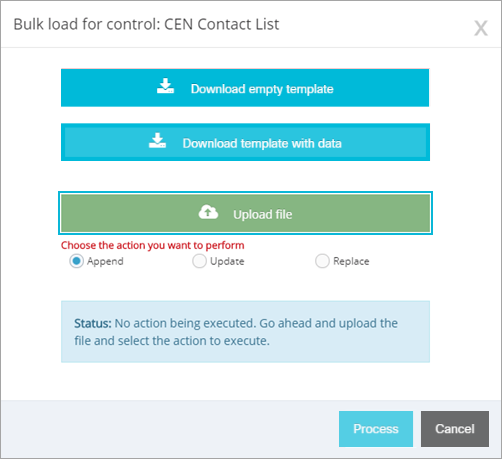
- Click the Bulk Load button.
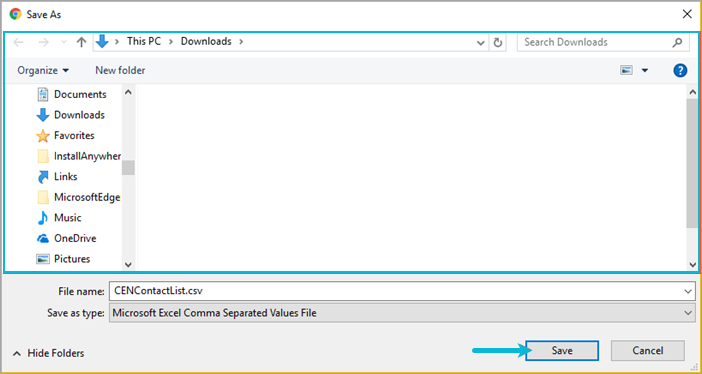
- Click the Download empty template button to download an empty Comma Separated Values (CSV) file which can be used for creating the control table and entering the data it includes.
![]()
- Choose a location to save the template and click the Save button.
This step may vary depending on the web browser used, as each have a different download interface. Some web browsers may save the file directly to the default Downloads folder, or the most recently selected download location.
- Locate and open the downloaded template file. It will open in Microsoft Excel or any other similar spreadsheet editing software.
- Enter a name for each column in the top row. These are the Column Headers for the table.
- Enter the data for each column in the rows below the headers. This is called the Row Data.
- When finished, save the CSV document.

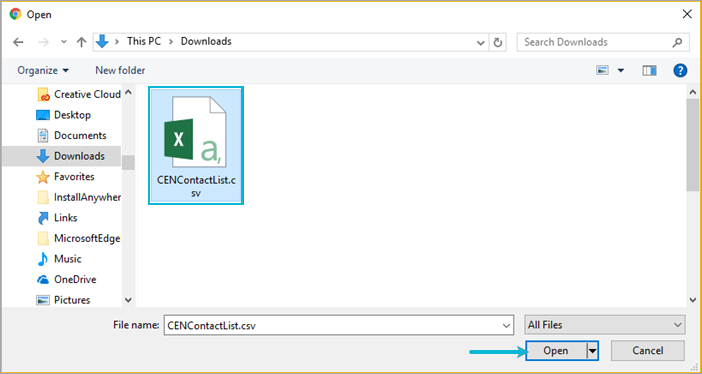
- Click the Upload file button.
- Locate and select the CSV file, and then click the Open button.
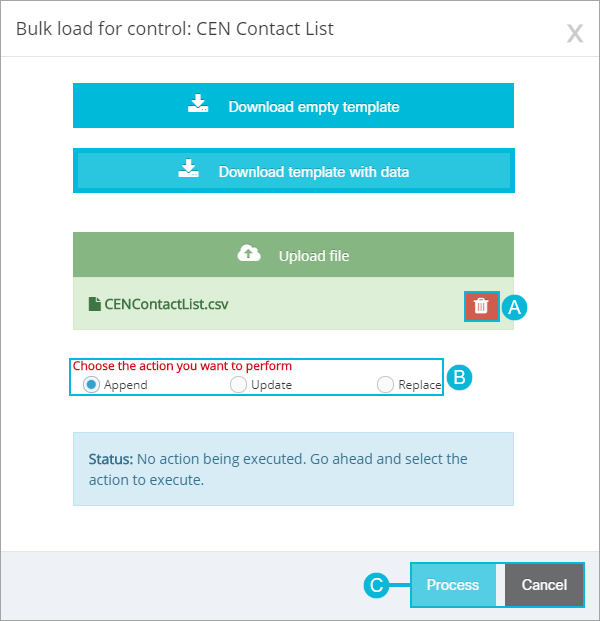
- Prepare the file for processing by doing the following:
- Click the Delete button to remove the file, if the wrong file was selected.
- Select the Replace option. This option replaces the default table that is in place when the table control is first created.
NOTE:
Each action changes how the file is processed:
- Append - Adds new records, from the template, to the existing table. It skips any records where the key field already exists. Skipped records show up when performing an audit.
- Update - Updates records in the current table for every record where the key field exists. Skipped records show up when performing an audit.
- Replace - Replaces all records in the current table where the key field already exists. Skipped records show up when performing an audit.
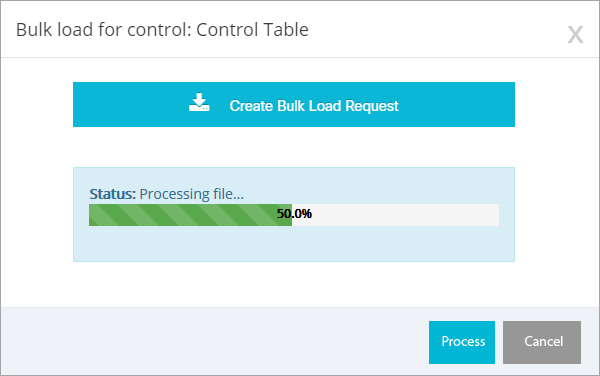
- Click the Process button to begin processing the template file, or click the Cancel button to cancel the operation.
NOTE:
If canceling the operation, click the Continue button to confirm.
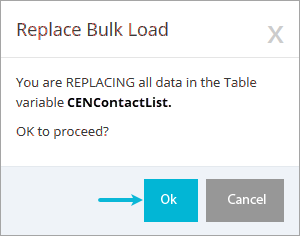
- Click the OK button to confirm. Click the Cancel button to cancel the operation.
A progress bar displays as the template file processes.
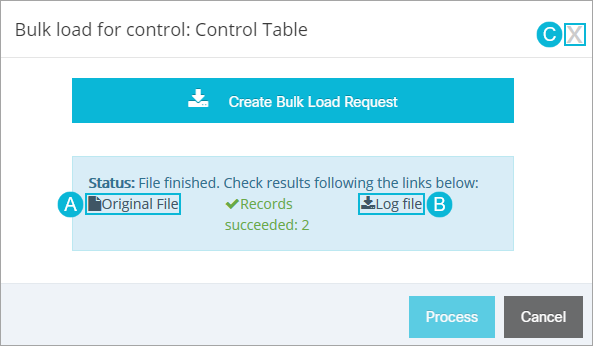
- When the has finished processing, two additional options are provided:
- Original File – Click this to download the original template file before changes were made.
- Log file – Click this to download a log of the changes that were processed.
- Click the Close button to close the Bulk load dialog.
- Click the Save button to save any changes made to the control or click the Cancel button to cancel the operation.
NOTE:
If canceling the operation, click the Continue button to confirm.
A success confirmation displays in the upper right corner upon successfully creating a new control. The message disappears after a few seconds.
See Also
Copyright © 2025 Cisco. All rights reserved.
![]()
![]()
![]()