Topic Updated: April 01, 2025
Node Properties
When selecting a node from the canvas, its properties display in the Properties panel. This section explains the properties available to each node.
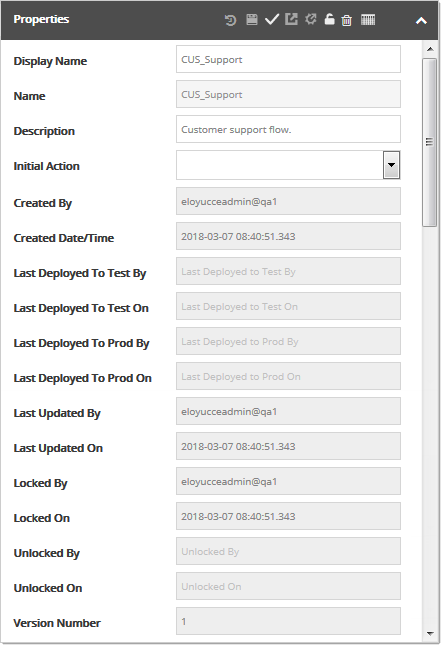
- Display Name – Name assigned to contact flow application. It also displays in the applications list in Applications and Queues panel.
- Name – Name assigned to contact flow application within the Interaction Manager database.
- Description – Provides a description of the contact flow application.
- Initial Action – Defines the first action to take place in the contact flow application.
- Created By – Identifies user that created the application.
- Created Date/Time – Displays date and time of when application was created.
- Last Deployed To Test By – Identifies the last user to deploy the application to test.
- Last Deployed To Test On – Displays the most recent date and time the application was deployed to test.
- Last Deployed To Prod By – Identifies the last user to deploy the application to production.
- Last Deployed To Prod On – Displays the most recent date and time the application was deployed to production.
- Last Updated By – Identifies the most recent user that updated the application.
- Last Updated On – Displays the most recent date and time the application was updated.
- Locked By – Identifies the user that most recently locked the application.
- Locked On – Displays the most recent date and time the application was locked.
- Unlocked By – Identifies the user that most recently unlocked the application.
- Unlocked On – Displays the most recent date and time the application was unlocked.
- Version Number – Displays the current version of the contact flow application.
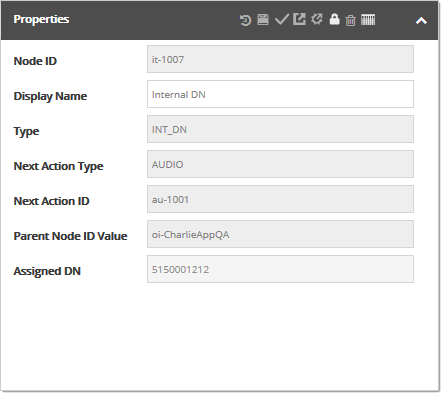
- Node ID – ID automatically assigned to the selected node by Interaction Manager.
- Display Name – Name assigned to the selected node. It also displays on the node within the contact flow. Change the display name by replacing text in the Display Name field.
- Type – Describes the node type selected.
- Next Action Type – Identifies the next action (or linked node type) to follow within the contact flow.
- Next Action ID – Displays the ID of the next action (or linked node) to follow within the contact flow.
- Parent Node ID Value – Indicates the parent node ID in relation to the contact flow application.
- Assigned DN – Displays dial number assigned to the node.
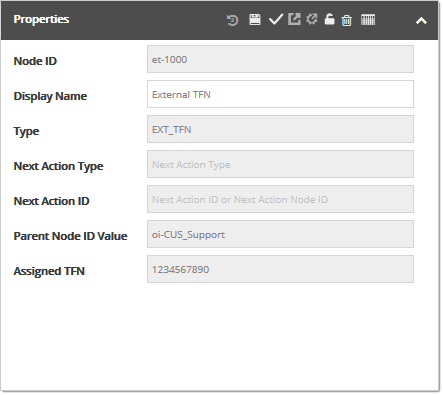
- Node ID – ID automatically assigned to the selected node by Interaction Manager.
- Display Name – Name assigned to the selected node. It also displays on the node within the contact flow. Change the display name by replacing text in the Display Name field.
- Type – Describes the node type selected.
- Next Action Type – Identifies the next action (or linked node type) to follow within the contact flow.
- Next Action ID – Displays the ID of the next action (or linked node) to follow within the contact flow.
- Parent Node ID Value – Indicates the parent node ID in relation to the contact flow application.
- Assigned TFN – Displays transfer number assigned to the node.
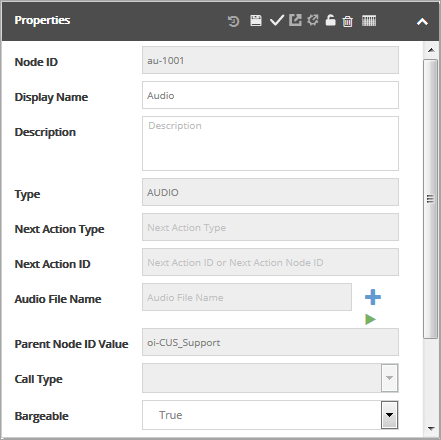
- Node ID – ID automatically assigned to the selected node by Interaction Manager.
- Display Name – Name assigned to the selected node. It also displays on the node within the contact flow. Change the display name by replacing text in the Display Name field.
- Description – Provides a description of the node. Change the description by replacing text in the Description field.
- Type – Describes the node type selected.
- Next Action Type – Identifies the next action (or linked node type) to follow within the contact flow.
- Next Action ID – Displays the ID of the next action (or linked node) to follow within the contact flow.
- Audio File Name – Displays the selected audio file for the node. Click the + button to change. After adding an audio file, the Play Audio button displays, allowing users to test the audio.
- Parent Node ID Value – Indicates the parent node ID in relation to the contact flow application.
- Call Type – Displays selected call type. Click the drop-menu to change.
- Bargeable – If True, caller can interrupt the prompt. If False, caller cannot interrupt prompt. Click the drop-menu to change this property.
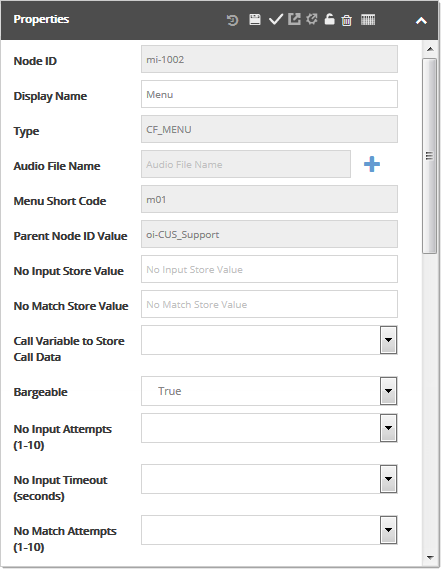
- Node ID – ID automatically assigned to the selected node by Interaction Manager.
- Display Name – Name assigned to the selected node. It also displays on the node within the contact flow. Change the display name by replacing text in the Display Name field.
- Type – Describes the node type selected.
- Audio File Name – Displays selected audio file for the node. Click the + button to change. After adding an audio file, the Play Audio button displays, allowing users to test the audio
- Menu Short Code – A short code assigned to each menu within the contact flow application.
- Parent Node ID Value – Indicates the parent node ID in relation to the contact flow application.
- No Input Store Value – Value passed to the agent desktop application if caller does not select a menu option.
- No Match Store Value – Value passed to the agent desktop application if caller selects invalid menu option.
- Call Variable to Store Call Data – Stores menu input in selected call variable (1-8). The input passes to the agent desktop application using the assigned call variable. Change the call variable by clicking the drop-menu, and then select the desired number.
- Bargeable – If True, caller can interrupt the prompt. If False, caller cannot interrupt prompt. Click the drop-menu to change this property.
- No Input Attempts (1-10) – Defines the number of attempts a caller must choose a menu option.
- No Input Timeout (Seconds) – Defines the amount of time a caller must select a menu option for each attempt.
- No Match Attempts (1-10) – Defines the number of times a caller can make invalid menu selections.
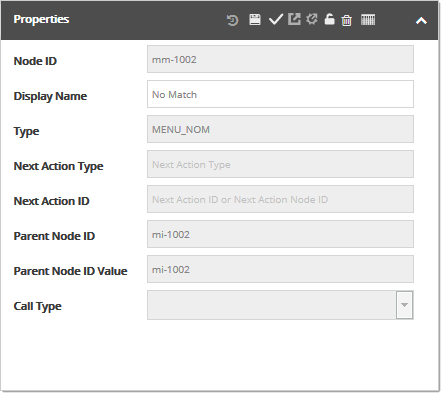
Menu – No Match Properties:
- Node ID – ID automatically assigned to the selected node by Interaction Manager.
- Display Name – Name assigned to the selected node. It also displays on the node within the contact flow. Change the display name by replacing text in the Display Name field.
- Type – Describes the node type selected.
- Next Action Type – Identifies the next action (or linked node type) to follow within the contact flow.
- Next Action ID – Displays the ID of the next action (or linked node) to follow within the contact flow.
- Parent Node ID – Displays the ID of the Menu No Match node's parent node.
- Parent Node ID Value – Indicates the parent node ID in relation to the contact flow application.
- Call Type – Displays selected call type. Click the drop-menu to change.
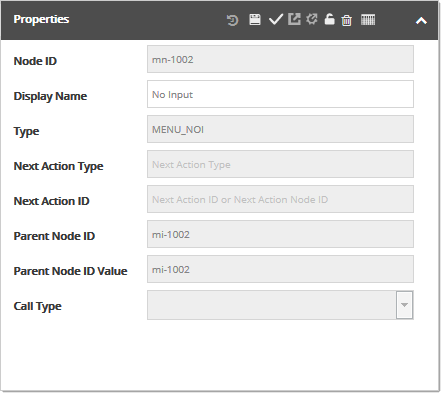
Menu – No Input Properties:
- Node ID – ID automatically assigned to the selected node by Interaction Manager.
- Display Name – Name assigned to the selected node. It also displays on the node within the contact flow. Change the display name by replacing text in the Display Name field.
- Type – Describes the node type selected.
- Next Action Type – Identifies the next action (or linked node type) to follow within the contact flow.
- Next Action ID – Displays the ID of the next action (or linked node) to follow within the contact flow.
- Parent Node ID – Displays the ID of the Menu No Input node's parent node.
- Parent Node ID Value – Indicates the parent node ID in relation to the contact flow application.
- Call Type – Displays selected call type. Click the drop-menu to change.
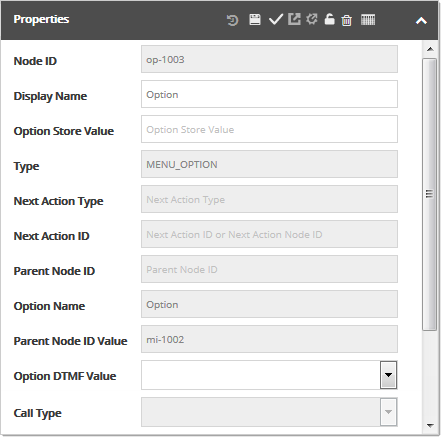
- Node ID – ID automatically assigned to the selected node by Interaction Manager.
- Display Name – Name assigned to the selected node. It also displays on the node within the contact flow. Change the display name by replacing text in the Display Name field.
- Option Store Value – Value passed to the agent desktop application when caller selects this option.
- Type – Describes the node type selected.
- Next Action Type – Identifies the next action (or linked node type) to follow within the contact flow.
- Next Action ID – Displays the ID of the next action (or linked node) to follow within the contact flow.
- Parent Node ID – Displays the ID of the Option node's parent node.
- Option Name – Named assigned to this option.
- Parent Node ID Value – Indicates the parent node ID in relation to the contact flow application.
- Option DTMF Value – Specifies which button the caller presses for this option. Click the drop-menu to assign a button.
- Call Type – Displays selected call type. Click the drop-menu to change.
- Node ID – ID automatically assigned to the selected node by Interaction Manager.
- Display Name – Name assigned to the selected node. It also displays on the node within the contact flow. Change the display name by replacing text in the Display Name field.
- Description – Provides a description of the node. Change the description by replacing text in the Description field.
- Type – Describes the node type selected.
- Audio File Name – Displays selected audio file for the node. Click the + button to change. After adding an audio file, the Play Audio button displays, allowing users to test the audio.
- Parent Node ID Value – Indicates the parent node ID in relation to the contact flow application.
- No Input Store Value – Value passed to the agent desktop application if caller does not enter digits.
- No Match Store Value – Value passed to the agent desktop application if caller enters invalid digits.
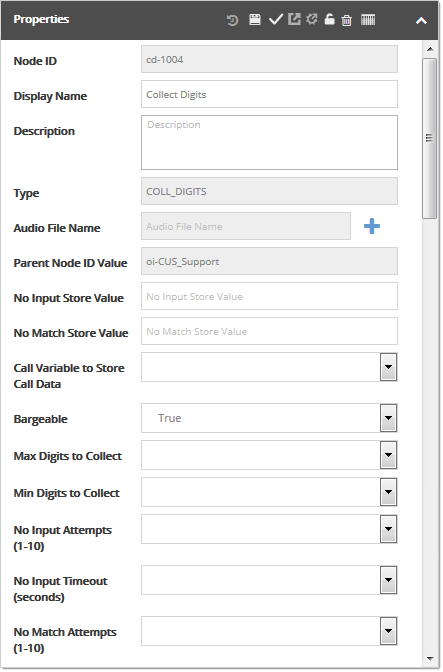
- Call Variable to Store Call Data – Stores collect digits input in selected call variable (1-8). The input passes to the agent desktop application using the assigned call variable. Change the call variable by clicking the drop-menu, and then select the desired number.
- Bargeable – If True, caller can interrupt the prompt. If False, caller cannot interrupt prompt. Click the drop-menu to change this property.
- Max Digits to Collect – Defines the maximum number of digits a caller can enter.
- Min Digits to Collect – Defines the minimum number of digits a caller can enter.
- No Input Attempts (1-10) – Defines the number of attempts a caller must choose a menu option.
- No Input Timeout (seconds) – Defines the amount of time a caller must enter digits for each attempt.
- No Match Attempts (1-10) – Defines the number of times a caller can make invalid digit entries.
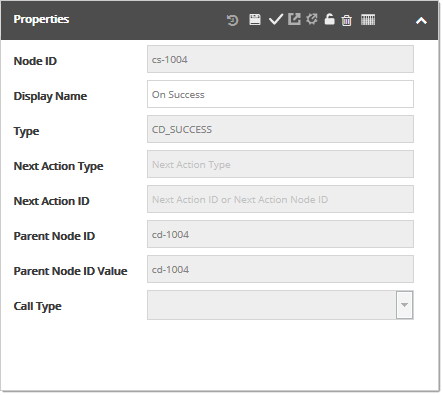
Collect Digits – On Success Properties:
- Node ID – ID automatically assigned to the selected node by Interaction Manager.
- Display Name – Name assigned to the selected node. It also displays on the node within the contact flow. Change the display name by replacing text in the Display Name field.
- Type – Describes the node type selected.
- Next Action Type – Identifies the next action (or linked node type) to follow within the contact flow.
- Next Action ID – Displays the ID of the next action (or linked node) to follow within the contact flow.
- Parent Node ID – Identifies this node's parent node.
- Parent Node ID Value – Indicates the parent node ID in relation to the contact flow application.
- Call Type – Displays selected call type. Click the drop-menu to change.
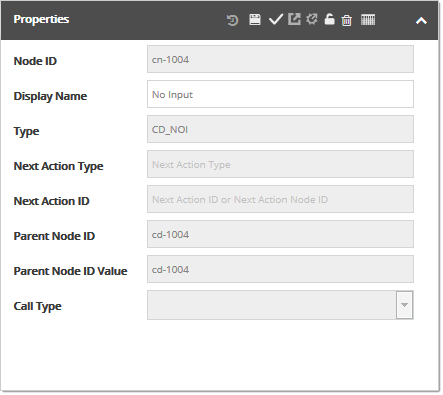
Collect Digits – No Input Properties:
- Node ID – ID automatically assigned to the selected node by Interaction Manager.
- Display Name – Name assigned to the selected node. It also displays on the node within the contact flow. Change the display name by replacing text in the Display Name field.
- Type – Describes the node type selected.
- Next Action Type – Identifies the next action (or linked node type) to follow within the contact flow.
- Next Action ID – Displays the ID of the next action (or linked node) to follow within the contact flow.
- Parent Node ID – Identifies this node's parent node.
- Parent Node ID Value – Indicates the parent node ID in relation to the contact flow application.
- Call Type – Displays selected call type. Click the drop-menu to change.
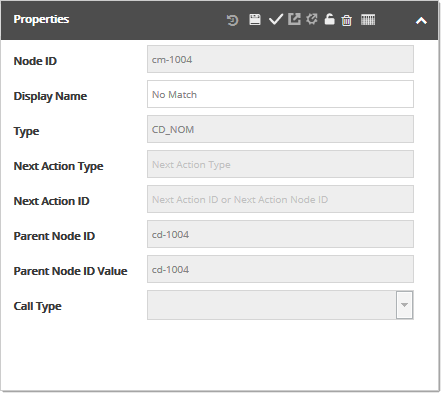
Collect Digits – No Match Properties:
- Node ID – ID automatically assigned to the selected node by Interaction Manager.
- Display Name – Name assigned to the selected node. It also displays on the node within the contact flow. Change the display name by replacing text in the Display Name field.
- Type – Describes the node type selected.
- Next Action Type – Identifies the next action (or linked node type) to follow within the contact flow.
- Next Action ID – Displays the ID of the next action (or linked node) to follow within the contact flow.
- Parent Node ID – Identifies this node's parent node.
- Parent Node ID Value – Indicates the parent node ID in relation to the contact flow application.
- Call Type – Displays selected call type. Click the drop-menu to change.
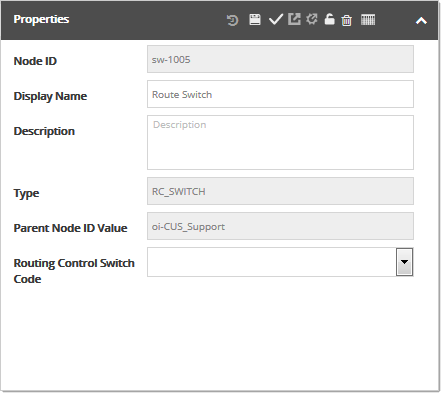
- Node ID – ID automatically assigned to the selected node by Interaction Manager.
- Display Name – Name assigned to the selected node. It also displays on the node within the contact flow. Change the display name by replacing text in the Display Name field.
- Description – Provides a description of the node. Change the description by replacing text in the Description field.
- Type – Describes the node type selected.
- Parent Node ID Value – Indicates the parent node ID in relation to the contact flow application.
- Routing Control Switch Code – Displays a list of Routing Control Switch Codes. Click the drop-menu to select a code.
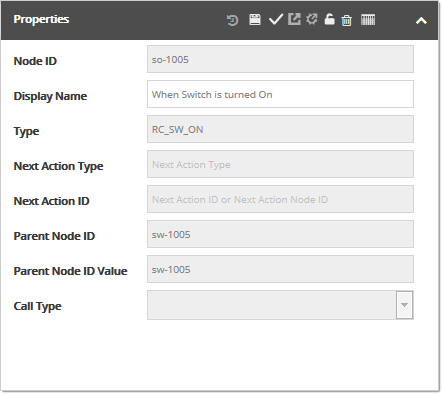
When Switch Is Turned On Properties:
- Node ID – ID automatically assigned to the selected node by Interaction Manager.
- Display Name – Name assigned to the selected node. It also displays on the node within the contact flow. Change the display name by replacing text in the Display Name field.
- Type – Describes the node type selected.
- Next Action Type – Identifies the next action (or linked node type) to follow within the contact flow.
- Next Action ID – Displays the ID of the next action (or linked node) to follow within the contact flow.
- Parent Node ID – Identifies this node's parent node.
- Parent Node ID Value – Indicates the parent node ID in relation to the contact flow application.
- Call Type – Displays selected call type. Click the drop-menu to change.
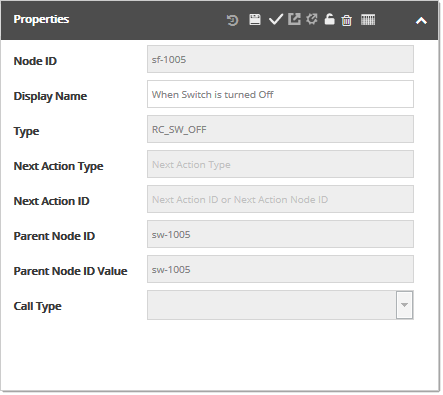
When Switch Is Turned Off Properties:
- Node ID – ID automatically assigned to the selected node by Interaction Manager.
- Display Name – Name assigned to the selected node. It also displays on the node within the contact flow. Change the display name by replacing text in the Display Name field.
- Type – Describes the node type selected.
- Next Action Type – Identifies the next action (or linked node type) to follow within the contact flow.
- Next Action ID – Displays the ID of the next action (or linked node) to follow within the contact flow.
- Parent Node ID – Identifies this node's parent node.
- Parent Node ID Value – Indicates the parent node ID in relation to the contact flow application.
- Call Type – Displays selected call type. Click the drop-menu to change.
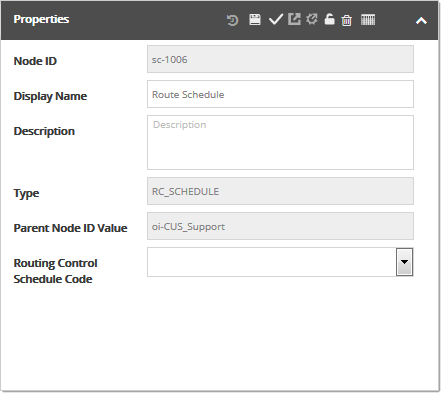
- Node ID – ID automatically assigned to the selected node by Interaction Manager.
- Display Name – Name assigned to the selected node. It also displays on the node within the contact flow. Change the display name by replacing text in the Display Name field.
- Description – Provides a description of the node. Change the description by replacing text in the Description field.
- Type – Describes the node type selected.
- Parent Node ID Value – Indicates the parent node ID in relation to the contact flow application.
- Routing Control Schedule Code – Displays a list of Routing Control Schedule Codes. Click the drop-menu to select a code.
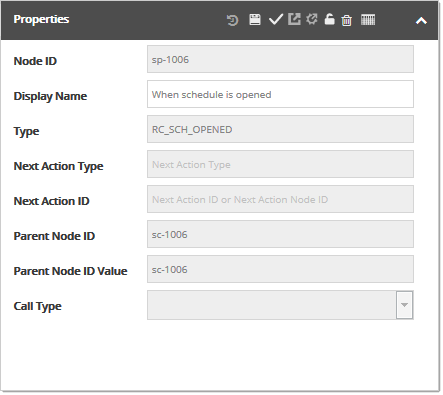
When Schedule Is Opened Properties:
- Node ID – ID automatically assigned to the selected node by Interaction Manager.
- Display Name – Name assigned to the selected node. It also displays on the node within the contact flow. Change the display name by replacing text in the Display Name field.
- Type – Describes the node type selected.
- Next Action Type – Identifies the next action (or linked node type) to follow within the contact flow.
- Next Action ID – Displays the ID of the next action (or linked node) to follow within the contact flow.
- Parent Node ID – Identifies this node's parent node.
- Parent Node ID Value – Indicates the parent node ID in relation to the contact flow application.
- Call Type – Displays selected call type. Click the drop-menu to change.
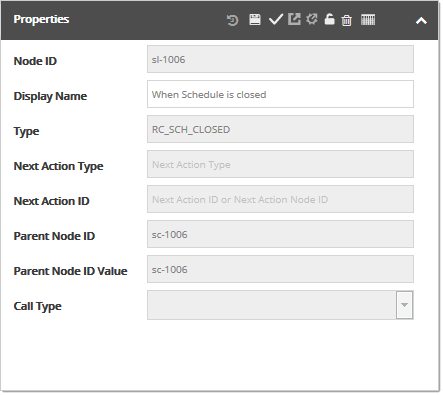
When Schedule Is Closed Properties:
- Node ID – ID automatically assigned to the selected node by Interaction Manager.
- Display Name – Name assigned to the selected node. It also displays on the node within the contact flow. Change the display name by replacing text in the Display Name field.
- Type – Describes the node type selected.
- Next Action Type – Identifies the next action (or linked node type) to follow within the contact flow.
- Next Action ID – Displays the ID of the next action (or linked node) to follow within the contact flow.
- Parent Node ID -Identifies this node's parent node.
- Parent Node ID Value – Indicates the parent node ID in relation to the contact flow application.
- Call Type – Displays selected call type. Click the drop-menu to change.
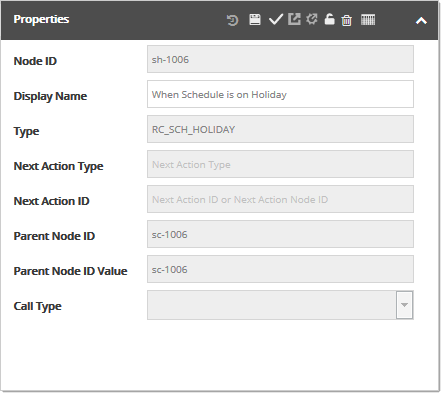
When Schedule Is On Holiday Properties:
- Node ID – ID automatically assigned to the selected node by Interaction Manager.
- Display Name – Name assigned to the selected node. It also displays on the node within the contact flow. Change the display name by replacing text in the Display Name field.
- Type – Describes the node type selected.
- Next Action Type – Identifies the next action (or linked node type) to follow within the contact flow.
- Next Action ID – Displays the ID of the next action (or linked node) to follow within the contact flow.
- Parent Node ID – Identifies this node's parent node.
- Parent Node ID Value – Indicates the parent node ID in relation to the contact flow application.
- Call Type – Displays selected call type. Click the drop-menu to change.
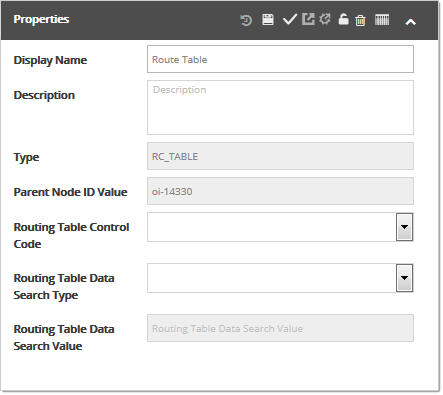
- Display Name – Name assigned to the selected node. It also displays on the node within the contact flow. Change the display name by replacing text in the Display Name field.
- Description – Provides a description of the node. Change the description by replacing text in the Description field.
- Type – Describes the node type selected.
- Parent Node ID Value – Indicates the parent node ID in relation to the contact flow application.
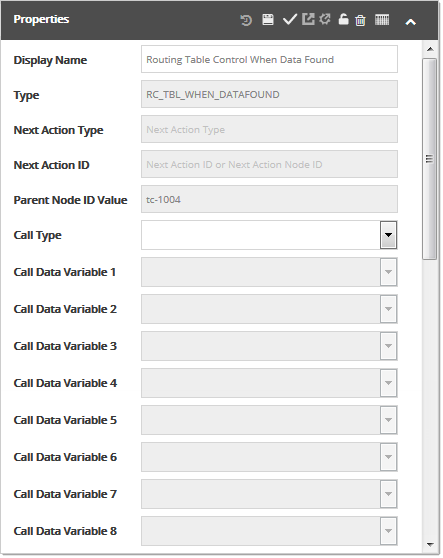
Route Table - When Data Found Properties:
- Display Name – Name assigned to the selected node. It also displays on the node within the contact flow. Change the display name by replacing text in the Display Name field.
- Type – Describes the node type selected.
- Next Action Type – Identifies the next action (or linked node type) to follow within the contact flow.
- Next Action ID – Displays the ID of the next action (or linked node) to follow within the contact flow.
- Parent Node ID Value – Indicates the parent node ID in relation to the contact flow application.
- Call Type – Displays selected call type. Click the drop-menu to change.
- Call Data Variable 1 – First selected call data variable. Click the drop-menu to change.
- Call Data Variable 2 – Second selected call data variable. Click the drop-menu to change.
- Call Data Variable 3 – Third selected call data variable. Click the drop-menu to change.
- Call Data Variable 4 – Fourth selected call data variable. Click the drop-menu to change.
- Call Data Variable 5 – Fifth selected call data variable. Click the drop-menu to change.
- Call Data Variable 6 – Sixth selected call data variable. Click the drop-menu to change.
- Call Data Variable 7 – Seventh selected call data variable. Click the drop-menu to change.
- Call Data Variable 8 – Eighth selected call data variable. Click the drop-menu to change.
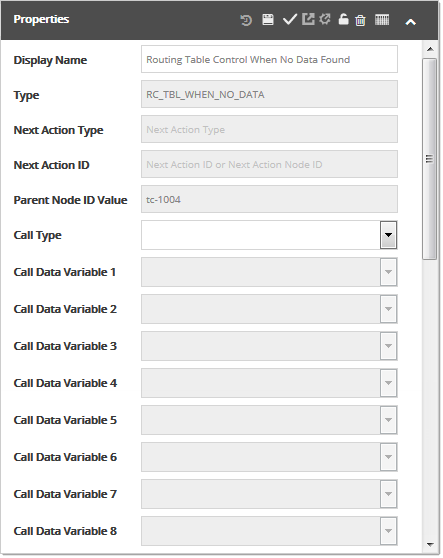
Route Table - When No Data Found Properties:
- Display Name – Name assigned to the selected node. It also displays on the node within the contact flow. Change the display name by replacing text in the Display Name field.
- Type – Describes the node type selected.
- Next Action Type – Identifies the next action (or linked node type) to follow within the contact flow.
- Next Action ID – Displays the ID of the next action (or linked node) to follow within the contact flow.
- Parent Node ID Value – Indicates the parent node ID in relation to the contact flow application.
- Call Type – Displays selected call type. Click the drop-menu to change.
- Call Data Variable 1 – First selected call data variable. Click the drop-menu to change.
- Call Data Variable 2 – Second selected call data variable. Click the drop-menu to change.
- Call Data Variable 3 – Third selected call data variable. Click the drop-menu to change.
- Call Data Variable 4 – Fourth selected call data variable. Click the drop-menu to change.
- Call Data Variable 5 – Fifth selected call data variable. Click the drop-menu to change.
- Call Data Variable 6 – Sixth selected call data variable. Click the drop-menu to change.
- Call Data Variable 7 – Seventh selected call data variable. Click the drop-menu to change.
- Call Data Variable 8 – Eighth selected call data variable. Click the drop-menu to change.
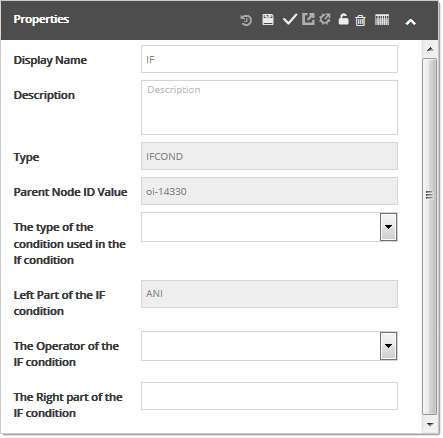
- Display Name – Name assigned to the selected node. It also displays on the node within the contact flow. Change the display name by replacing text in the Display Name field.
- Description – Provides a description of the node. Change the description by replacing text in the Description field.
- Type – Describes the node type selected.
- Parent Node ID – Identifies this node's parent node.
- The type of the condition used in the If condition – Drop-down menu for selecting a condition type.
- Left Part of the IF condition – Allows for the selection of call or Interaction Manager (ECC) variables.
- The Operator of the IF condition – Select the operator to use for the left and right side comparison.
- The Right part of the IF condition – Enter text in this field for comparison to the left part (field).
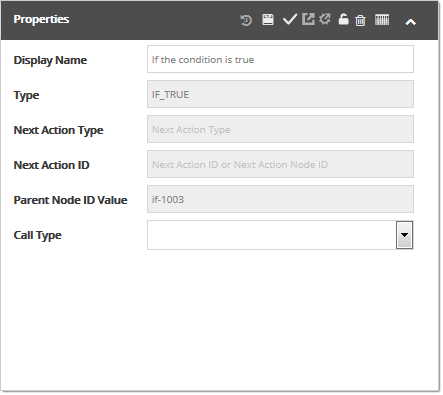
IF Condition – If the Condition is True Properties:
- Display Name – Name assigned to the selected node. It also displays on the node within the contact flow. Change the display name by replacing text in the Display Name field.
- Type – Describes the node type selected.
- Next Action Type – Identifies the next action (or linked node type) to follow within the contact flow.
- Next Action ID – Displays the ID of the next action (or linked node) to follow within the contact flow.
- Parent Node ID Value – Indicates the parent node ID in relation to the contact flow application.
- Call Type – Displays selected call type. Click the drop-menu to change.
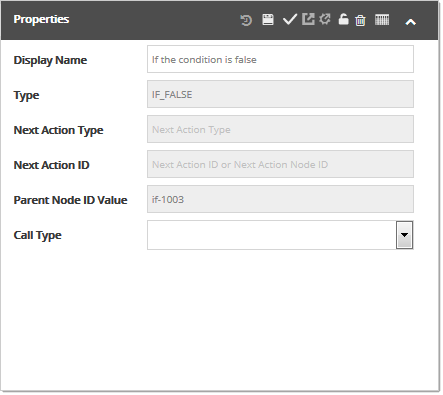
IF Condition – If the Condition is False Properties:
- Display Name – Name assigned to the selected node. It also displays on the node within the contact flow. Change the display name by replacing text in the Display Name field.
- Type – Describes the node type selected.
- Next Action Type – Identifies the next action (or linked node type) to follow within the contact flow.
- Next Action ID – Displays the ID of the next action (or linked node) to follow within the contact flow.
- Parent Node ID Value – Indicates the parent node ID in relation to the contact flow application.
- Call Type – Displays selected call type. Click the drop-menu to change.
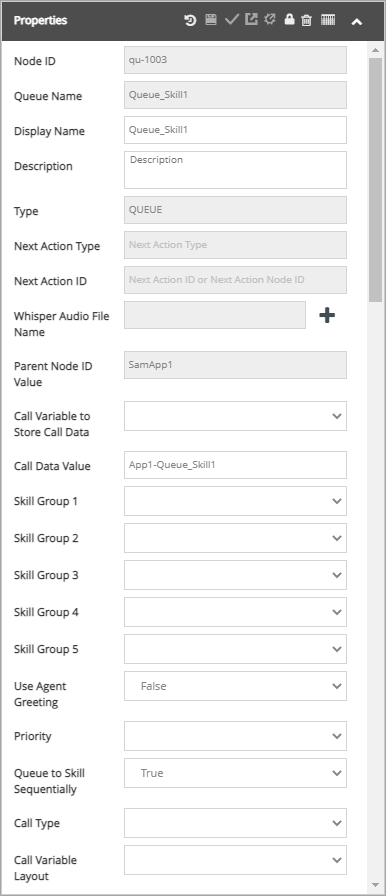
Queue Node Type: Skills
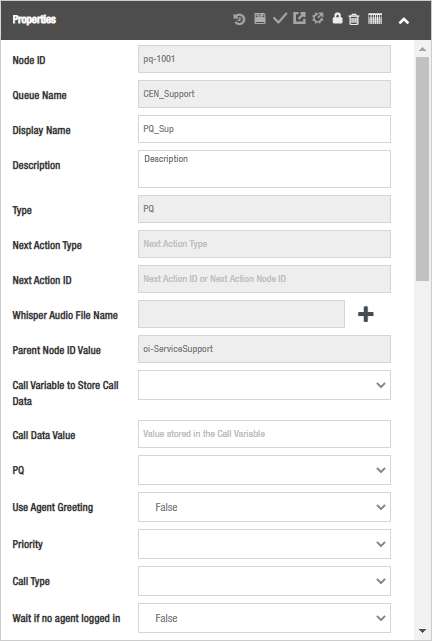
Queue Node Type: Precision Queues
- Node ID – ID automatically assigned to the selected node by Interaction Manager.
- Queue Name – Name assigned to Queue node.
- Display Name – Name assigned to the selected node. It also displays on the node within the contact flow. Change the display name by replacing text in the Display Name field.
- Description – Provides a description of the node. Change the description by replacing text in the Description field.
- Type – Describes the node type selected.
- Next Action Type – Identifies the next action (or linked node type) to follow within the contact flow.
- Next Action ID – Displays the ID of the next action (or linked node) to follow within the contact flow.
- Whisper Audio File Name – Displays audio file that plays for the agent when the call arrives. Click the + button to change. After adding an audio file, the Play Audio button displays, allowing users to test the audio.
- Parent Node ID Value – Indicates the parent node ID in relation to the contact flow application.
- Call Variable to Store Call Data – Stores queue details in selected call variable (1-8). The input passes to the agent desktop application using the assigned call variable. Change the call variable by clicking the drop-menu, and then select the desired number.
- Call Data Value – Field allows for entry of custom text to pass through to agent desktop or finesse.
- Parent Node ID – Identifies this node's parent node.
- PQ – Allows for the selection of a Precision Queue (PQ). Click the drop-menu to change.
- Skill Group 1 – First selected skill group. Click the drop-menu to change.
- Skill Group 2 – Second selected skill group. Click the drop-menu to change.
- Skill Group 3 – Third selected skill group. Click the drop-menu to change.
- Skill Group 4 – Fourth selected skill group. Click the drop-menu to change.
- Skill Group 5 – Fifth selected skill group. Click the drop-menu to change.
- Use Agent Greeting – If set to True, caller can hear an agent's personal greeting. If False, an agent's personal greeting will not play.
- Priority – Assigns priority to this queue. Click the drop-menu to select a priority.
- Queue to Skill Sequentially – If set to True, each skill group is checked for an available agent starting with Skill Group 1 through Skill Group 5. If False, the first available agent within any Skill Group is assigned to the caller.
- Call Type – Displays selected call type. Click the drop-menu to change.
- Call Variable Layout – .Allows for the selection of the Finesse call variable to display to the agent.
- Wait if no agent logged in – If set to True, the caller(s) stay in the queue until an agent logs in. If set to False, the caller(s) are not held in the queue.
- Node ID – ID automatically assigned to the selected node by Interaction Manager.
- Display Name – Name assigned to the selected node. It also displays on the node within the contact flow. Change the display name by replacing text in the Display Name field.
- Description – Provides a description of the node. Change the description by replacing text in the Description field.
- Next Action ID – Displays the ID of the next action (or linked node) to follow within the contact flow.
- Type – Describes the node type selected.
- Next Action Type – Identifies the next action (or linked node type) to follow within the contact flow.
- Parent Node ID Value – Indicates the parent node ID in relation to the contact flow application.
- Set Value on CV1 Enabled – Used to enable or disable the CV1 value. If True is selected, the value is enabled. If False is selected, the value is disabled.
- Set Value on CV1 – Enter a value into the CV1 field to pass through to the agent desktop.
- Set Value on CV2 Enabled – Used to enable or disable the CV2 value. If True is selected, the value is enabled. If False is selected, the value is disabled.
- Set Value on CV2 – Enter a value into the CV2 field to pass through to the agent desktop.
- Set Value on CV3 Enabled – Used to enable or disable the CV3 value. If True is selected, the value is enabled. If False is selected, the value is disabled.
- Set Value on CV3 – Enter a value into the CV3 field to pass through to the agent desktop.
- Set Value on CV4 Enabled – Used to enable or disable the CV4 value. If True is selected, the value is enabled. If False is selected, the value is disabled.
- Set Value on CV4 – Enter a value into the CV4 field to pass through to the agent desktop.
- Set Value on CV5 Enabled – Used to enable or disable the CV5 value. If True is selected, the value is enabled. If False is selected, the value is disabled.
- Set Value on CV5 – Enter a value into the CV5 field to pass through to the agent desktop.
- Set Value on CV6 Enabled – Used to enable or disable the CV6 value. If True is selected, the value is enabled. If False is selected, the value is disabled.
- Set Value on CV6 – Enter a value into the CV6 field to pass through to the agent desktop.
- Set Value on CV7 Enabled – Used to enable or disable the CV7 value. If True is selected, the value is enabled. If False is selected, the value is disabled.
- Set Value on CV7 – Enter a value into the CV7 field to pass through to the agent desktop.
- Set Value on CV8 Enabled – Used to enable or disable the CV8 value. If True is selected, the value is enabled. If False is selected, the value is disabled.
- Set Value on CV8 – Enter a value into the CV8 field to pass through to the agent desktop.
- Set Value on ECC Variable user.IMVar1 Enabled – Used to enable or disable the user.IMVar1. If True is selected, the value field is enabled. If False is selected, the value field is disabled.
- Set Value on ECC Variable user.IMVar1 – Enter an ECC value for user.IMVar1.
- Set Value on ECC Variable user.IMVar2 Enabled – Used to enable or disable the user.IMVar2. If True is selected, the value field is enabled. If False is selected, the value field is disabled.
- Set Value on ECC Variable user.IMVar2 – Enter an ECC value for user.IMVar2.
- Set Value on ECC Variable user.IMVar3 Enabled – Used to enable or disable the user.IMVar3. If True is selected, the value field is enabled. If False is selected, the value field is disabled.
- Set Value on ECC Variable user.IMVar3 – Enter an ECC value for user.IMVar3.
- Set Value on ECC Variable user.IMVar4 Enabled – Used to enable or disable the user.IMVar4. If True is selected, the value field is enabled. If False is selected, the value field is disabled.
- Set Value on ECC Variable user.IMVar4 – Enter an ECC value for user.IMVar4.
- Set Value on ECC Variable user.IMVar5 Enabled – Used to enable or disable the user.IMVar5. If True is selected, the value field is enabled. If False is selected, the value field is disabled.
- Set Value on ECC Variable user.IMVar5 – Enter an ECC value for user.IMVar5.
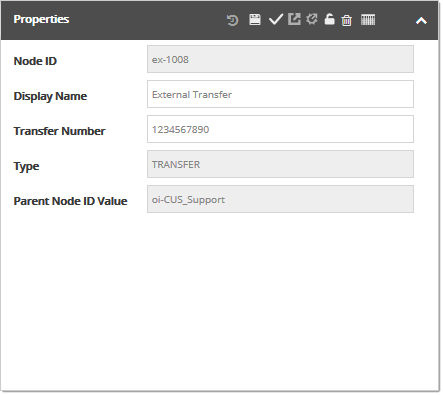
- Node ID – ID automatically assigned to the selected node by Interaction Manager.
- Display Name – Name assigned to the selected node. It also displays on the node within the contact flow. Change the display name by replacing text in the Display Name field.
- Transfer Number – Displays the assigned transfer number. Click the drop-menu to select and assign a number.
- Type – Describes the node type selected.
- Parent Node ID Value – Indicates the parent node ID in relation to the contact flow application.
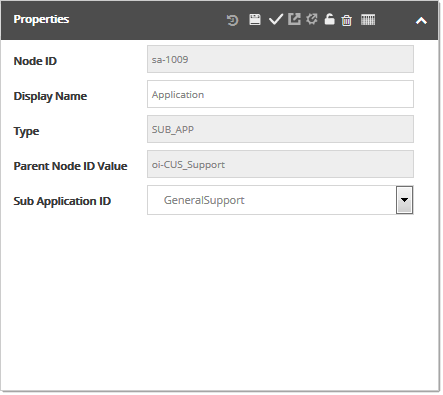
- Node ID – ID automatically assigned to the selected node by Interaction Manager.
- Display Name – Name assigned to the selected node. It also displays on the node within the contact flow. Change the display name by replacing text in the Display Name field.
- Type – Describes the node type selected.
- Parent Node ID Value – Indicates the parent node ID in relation to the contact flow application.
- Sub Application ID – Displays selected sub application. Click this drop-menu to select a different application.
- Display Name – Name assigned to the selected node. It also displays on the node within the contact flow. Change the display name by replacing text in the Display Name field.
- Description – Provides a description of the node. Change the description by replacing text in the Description field.
- External App Name – Provides the name of the external application associated with this node.
- Next Action ID – Displays the ID of the next action (or linked node) to follow within the contact flow.
- Type – Describes the node type selected.
- Next Action Type – Identifies the next action (or linked node type) to follow within the contact flow.
- Parent Node ID Value – Indicates the parent node ID in relation to the contact flow application.
- Name of Output Parameter 1 - 5 – Displays the name for the output parameters.
- Value of Output Parameter 1 - 5 – Allows for the selection of call or Interaction Manager (ECC) variables.
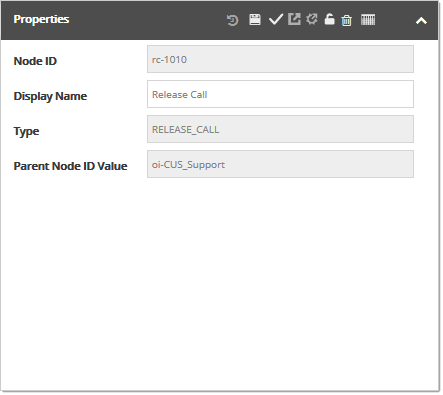
- Node ID – ID automatically assigned to the selected node by Interaction Manager.
- Display Name – Name assigned to the selected node. It also displays on the node within the contact flow. Change the display name by replacing text in the Display Name field.
- Type – Describes the node type selected.
- Parent Node ID Value – Indicates the parent node ID in relation to the contact flow application.
See Also
