Clone a Schedule Control
When a new schedule control is needed, cloning an existing one is often the preferred method. Cloning an existing schedule control creates the new control with the same configuration used in the cloned schedule.
Accessing the Clone Schedule Control Dialog
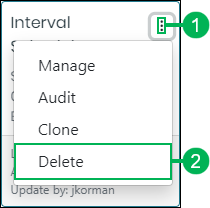
Locate a schedule control to clone and do the following:
- Access the Actions menu for the base user by clicking the Actions button.
- Select the Clone option to access the Clone Schedule dialog.
Cloning a Schedule Control
The Clone Schedule dialog displays. See the field and button descriptions below:
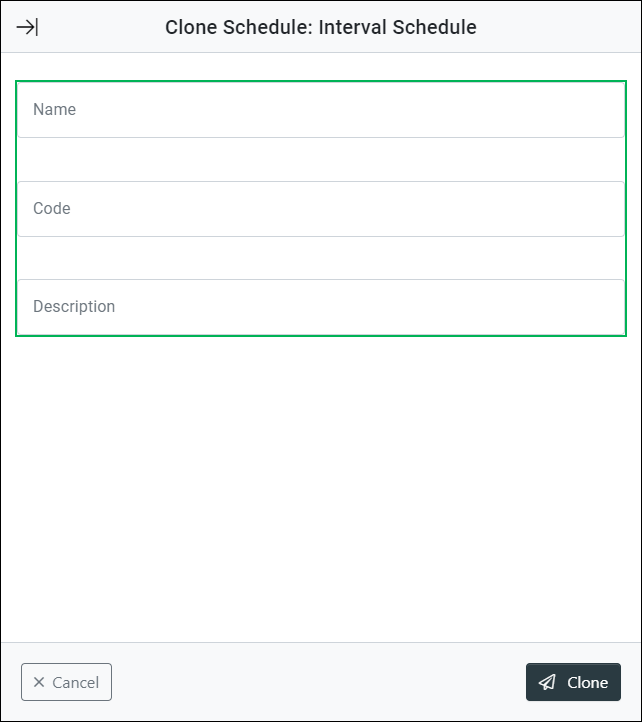
Name – Field for entering a name for the schedule control.
Code – Field for entering a code used for the schedule control. This field auto generates as text is entered in the Name field. Replace the text in this field to assign a custom code.
Description – Field for entering a description for the new schedule control.
Completing the Clone Schedule Control
Finish creating the new schedule control by clicking the Clone button, or click the Cancel button to cancel the operation.

Configuring the New Schedule Control
The new cloned schedule control now displays on the Routing Controls page. To learn more about configuring the schedule, see Manage a Schedule Control.