Manage an Audio Prompt
Audio prompts often contain multiple audio files, and allow you to manage them by doing the following:
- Add / select languages
- Add / upload audio files
- Set the active audio file
- Edit the audio file activation schedule
- Play / pause audio files
- Edit audio files
- Delete audio files
Accessing the Manage Audio Prompt Interface
To manage the audio files within an audio prompt, do the following:
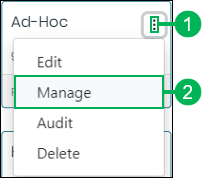
- Locate the audio group that contains the audio prompt you would like to manage and click the Actions button.
- Select Manage to access the Manage Group interface.
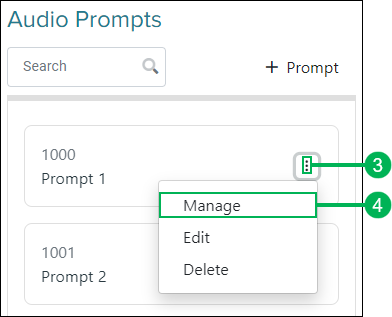
- Find the audio prompt to manage and click the Actions button.
- Select Manage to access the Edit Audio Prompt dialog.
NOTE:
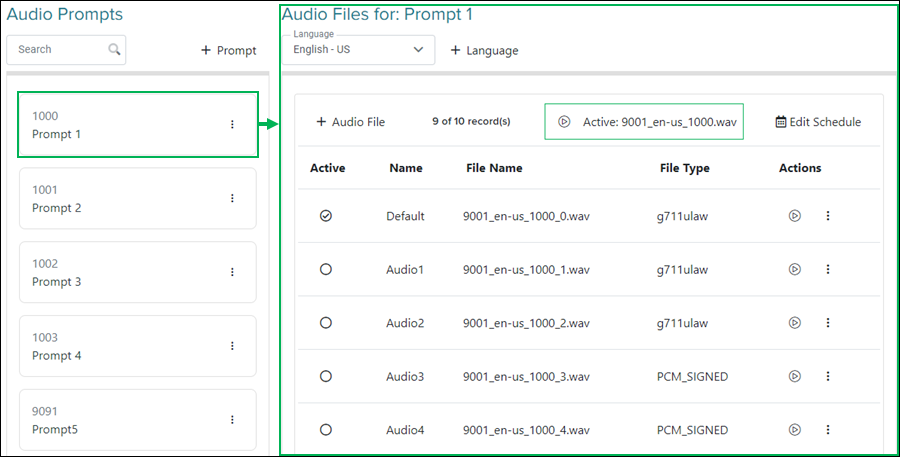
Alternatively, you can just click on the audio prompt's name to access the Audio File management interface for that specific audio prompt.

Managing the Audio Prompt and Audio Files
The Audio Files for section of the page changes to display audio files and configuration options for the selected audio prompt. Select the prompt you would like to manage, and continue with one of the actions below:
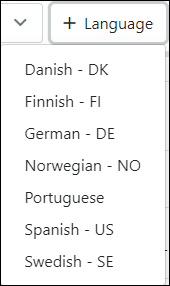
Add a language to the audio prompt by doing the following:
- Click the Add Language menu.
- Select the language to add.
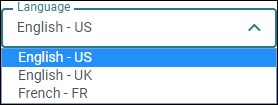
Change the language for which audio files are displayed by doing the following:
- Click on the Language Selection menu.
- Select the language to display.
Add audio files using the to the audio prompt by doing the following:
NOTE:
Before proceeding, select the language for the audio file to be uploaded. This ensures the audio file displays when the language is selected within the audio prompt.

Accessing the Add Audio File Dialog
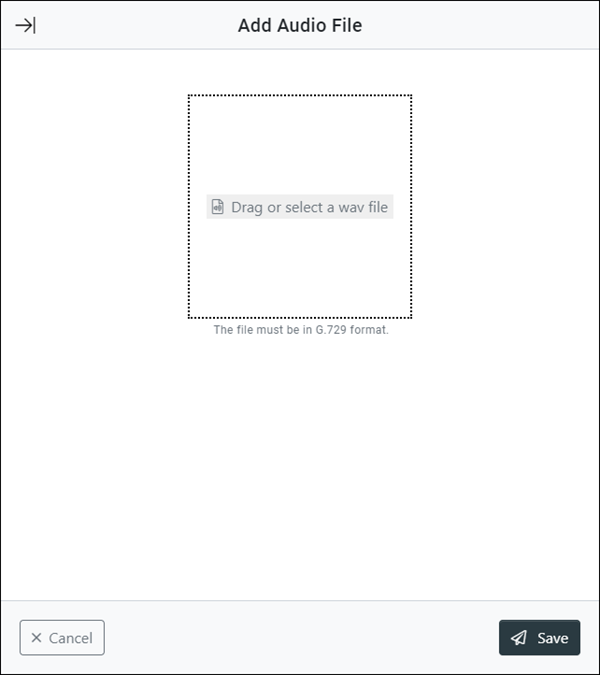
- Access the Add Audio File dialog by clicking the Add Audio File button.

The Add Audio File dialog displays.
Adding an Audio File
From the Add Audio File dialog, use one of the following methods to add an audio file.
NOTE:
Audio files must meet the following format requirements:
- File must have the .wav extension
- Format must be Audio Interchange File Format (AIFF)
- Compression type must be μ-law
- Data must be 8-bit ITU G.711 μ-law, G.711 A-law, or G.729
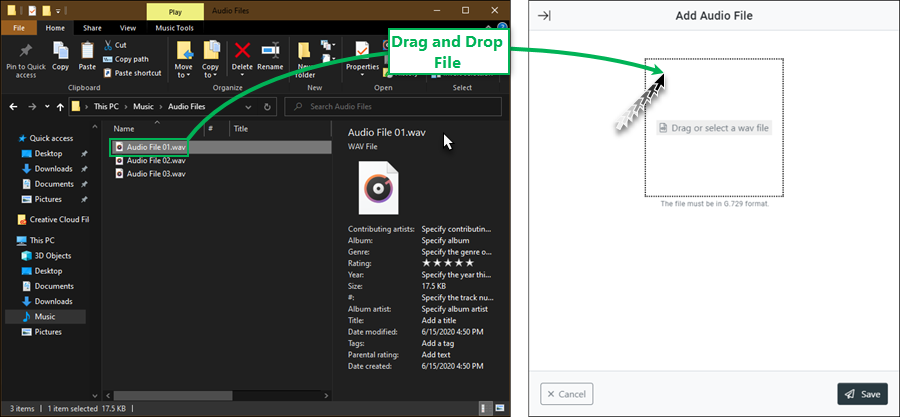
Method 1: Drag and Drop Audio File
- Locate the audio file you want to add.
- Left-click and hold to drag the file into the specified area within the Add Audio File dialog.
Method 2: Select Audio File
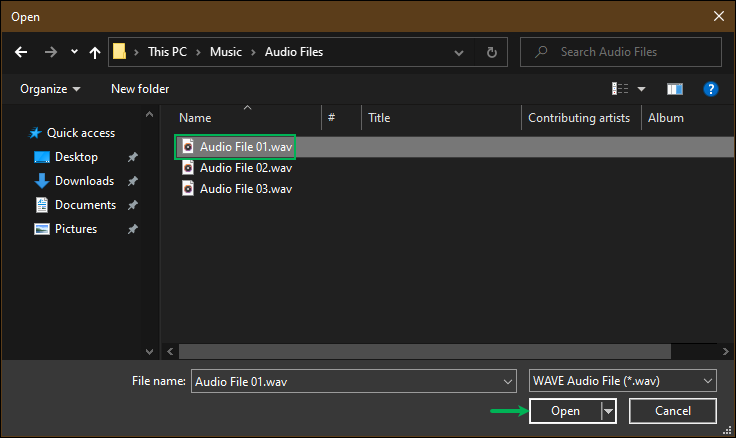
- Click the Drag or select a wave file area to access the open file dialog.
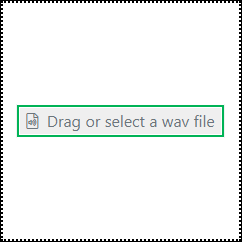
- Locate and select the audio file you want to add.
Deleting an Added Audio File
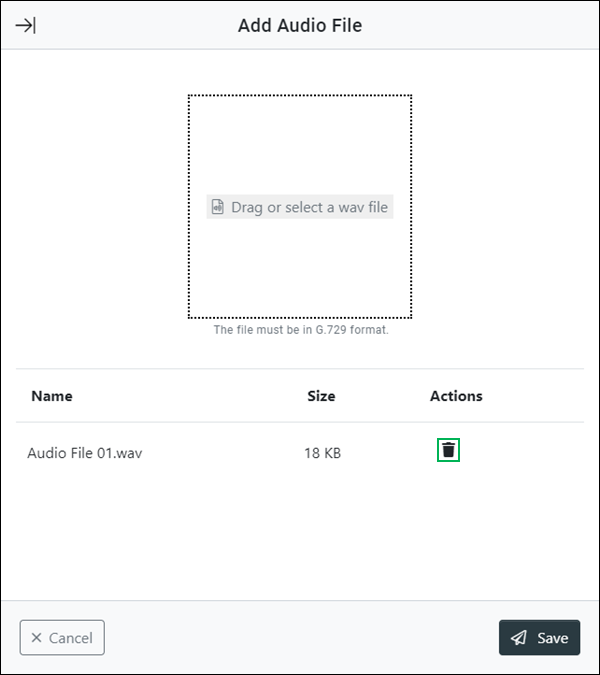
If you accidentally added the wrong audio file, or decide you do not want to add the selected file, click the Delete (trash can) icon.
Saving and Uploading the Audio File
Save the audio file by clicking Save, or click Cancel to cancel the operation.

Set which audio file is active for each language within an audio prompt by doing the following:
- Select the language for which you want to select an active audio file.

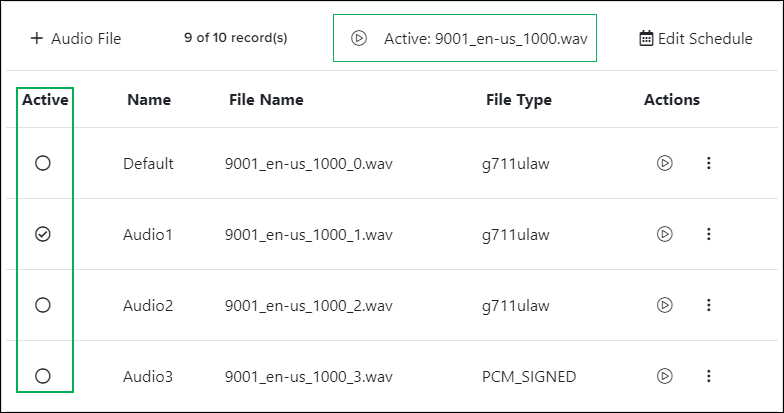
- Click an Inactive Audio File (empty circle) icon to place a check next to the audio file you want to set as active.
NOTE:
Each language within the audio prompt can only have one audio file set as active. A checked circle indicates an active audio file, while and empty circle indicates audios files that are not active.
![]()
Active Audio File Icon
![]()
Inactive Audio File Icon
Create a schedule for audio file activation by doing the following:
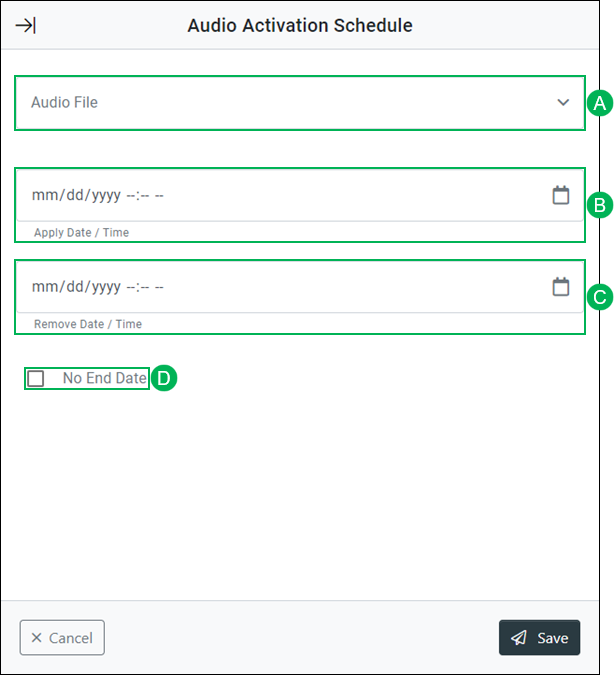
- Click the Create Schedule button to access the Audio Activation Schedule dialog.

- On the Audio Activation Schedule dialog, configure the schedule as directed below:
- Select the audio file to activate on the defined schedule.
- Set a date and time for the schedule to apply in the Apply Date / Time field.
- Set a date and time to end the activation schedule into the Remove Date / Time field. When this date / time occurs, the audio file applied by the schedule is removed and the audio prompt's default audio file is activated.
NOTE:
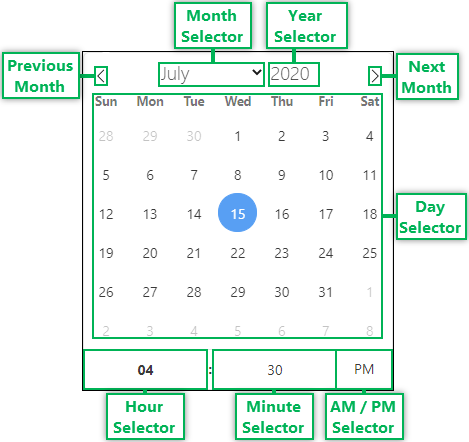
Clicking the Apply Date / Time or Remove Date / Time fields reveals the Show Date / Time Selection menu. Use this menu to select the date and time for applying or removing the activation schedule:
Date / Time Selection Menu
Month Selector – Click to select a month for the schedule.
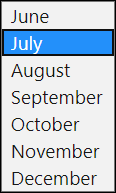
Year Selector – Click to enter or select a year. Use the up and down arrows to select the previous or next year.

Next Month – Arrow used to navigate to the next month.
Previous Month – Arrow used to navigate to the previous month.
Day Selector – Allows for the selection of the day. A selected day is highlighted in blue, and the current day is outlined in a gray circle.
Hour Selector – Enter or select the hour for the time the schedule will activate. Use the up and down arrows to select the previous or next hour.

Minute Selector – Enter or select the minute for the time the schedule will activate. Use the up and down arrows to select the previous or next minute.

AM / PM Selector – Select PM or AM for the time the schedule will activate.

- Place a check next to the No End Date option if the schedule does not need an end date.
Saving the Audio File Activation Schedule
Save the new audio file activation schedule by clicking Save, or click Cancel to cancel the operation.

Edit an audio file activation schedule by doing the following:
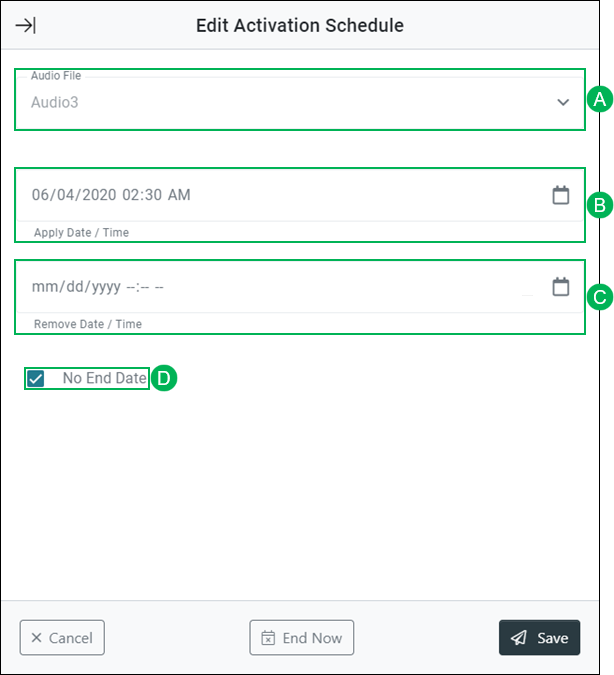
- Click the Edit Schedule button to access the Edit Activation Schedule dialog.

- On the Audio Activation Schedule dialog, edit the schedule as directed below:
- Select the audio file to activate on the defined schedule.
NOTE:
If the activation schedule is currently running, you cannot change which audio file is selected. To change this, click the End Now button located at the bottom of the dialog.
- Change the date and time for the schedule to apply in the Apply Date / Time field.
- Change the date and time to end the activation schedule into the Remove Date / Time field. When this date / time occurs, the audio file applied by the schedule is removed and the audio prompt's default audio file is activated.
NOTE:
Clicking the Apply Date / Time or Remove Date / Time fields reveals the Show Date / Time Selection menu. Use this menu to select the date and time for applying or removing the activation schedule:

Date / Time Selection Menu
Month Selector – Click to select a month for the schedule.

Year Selector – Click to enter or select a year. Use the up and down arrows to select the previous or next year.

Next Month – Arrow used to navigate to the next month.
Previous Month – Arrow used to navigate to the previous month.
Day Selector – Allows for the selection of the day. A selected day is highlighted in blue, and the current day is outlined in a gray circle.
Hour Selector – Enter or select the hour for the time the schedule will activate. Use the up and down arrows to select the previous or next hour.

Minute Selector – Enter or select the minute for the time the schedule will activate. Use the up and down arrows to select the previous or next minute.

AM / PM Selector – Select PM or AM for the time the schedule will activate.

- Place a check next to the No End Date option if the schedule does not need an end date.
- Click the End Now button if you need to end a schedule that is currently running.
Saving Activation Schedule Changes
Save the audio file activation schedule changes by clicking Save, or click Cancel to cancel the operation.

Play and pause audio files within an audio prompt by doing the following:
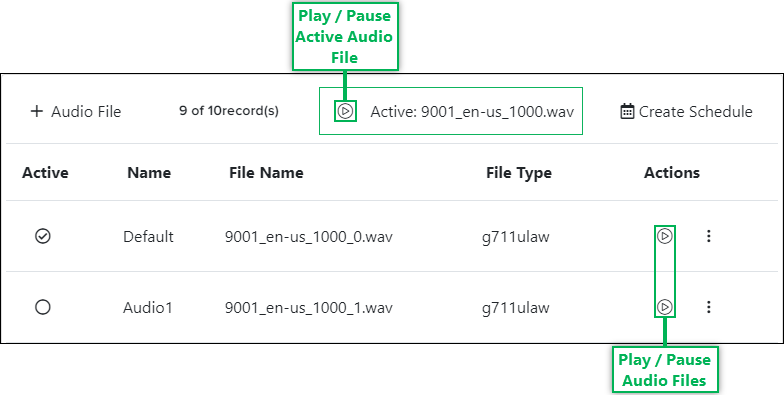
Playing and Pausing an Audio File
- Click the Play icon to listen to the audio files.
![]()
Play Icon
- Pause the playback by clicking the Pause icon.
![]()
Pause Icon
Accessing the Edit Audio File Dialog
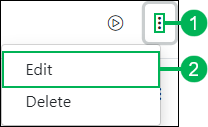
- Click the Actions button for the audio file you want to change.
- Select Edit to access the Edit Audio File dialog.
Changing the Audio File Name
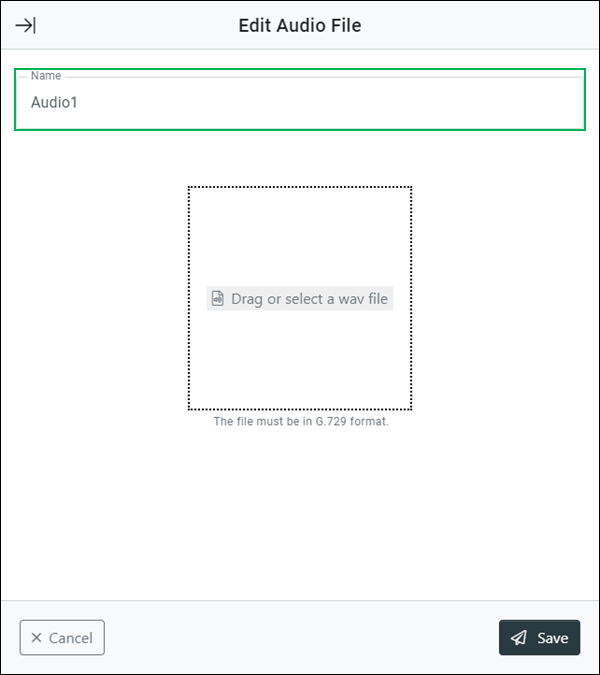
Change the name of the audio file by replacing the text in the Name field.
Replacing the Audio File
From the Edit Audio File dialog, use one of the following methods to replace the existing audio file.
NOTE:
Audio files must meet the following format requirements:
- File must have the .wav extension
- Format must be Audio Interchange File Format (AIFF)
- Compression type must be μ-law
- Data must be 8-bit ITU G.711 μ-law, G.711 A-law, or G.729
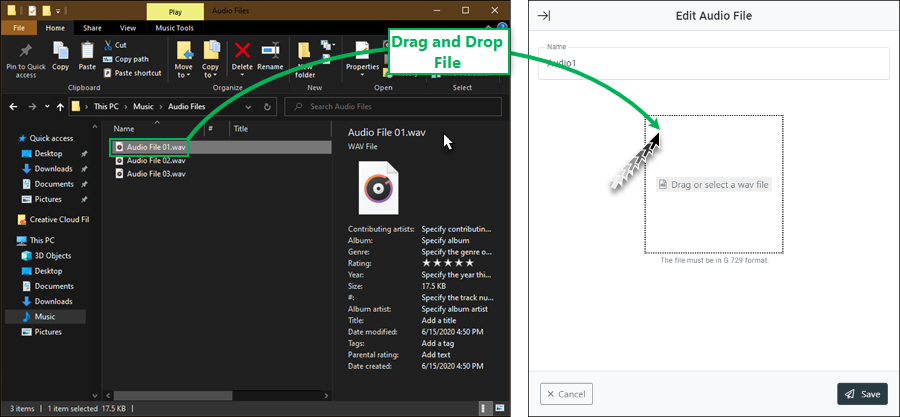
Method 1: Drag and Drop Audio File
- Locate the audio file you want to add.
- Left-click and hold to drag the file into the specified area within the Edit Audio File dialog.
Method 2: Select Audio File
- Click the Drag or select a wave file area to access the open file dialog.

- Locate and select the audio file you want to add.

Deleting an Added Audio File
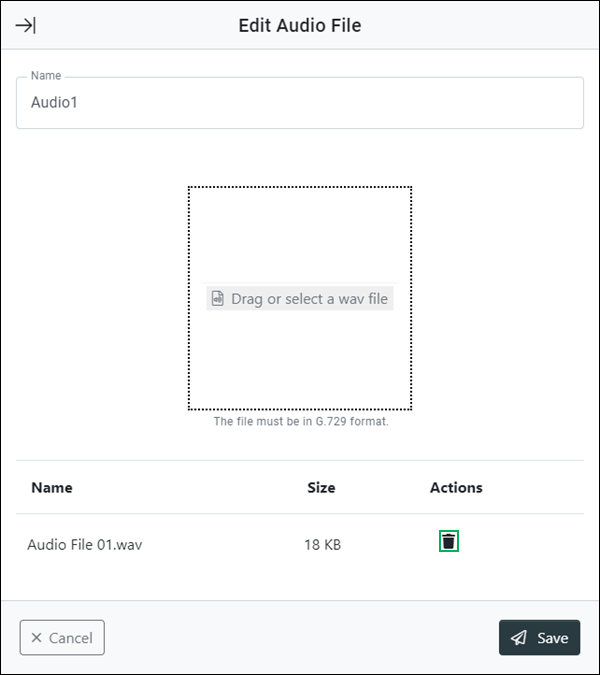
If you accidentally added the wrong audio file, or decide you do not want to add the selected file, click the Delete (trash can) icon.
Saving Audio File Changes
Save the audio file changes by clicking Save, or click Cancel to cancel the operation.

Remove any audio files that are no longer need by doing the following:
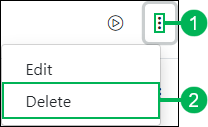
- Click the Actions button for the audio file you want to delete.
- Select Delete to access the Confirm Audio File Delete dialog.
- Confirm the deletion of the audio file by clicking the Delete button, or click the Cancel button to cancel the operation.
