Topic Updated: April 01, 2025
Clone an Existing Phone
Cloning a phone is a quick way to add a phone for a new user without needing to create a ticket to request to have it created. This topic will cover how to clone a phone.
REQUIREMENTS:
Before cloning a phone, you must first know the following requirements for the new phone:
- Product type
- Communication protocol
Cloning a Phone
Clone a phone by completing the following steps:
- On the Phones page, locate an existing phone that matches the basic requirements needed for the new phone.
- Click the Clone Phone task icon located on the same row of the phone to be cloned.

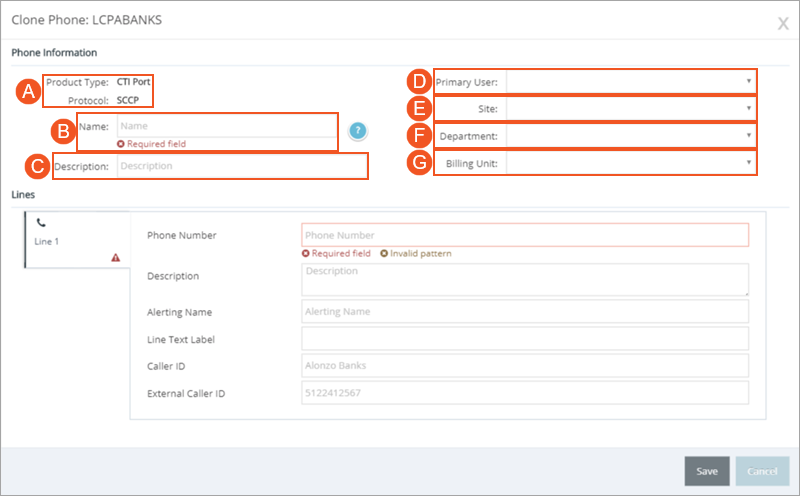
- Do the following under the Phone Information section of the Clone Phone dialog:
NOTE:
If cloning the phone for future needs, you can leave the following boxes empty and complete them later.
- Ensure the Product Type and Protocol match the requirements for the cloned phone. If not, clone a phone that does match the requirements.
- Enter a name for the phone into the Name field. It is recommended that you enter a unique name, so there is no confusion when assigning the an agent.
- Enter a description for the phone into the Description field to help identify how the phone is used or who it is used by.
- Click the drop-menu next to the Primary User option to select the ID of the agent whom this phone will be assigned to.
- Click the drop-menu next to the Site option to select the site in which the phone will be used.
- Click the drop-menu next to the Department option to select the department in which the phone will be used.
- Click the drop-menu next to the Billing Unit option to select the billing unit in which the phone will be used.
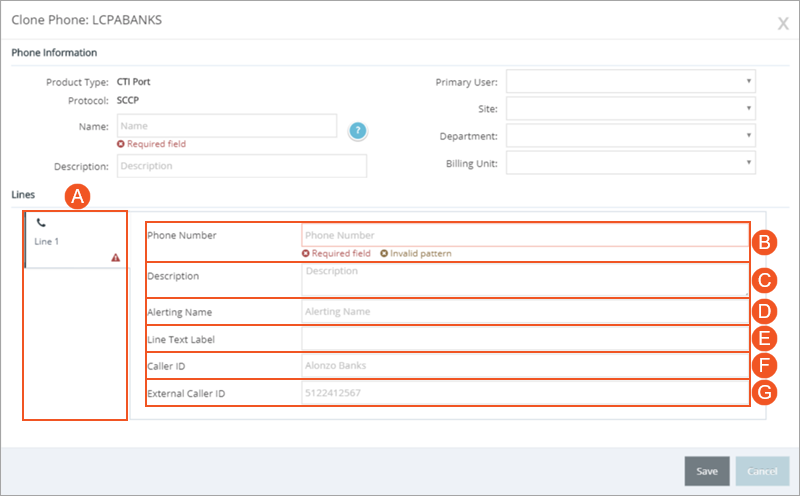
- Do the following under the Lines section of the Clone Phone dialog:
- Click to select the line to edit, if multiple lines are available for the cloned phone.
- Enter the phone number associated with the new line assigned to the phone in the Phone Number field. When this number is dialed, calls are automatically routed to this phone.
- Enter a description for the line into the Description field. This field can include as much information as needed.
- Enter the name to display on a phone receiving a call from this line into the Alerting Name field.
- Text entered into the Line Text Label field passes through to a target phone that uses ASCII characters instead of Unicode characters. Users commonly enter the same name that was specified in the Alerting Name field.
- Enter the caller name to display on the target phone into the Caller ID field.
- Enter the name or information to display to the target phone when dialing from an external source into the External Caller ID field.
NOTE:
If additional lines are available for the phone, complete the fields for those lines as well.
- Click the Save button to save any changes, or click the Cancel button to cancel the operation.
A success confirmation displays in the upper right corner upon successfully saving the cloned phone. The message disappears after a few seconds.
See Also
Please let us know how we can improve this topic by clicking the link below:
© TTEC Digital 2025
![]()
![]()
![]()