Topic Updated: April 01, 2025
Turn Features On or Off for a Role
Roles are used to control which Portal features users can access. After assigning users to a role, you must then turn on the features you want to allow those assigned users to have access to. This topic shows you how to enable and disable features for a role.
Accessing the Features For Role Dialog
Access the Features For Role dialog by doing the following:
Locate the role needing features enabled or disabled.
Click the Edit Features task icon located on the same row of the role.

Understanding and Using the Features for Role Interface
The Features For Role dialog opens allowing you to enable or disable features for the role.
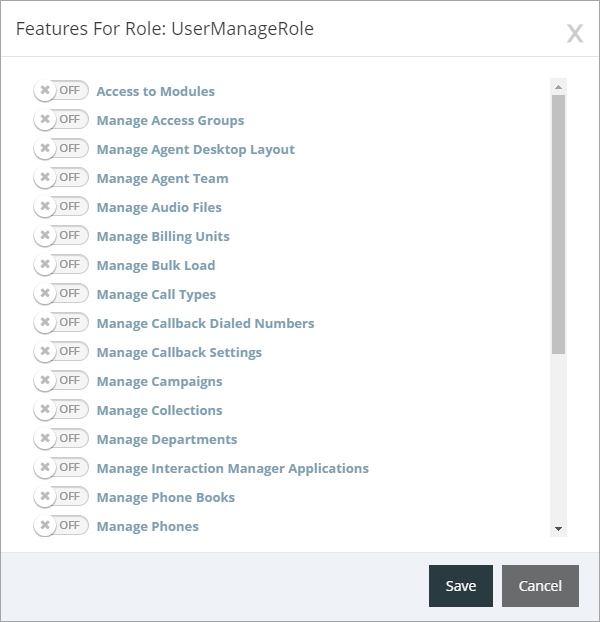
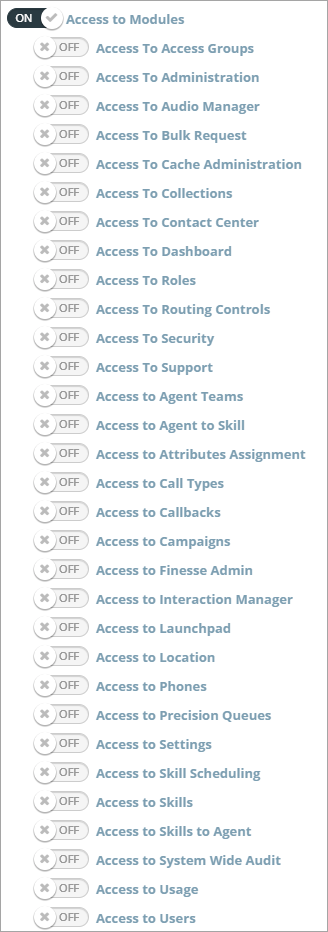
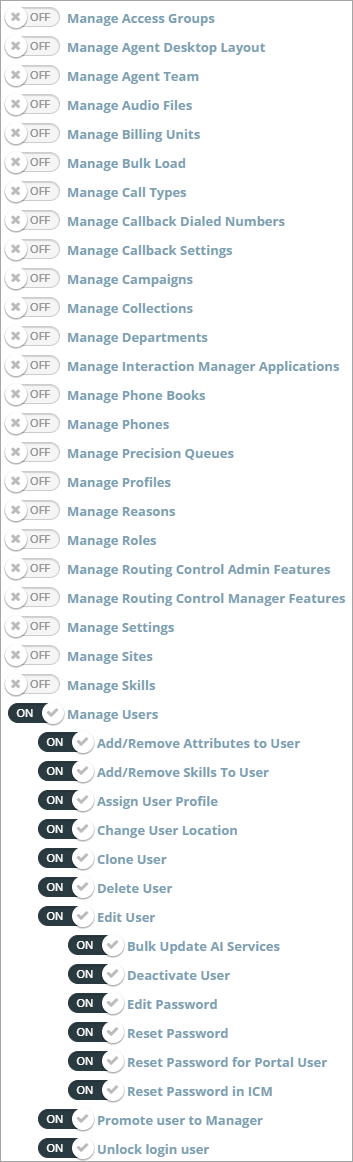
Features are divided into the following two main types:
Access – To gain access to any Portal features, you must first turn on the Access to Modules option. This allows you to turn on or off access to the main Portal features from the global navigation menu.
Manage – To manage the level of control a role has within Portal features and any sub-features, you can turn on or off any of the Manage feature options. When turning these features on, many expand to reveal an additional subset of features giving you even more control over a feature.
NOTE:
When turning on features, their sub-features are also set to ON by default. Be sure to turn off any of those features you do not want enabled.
Turn Features On
Enable features by toggling the ON/OFF Switch to the ON position.

ON/OFF SWITCH "ON"
Turn Features Off
Disable features by toggling the ON/OFF Switch to the OFF position.

ON/OFF SWITCH "OFF"
Saving Changes to the Role Features
Click the Save button to save the changes, or click the Cancel button to cancel the operation.

See Also
Please let us know how we can improve this topic by clicking the link below:
© TTEC Digital 2025
![]()
![]()
![]()