Topic Updated: April 01, 2025
Manage Active Directory Security Using Custom Access
Custom Access is a sub-feature of Security within Humanify Portal that allows partners and customers to manage Active Directory security group memberships. This topic will cover the following:
- Accessing the Custom Access feature
- Assigning users to a security group
- Removing users from a security group
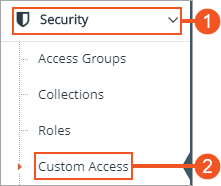
Accessing the Custom Access Page
To access the Custom Access page:
- Select Security from the Humanify Portal navigation menu. The menu expands to reveal additional sub-features.
- Click Custom Access to access the Custom Access feature.
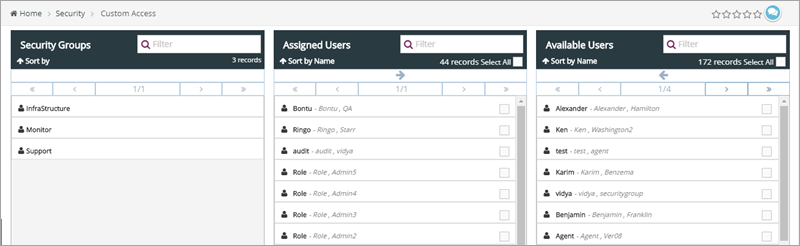
Understanding the Custom Access Interface
The Custom Access interface consists of three panes which are used to both assign or remove users for a security group.
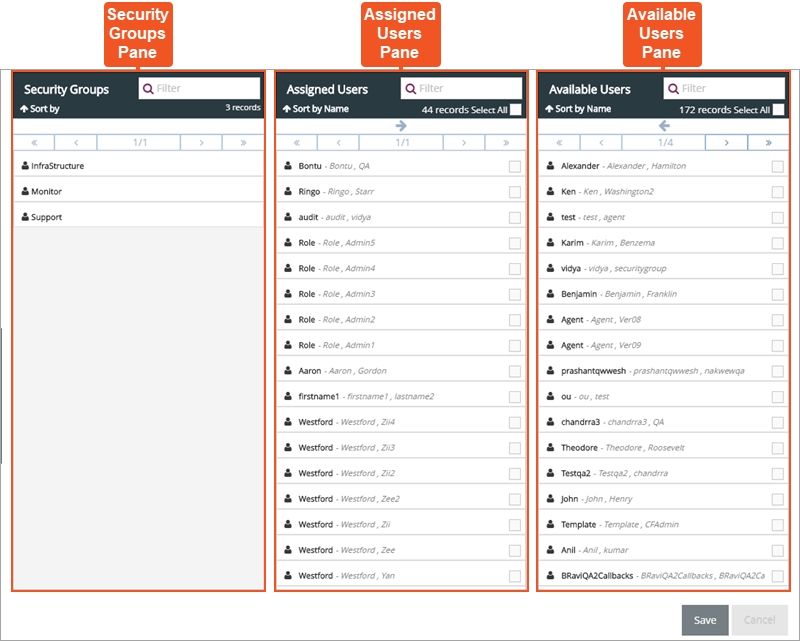
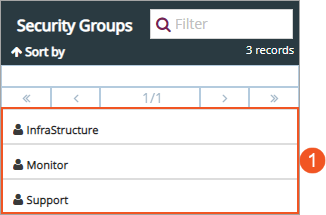
- Security Groups Pane - Displays the security groups available. Click on a security group to display all assigned and available users for that group.
- Assigned Users Pane - Lists all users currently assigned to the selected security group.
- Available Users Pane - Lists all users currently available for assignment to the selected security group.
To learn more about using the assignment panes, see Assignment Panes Interface.
Assigning Users to a Security Group
To assign users to a security group:
- Locate and select the security group needing user(s) assigned from the Security Groups Pane.
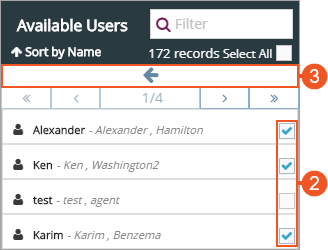
- Place a check next to each user to assign to the security group in the Available Users Pane.
- Click the Assign button to move selected user(s) to the Assigned Users Pane.
The selected user(s) now display at the top of the Assigned Users Pane. The green highlighting indicates any users recently assigned, but not yet saved.
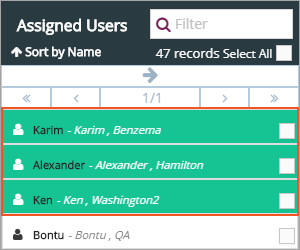
- Click the Save button to save the newly assigned users, or click the Cancel button to cancel the operation.

Removing Users from a Security Group
To remove users from a security group:
- Locate and select the security group needing user(s) removed from within the Security Groups Pane.
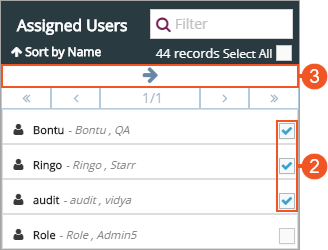
- Place a check next to each user to select them in the Assigned Users Pane. To quickly select all assigned users for removal, click the Select All check box.
- Click the Remove button to move selected users to the Available Users Pane.
The selected users now display at the top of the Available Users Pane. The red highlighting indicates any users recently removed, but not yet saved.
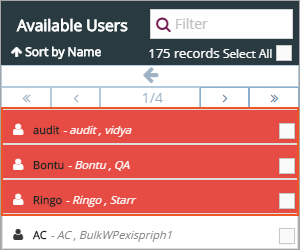
- Click the Save button to save the newly removed users, or click the Cancel button to cancel the operation.
See Also
Please let us know how we can improve this topic by clicking the link below:
© TTEC Digital 2025
![]()
![]()
![]()