Topic Updated: April 01, 2025
Features of the Departments Pane
In the main menu, you can open the Locations page by clicking on Administration > Locations. The Locations page consists of three panes, the Sites pane, the Departments pane, and the Billing Units pane. See the following screen capture to identify the three panes in the Locations page..
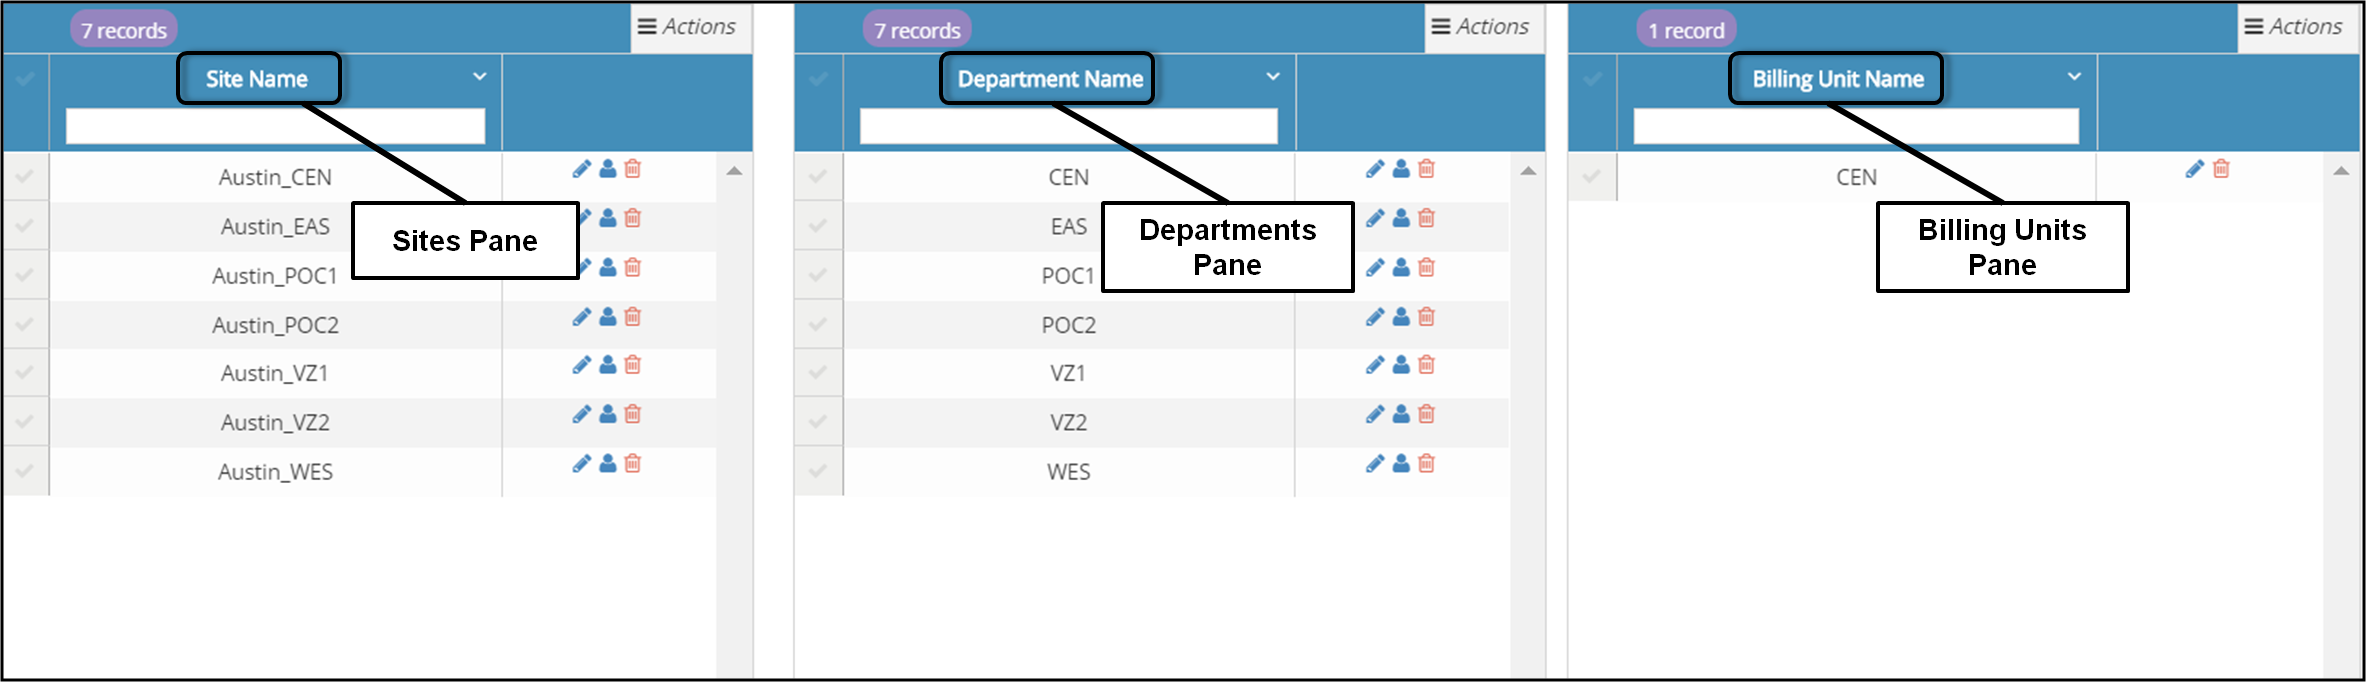
The Locations page includes several features to help you work within the three panes that make up the Locations page. This topic discusses the features that are included in the Departments pane.
The following information explains features of the Departments pane in greater detail:
Search. - Enter a character string that represents all or part of the name of a department into the Search box and click on the Search button (the button with the magnifying glass) to perform a search for the department. For more information about performing a search, .
Note: By default, the Search function examines all three panes for matching character strings. You can narrow the search by selecting an option in the All box on the left side of the window.
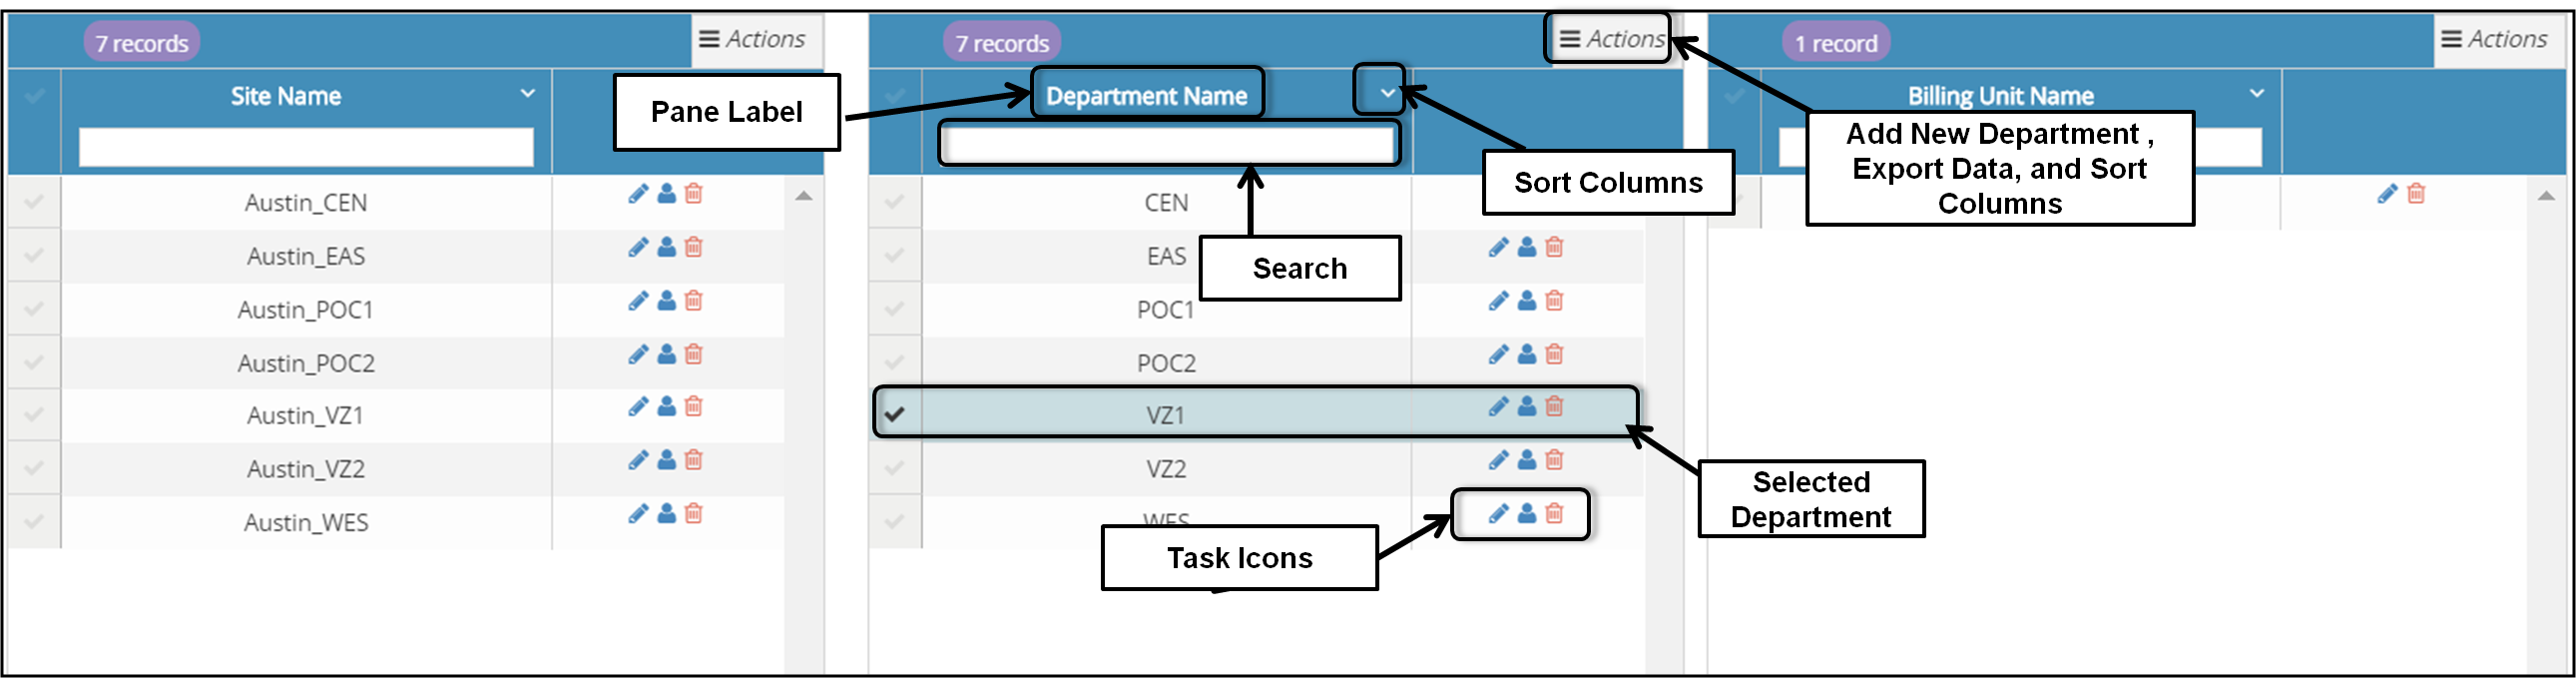
Pane Label - The name that identifies the pane. You cannot change this information.
Sort Columns - To sort the contents of the Departments pane either in ascending order or in descending order, click anywhere in the column header in the pane for which you want to change the sort order. The arrow on the right side of the column label (see the screen capture above) indicates if you are sorting the pane into ascending order or descending order. Sorting a single pane does not affect the sort order of the other two panes.
Selected Department - When you select a department, the entire row that contains the department changes to a light green color. This makes it easier to verify that you are working with the right department, but does not perform any action.
Task Icons - The task icons associated with each department are located on the right side of the row on which the department is located. The following screen capture illustrates the task icons. The task icons have been enlarged for clarity.
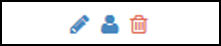
You can use the following task icons to work with the associated department:
 - Edit the information for the associated department. Update Information for an Existing Department.
 - Assign or un-assign users to or from the department. Assign Users to a Department.
 - Delete a department. Delete a Department.
Add New Department button - Click on this button to create a new department. For more information about creating a new department, Create a New Department.


Please let us know how we can improve this topic by clicking the link below:
© TTEC Digital 2025
![]()
![]()
![]()