Topic Updated: April 01, 2025
Assign or Un-assign Users for a Role
For a role to become effective, it must have users assigned. The users assigned to the role are then associated with any features that are turned on or off within the role as well. Follow the steps below to learn more about assigning or un-assigning users for a role.
Accessing the Users for Role Dialog
Access the Users For Role dialog by doing the following:
- Locate the role needing users assigned or un-assigned.
- Click the Edit Users task icon located on the same row of the role.
Understanding the Users for Role Interface
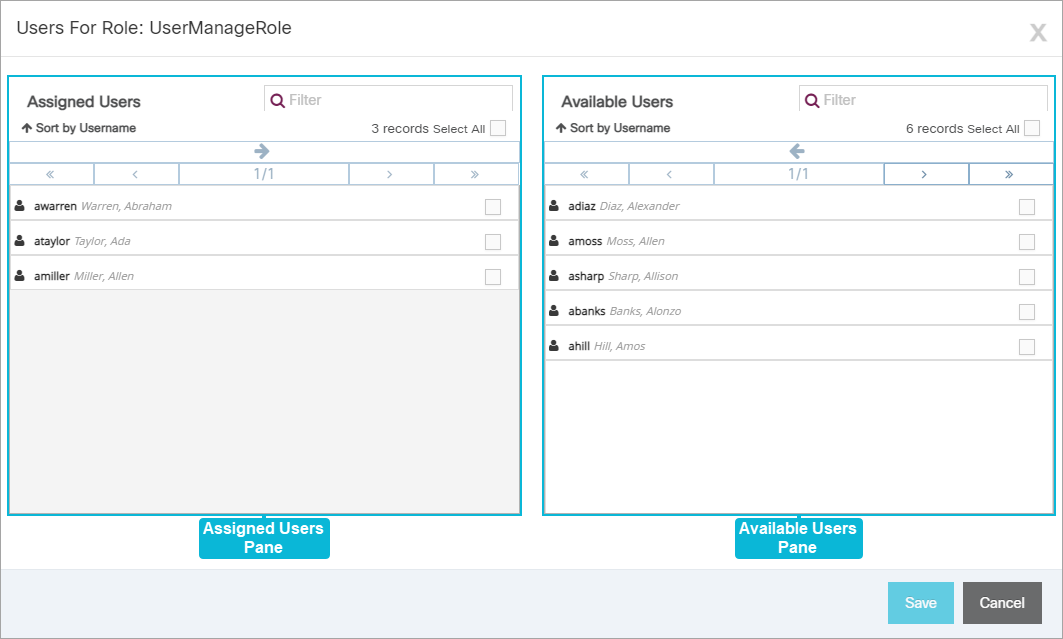
The Users For Role dialog opens allowing you to assign or un-assign users for the role.
Assigned Users Pane – Lists all users currently assigned to the selected role.
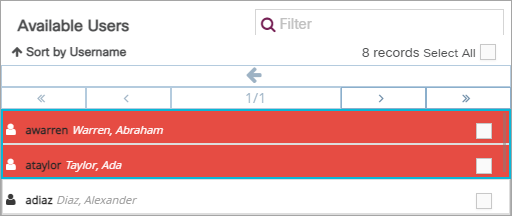
Available Users Pane – Lists all users currently available for assigning to the selected role.
To learn more about using assignment panes, see Assignment Panes Interface.
To assign users to a role:
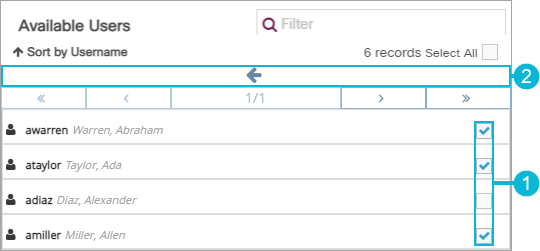
- Place a check next to each user to assign to the role in the Available Users pane. To quickly select all available users for assignment, click the Select All check box.
- Click the Assign button to move selected user(s) to the Assigned Users pane.
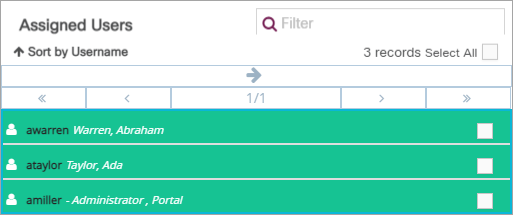
The selected users now display at the top of the Assigned Users pane. The green highlighting indicates any users recently assigned, but not yet saved.
- Click the Save button to save the changes, or click the Cancel button to cancel the operation.
To un-assign users from a role:
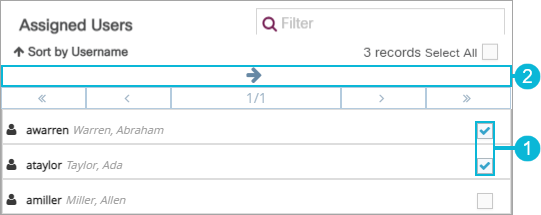
- Place a check next to each user to select them in the Assigned Users pane. To quickly select all assigned users for removal, click the Select All check box.
- Click the Un-assign button to move selected users to the Available Users pane.
The selected users now display at the top of the Available Users pane. The red highlighting indicates any users recently un-assigned, but not yet saved.
- Click the Save button to save the changes, or click the Cancel button to cancel the operation.
See Also
