Handling Common Onboarding Issues and Requests
RealPlay™ BOT Admin Portal Importing Errors
Error Messages and Their Solutions
| Error Messages | Reason and/or Resolution |
| Error in alt_id property – String does not match pattern ^\S*$: [employee ID] |
|
| Error in identities[0].profileData.email property – Object didn’t pass validation format for email: [employee’s email address] |
|
| Property [email] has non-unique value: [employee’s email address] |
The same email address has been submitted for another employee.
|
| Error: ‘utf-8’ codec can’t decode byte 0xf1 in position [number]: invalid continuation byte |
There is a special character in any of the fields.
NOTE: As of November 2021, the RealPlay™ BOT Admin Portal no longer rejects special characters. This error message is still included in this list in case the issue reoccurs in the future. |
| A user with this same [email|username|user_id] was already provided. |
This person’s employee ID is the same as that of another learner.
|
| Error in identities[0].profileData.email property – Expected type string but found type null |
Null indicates that the field is empty. In this case the file was submitted with an empty cell under the email column.
|
| Error: Expecting value: line 1 column 1 (char 0) |
Look for invalid characters in the fields. Some invalid characters may be invisible. Your clues of their presence are:
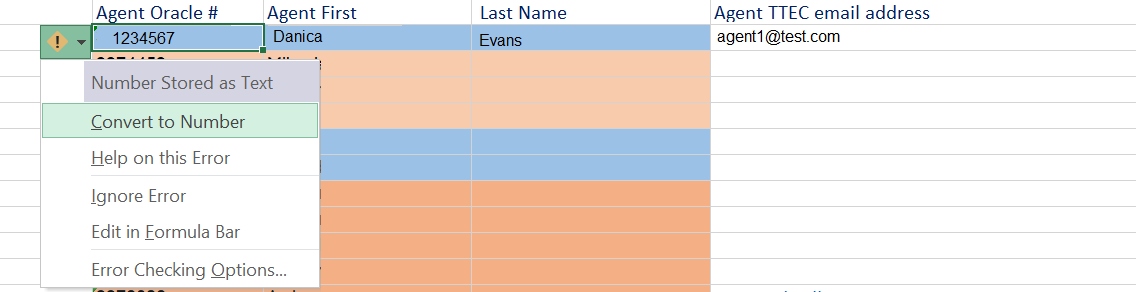
Example: Look at the exclamation point and the green indicator in the upper left corner of the Oracle #. When you hover your mouse over the exclamation point, the message ‘The number in this cell is formatted as text or preceded by an apostrophe.’ is displayed. When this is copied into your CSV file, an error may result when importing the file into the RealPlay™ Admin Portal.
To remove the special formatting, click the drop-down arrow beside the exclamation point, and from the options, select Convert to Number.
|
| Error: Error getting Auth0 Connection ID. Ensure proper Permissions are assigned to Application ‘RealPlay BOT’ for Auth0 Tenant – [tenant’s name]. | Contact the Innovation – RealPlay™ BOT Team. |
Errors Not Listed in the Previous Section
To prevent and correct file import errors:
- Check for special characters in the cells.
Some of the special characters are: the enye symbol (ñ), apostrophe, quotation marks, and MS Excel functions.
- Look for unnecessary spaces at the beginning and end of the cells.
- Always save the file as a CSV.
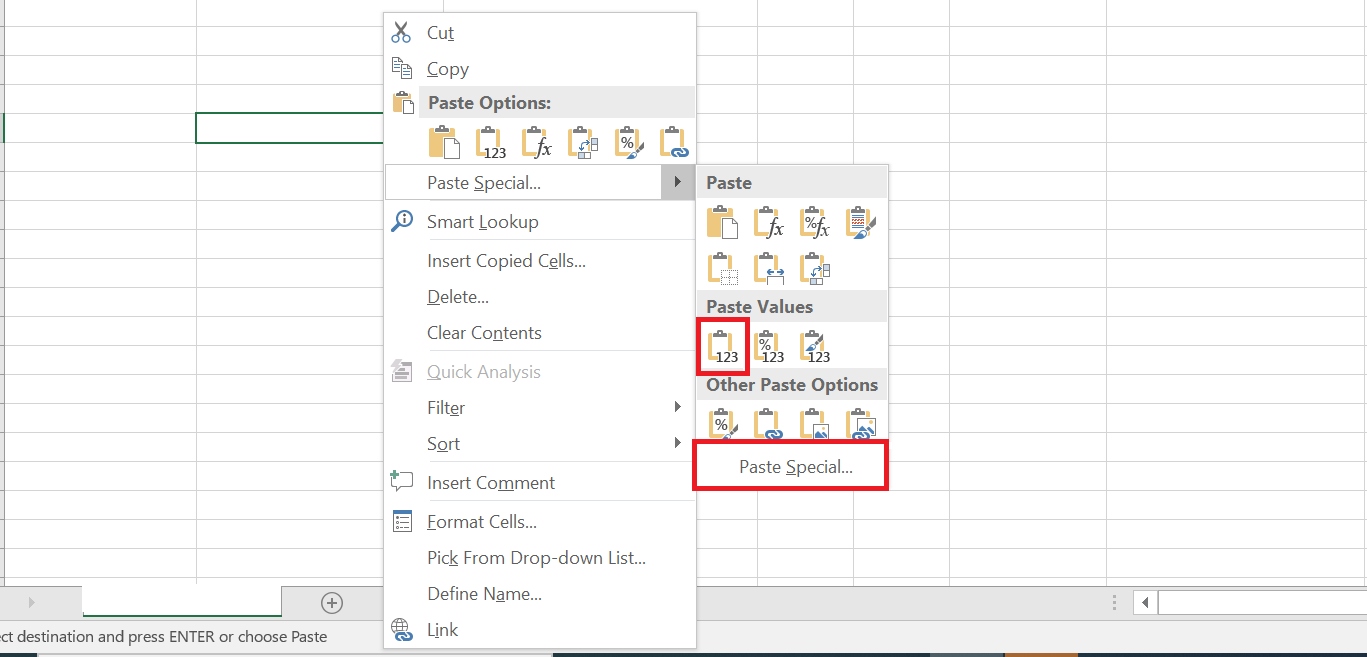
- Copy the data from the onboarding request, and paste them as values into your CSV file.
Right-click and select Match Destination Formatting or Paste Values. This option is also available when you select Paste Special.
- If some of the cells in the onboarding request file contain special marks, you must address the issues before copying the data.
Look at the exclamation point and the green indicator in the upper left corner of the Oracle #. When you hover your mouse over the exclamation point, the message ‘The number in this cell is formatted as text or preceded by an apostrophe.’ is displayed.
When this is copied into your CSV file, an error may result when the file is imported into the RealPlay™ Admin Portal.

To remove the special formatting, click the drop-down arrow beside the exclamation point, and from the options, select Convert to Number.
The Onboarding Team is Not Notified When New Onboarding Requests Come In
- Check if the Smartsheet automation/workflow for the trigger ‘When rows are added’ is still active.
- Check if the onboarding team member is enrolled in the Smartsheet automation.
How to Enroll a Team Member into a Smartsheet Automation/Workflow
- Click the Automation tab on the upper left corner of the sheet. This should open a menu.
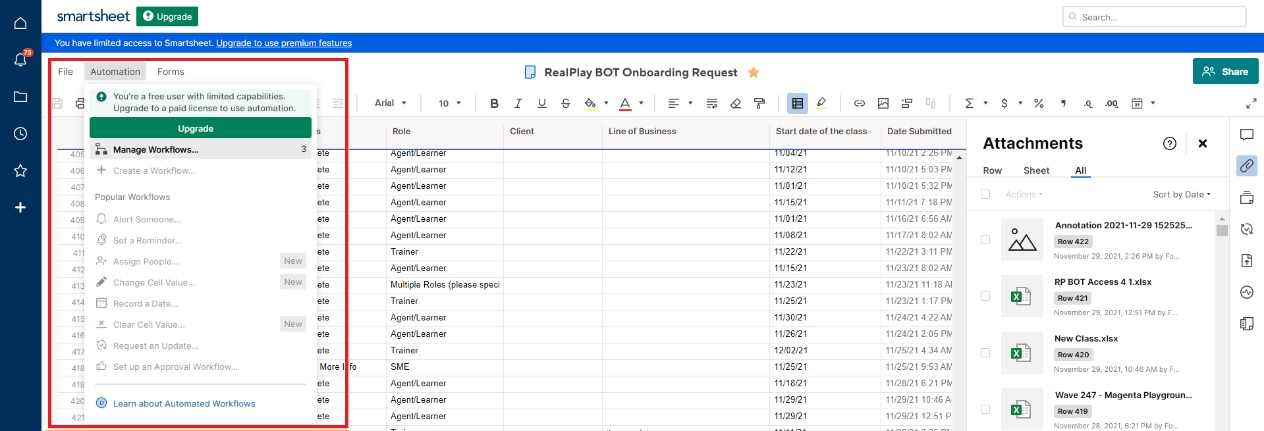
- Select Manage Workflows.
- Select the workflow that you would like to edit.
- Under the Assign People section, select or add your team member.
- Click the Save button.
More information on assigning people in an automated workflow can be found on Smartsheet’s help section.
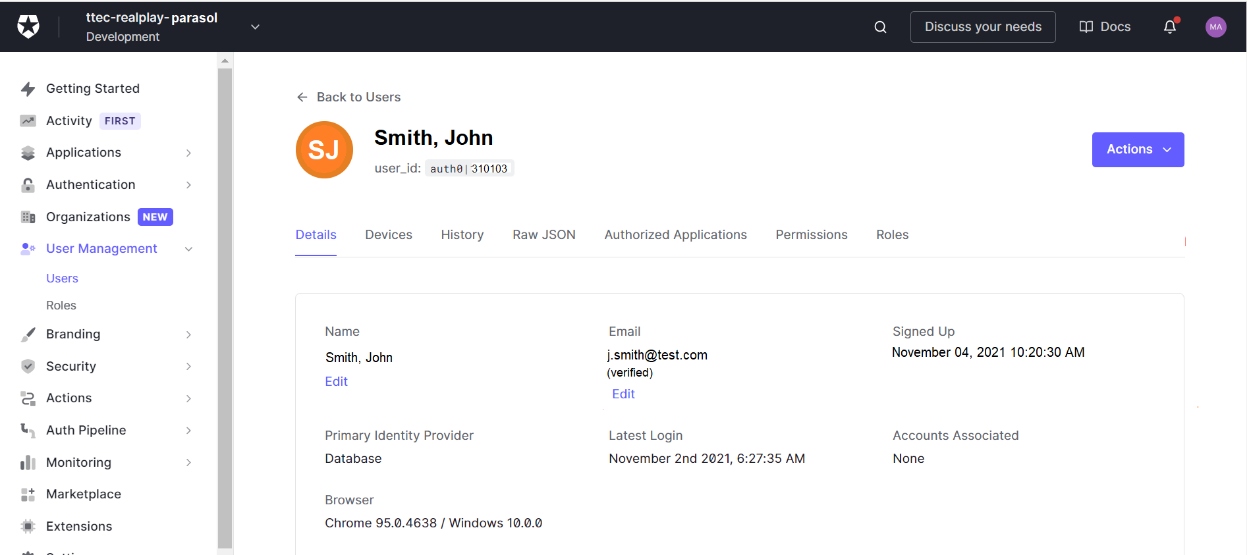
Password Resets
- Search for the user’s account on Auth0.
- Under the User Management drop-down, click the Users link.
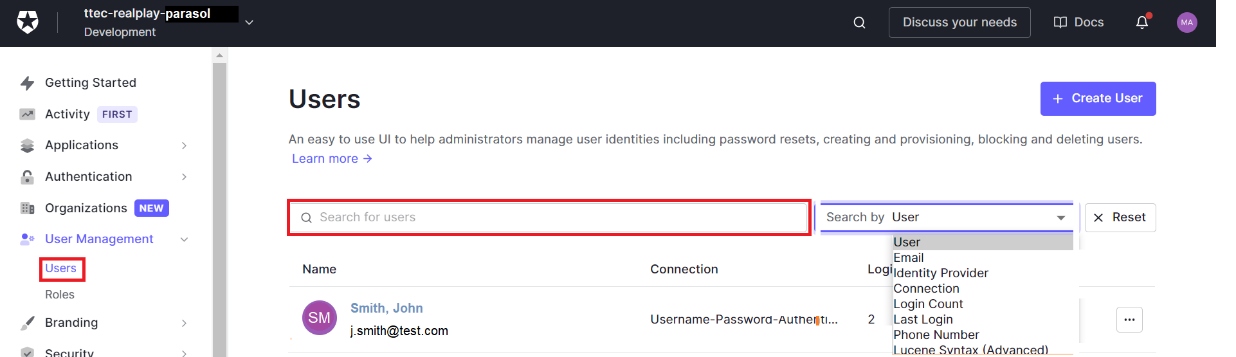
- Type the user’s name or email address into the Search for users field.
- Select the type of information that you entered from the drop-down menu.
- Press the Enter key.
- Click the name of the user to pull up the details.
- Scroll down.

- Click the Change button in the Danger Zone section.
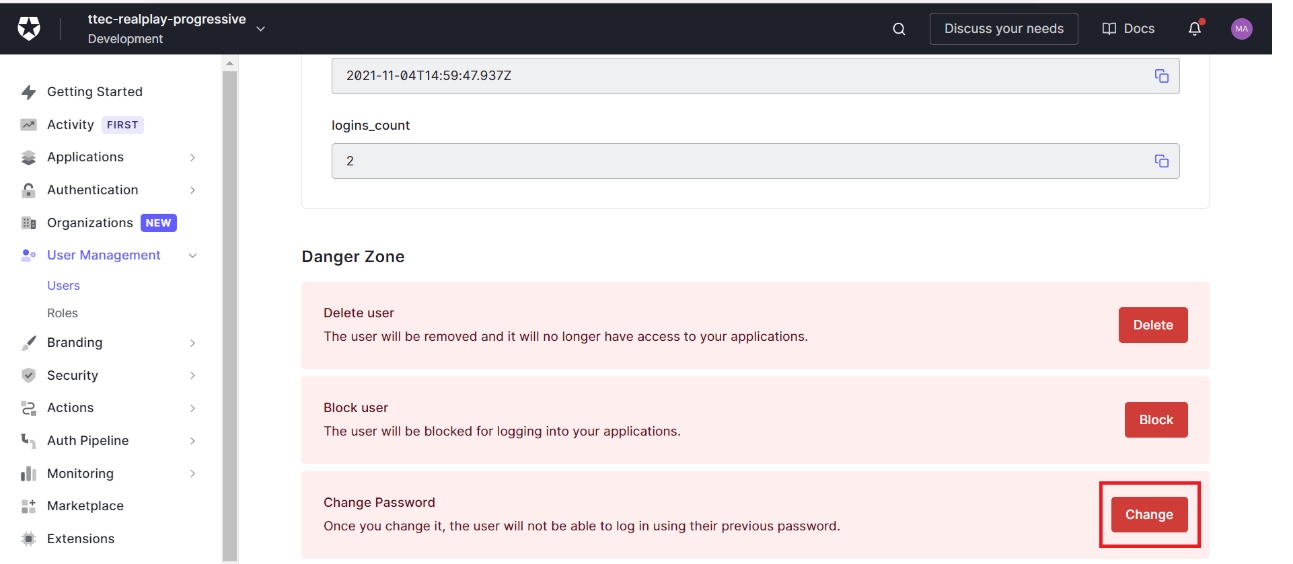
- Enter the default password, Password1.
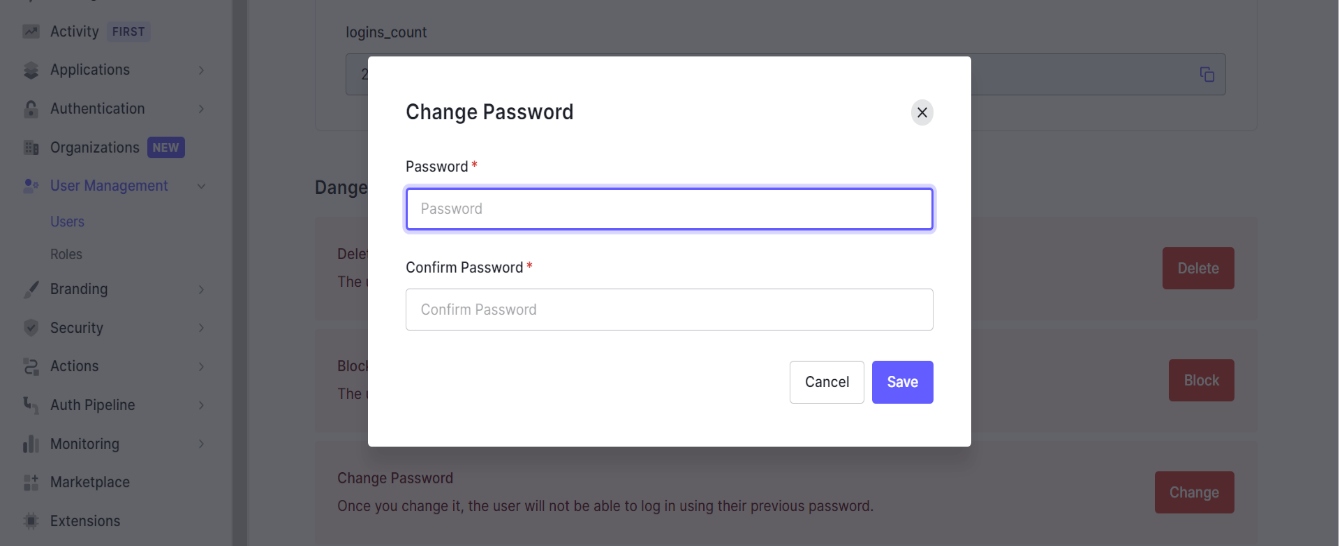
- Click the Save button.
NOTE:
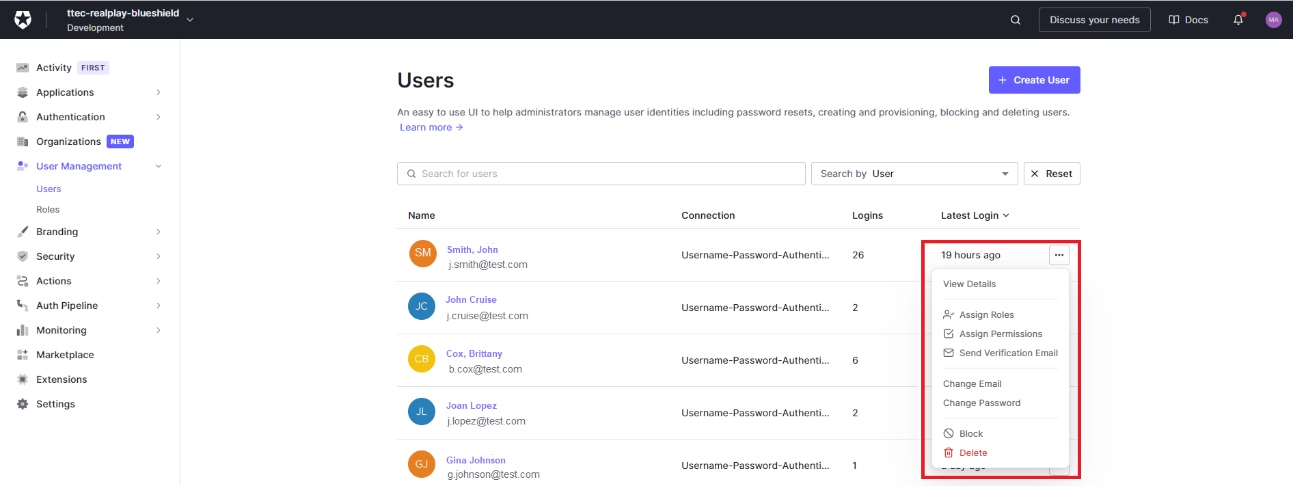
The change password and unblock functions can be accessed by clicking the Actions button on the upper right portion of the Account Details screen.
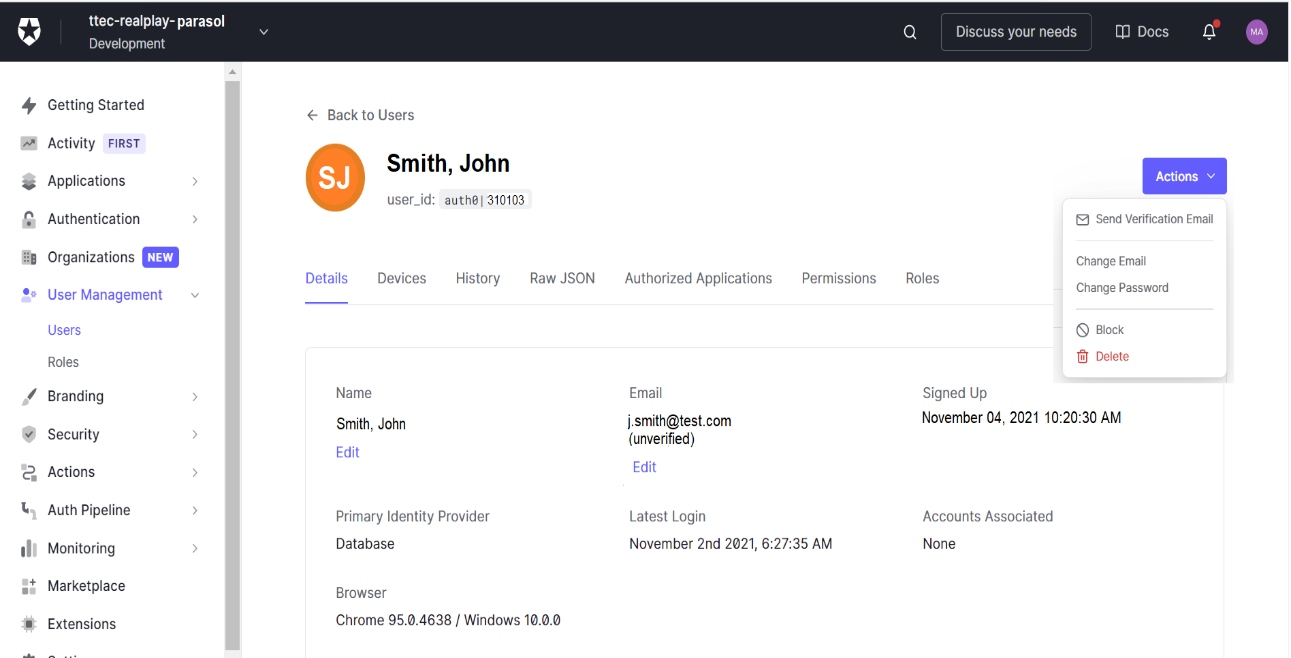
These can also be accessed by clicking the meatballs menu at the end of each user’s name in the Users screen.
Unblocking User Accounts
Auth0 may automatically block certain accounts, after several invalid password attempts or due to network security issues.
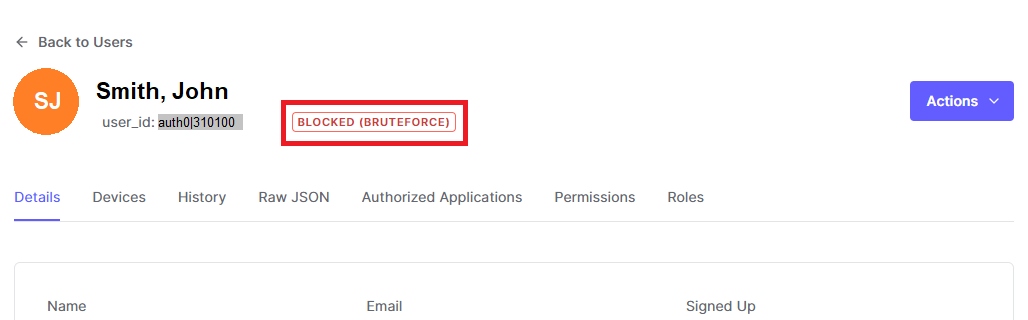
- Pull-up the user’s details to check if it has been blocked.
- Under the User Management drop-down, click the Users link.

- Type the user’s name or email address into the Search for users field.
- Press the Enter key.
- Click the name of the user to pull up the details.
- Scroll down.
- Click the Unblock button in the Danger Zone section.

NOTE:
The change password and unblock functions can be accessed by clicking the Actions button on the upper right portion of the Account Details screen.
These can also be accessed by clicking the meatballs menu at the end of each user’s name in the Users screen.
Other Access Issues
- Confirm that the learner is logging in using their enrolled credentials in Auth0. If necessary, update their email in Auth0.
Example:
Learners will not be able to access the BOT using their client-provided email address, if their RealPlay™ BOT user account is linked to their Teletech email address.
If a learner’s email address in the onboarding request contains a typographical error, they will not be able to log in using their correct email address.
- Some access issues can be resolved by simply resetting a user’s password using Auth0.
- The RealPlay™ BOT is only designed to work in the Chrome browser. If you use Internet Explorer, it will not let you log in.
Changing an Email Address
- Search for the user’s account on Auth0.
- Under the User Management drop-down, click the Users link.
- Type the user’s name or email address into the Search for users field.
- Press the Enter key.
- Click the name of the user to pull up the details.
- In the user’s profile, click the Edit link below the email address.
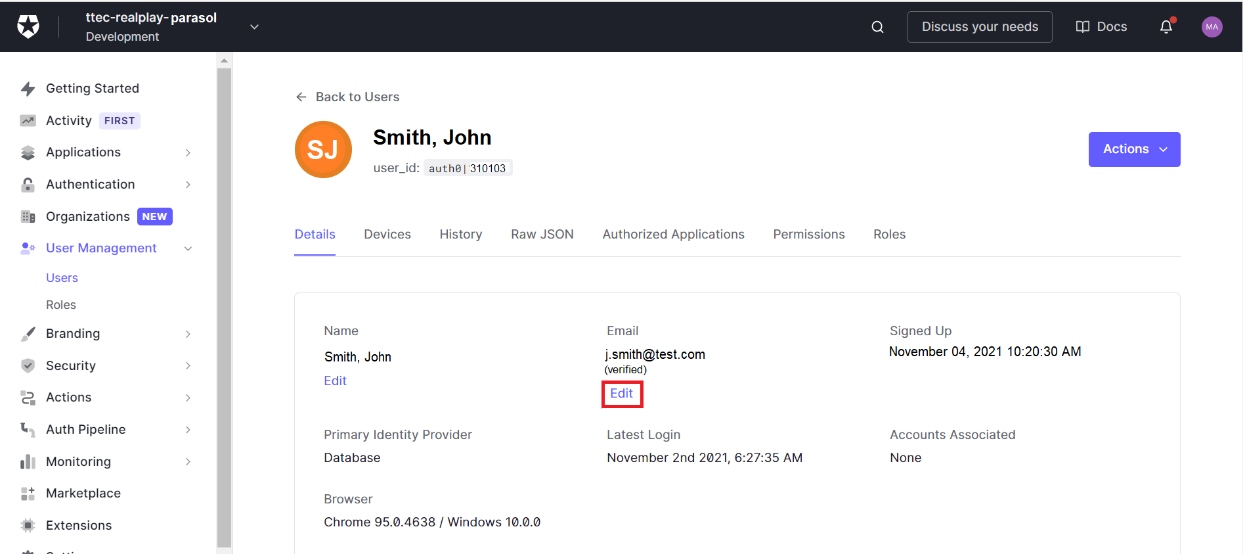
- Type the new email address in the Email field.
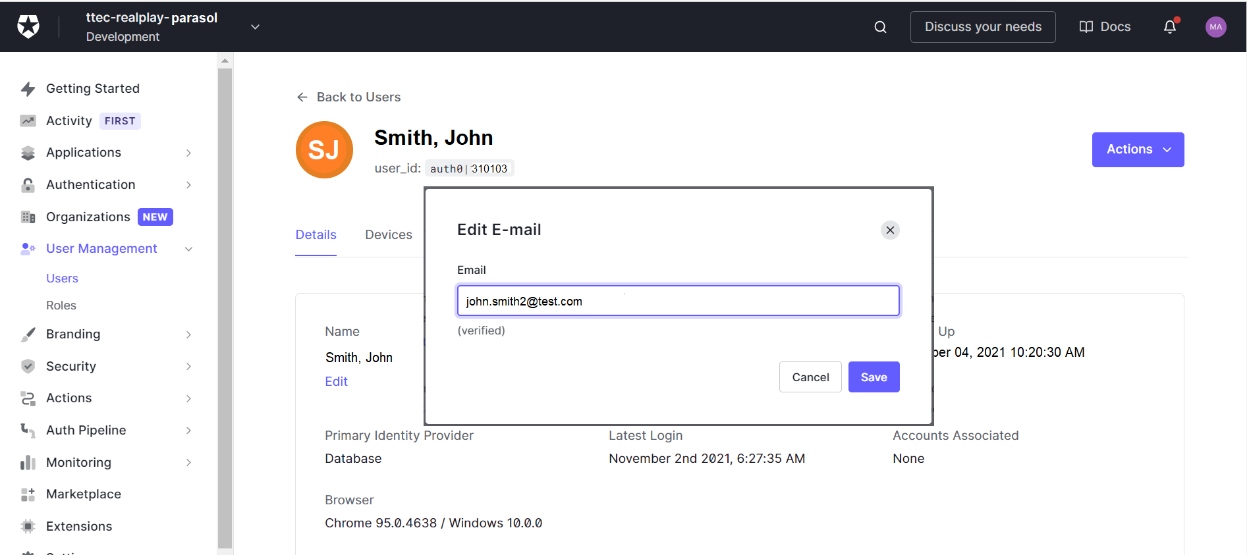
- Click the Save button.
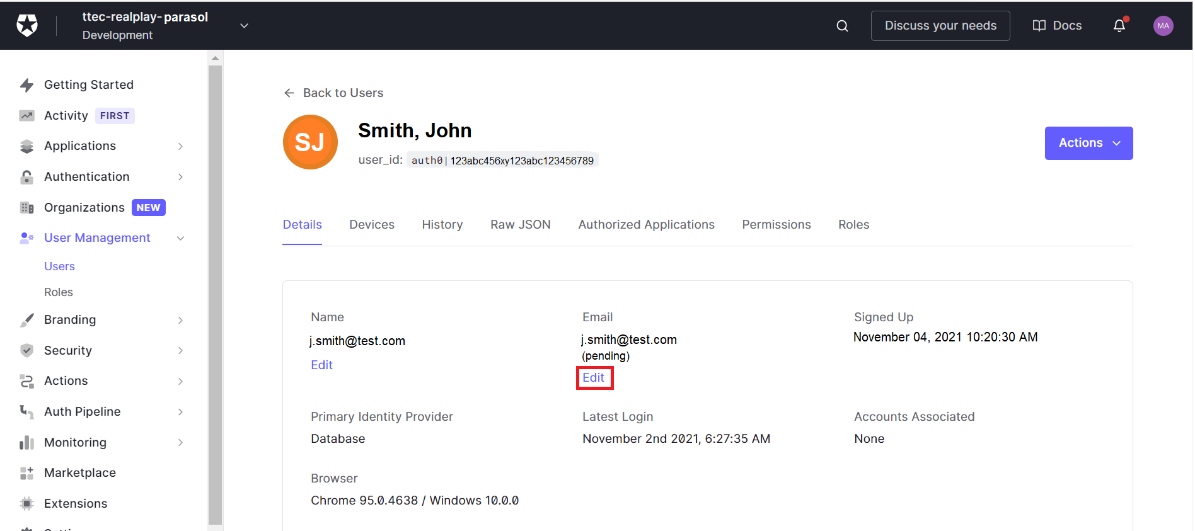
- Verify the user’s new email address.
- Under the Email section, click Edit.
- Click the Set email as verified button.
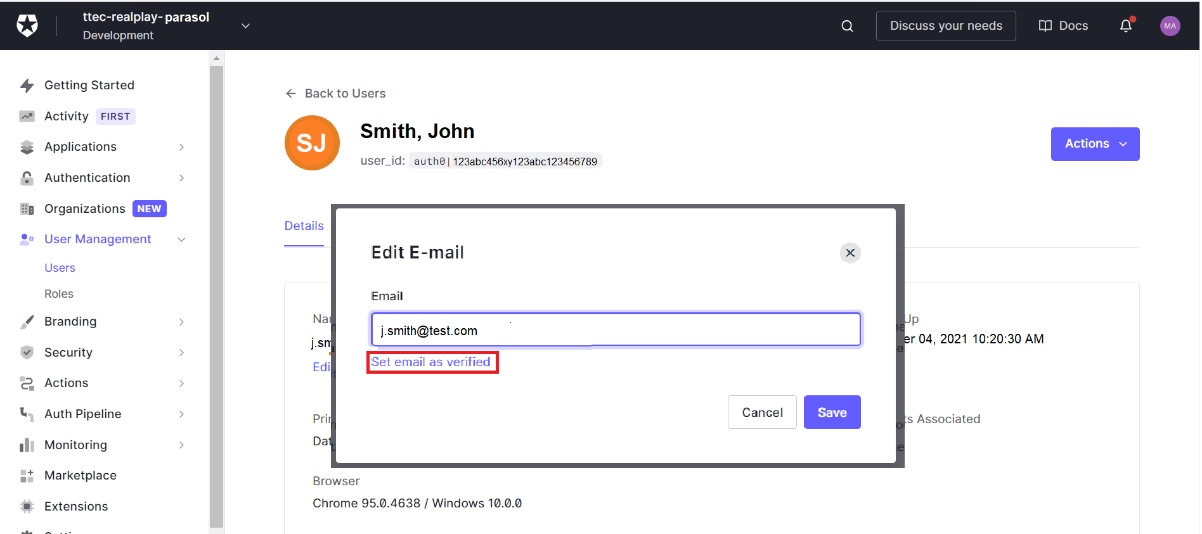
- Click the Save button.
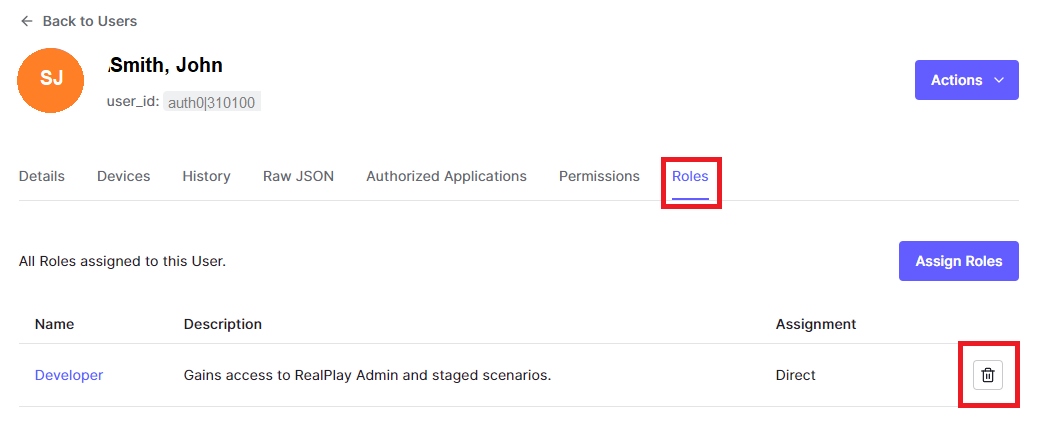
Updating Role Assignments
The process for updating role assignments depends on the user’s current and new role. There are three possible scenarios:
- Upgrade from learner to special user
- Change from one special role to another
- Downgrade from special user to learner
| Current Role | New Role | Instructions |
| Learner | Special User | Follow the instructions for Assigning Special Roles Through Auth0. |
| Special User | Another Special Role | Follow the instructions for Assigning Special Roles Through Auth0. |
| Special User | Learner |
|
NOTE:
Use only the following predefined roles:
- Learner (empty role assignment)
- SME
- Manager
- Developer