Manage a Group
Using the Security tool you can manage existing access groups to do the following:
- Edit/change group information
- Assign or remove users for a group
Accessing the Manage Group Interface
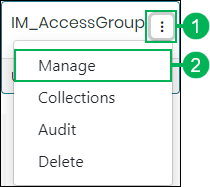
Locate the access group you need to manage and access the Manage Group interface by doing the following:
- Click the Actions button.
- Select Manage to access.

Using the Manage Group Interface

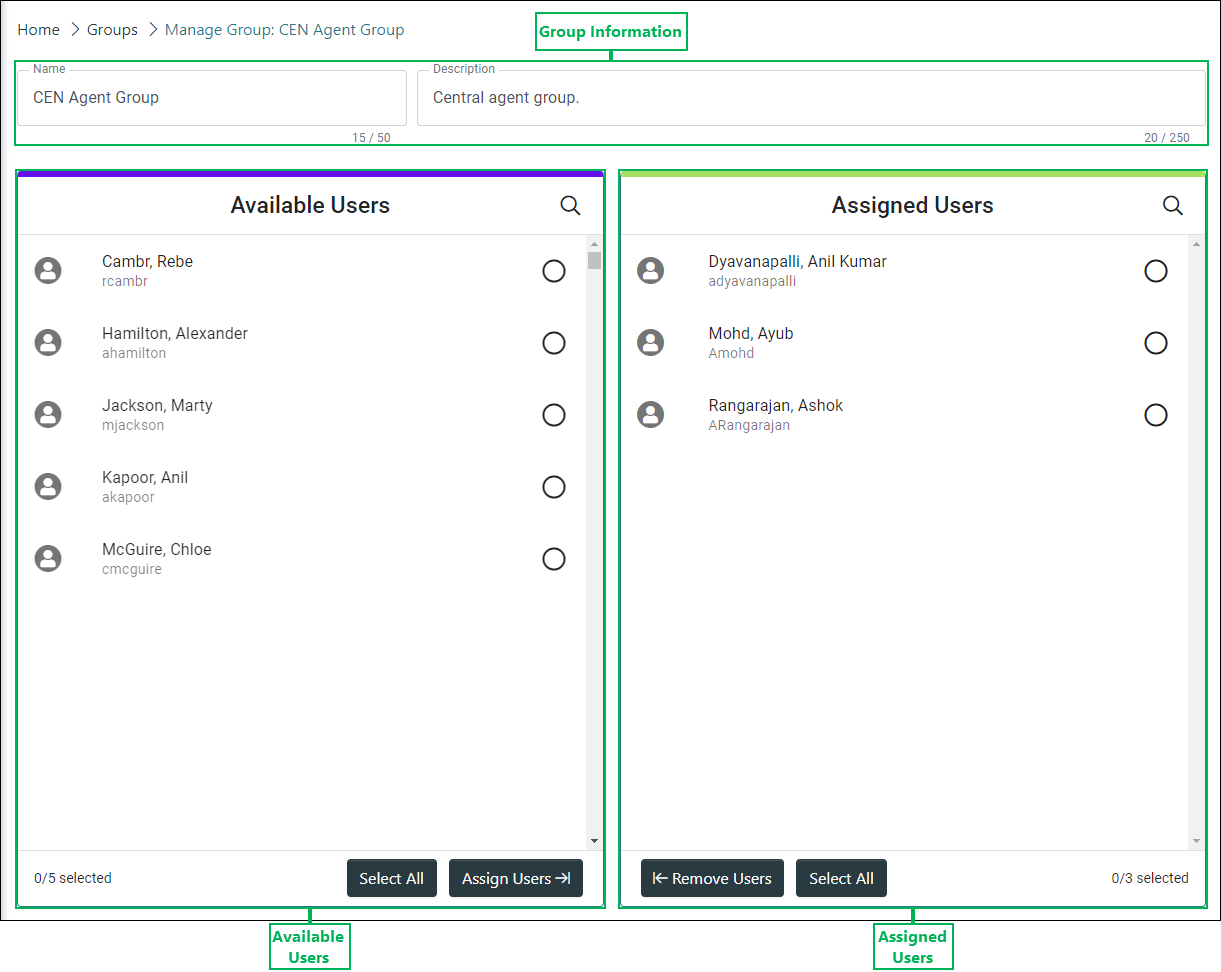
Group Information – This section allows you to view the group information and change the name and description.

- Name – Name of the group. Replace the text in this field to change the name of the group.
- Description – Provides a description of the group. Change or add the description for the group by entering text in this field. (Optional.)
Managing User Assignments Using the Assignment List Panes
Click to expand the sections below to see additional details.
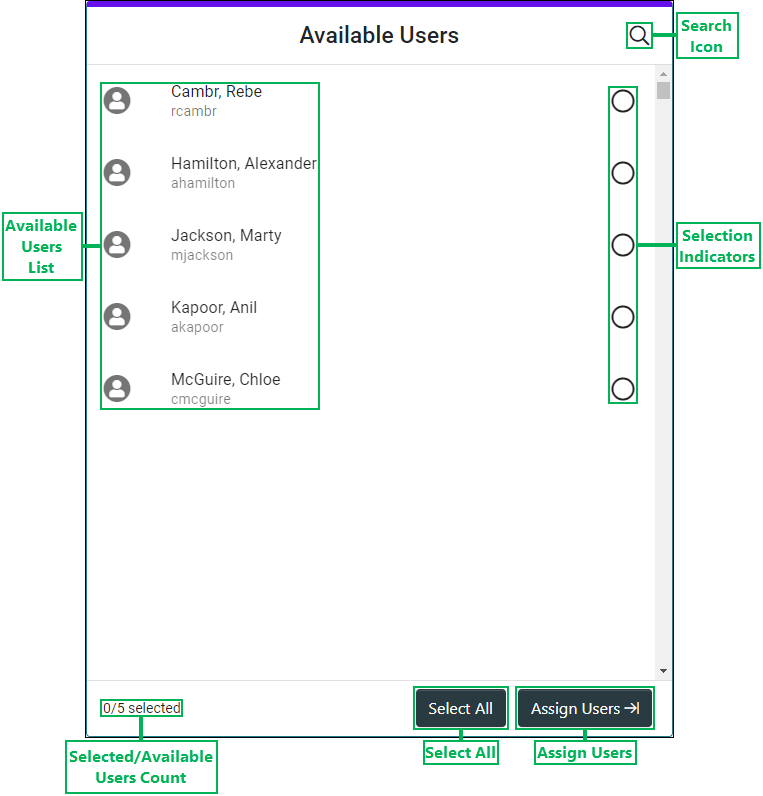
Displays all users available for assignment to the group and allows you to assign users.

- Available Users List – List of selectable users available for assignment.
- Selected/Available Users Count – Displays the total number of users selected out of the total number of users available for assignment to the group.
- Search Icon – Clicking this icon displays the Search field. Enter text in this field and click the Magnifying Glass icon to search for a specific users that are available for assignment to the group.

- Selection Indicators – When a list item is selected, this circle displays a check mark.


- Select All – Clicking this button selects all available users.
- Assign Users – Button used to assign the selected user(s). Clicking this button moves the selected user(s) over to the Assigned Users section.
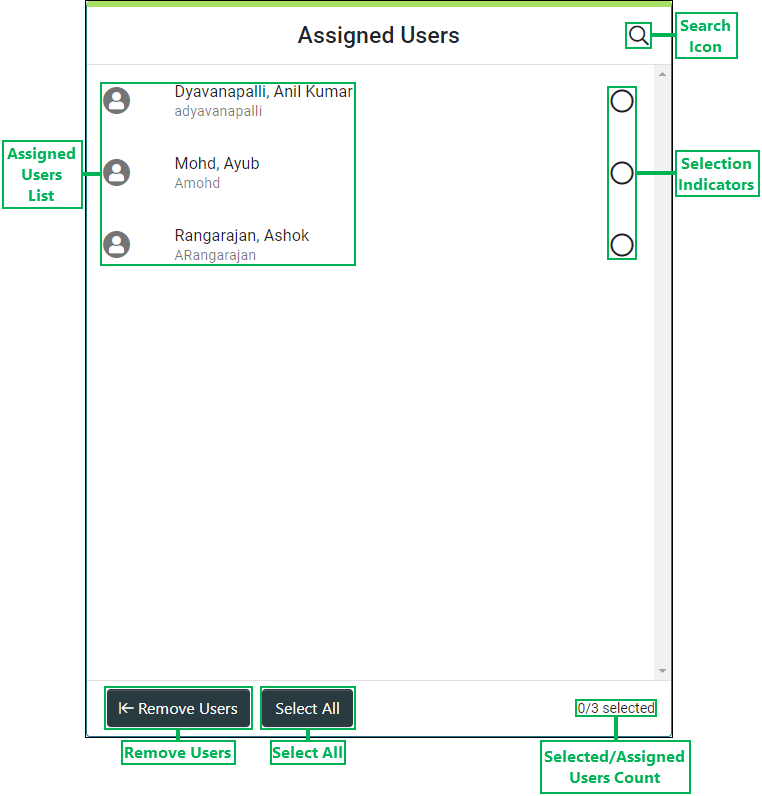
Displays all users currently assigned to the group and allows you to remove them.

- Assigned Users List – List of selectable users currently assigned to the group.
- Selected/Assigned Users Count – Displays the total number of users selected out of the total number of users assigned to the group.
- Search Icon – Clicking this icon displays the Search field. Enter text in this field and click the Magnifying Glass icon to search for a specific user or users that are assigned to the group.

- Selection Indicators – When a list item is selected, this circle displays a check mark.


- Select All – Clicking this button selects all assigned users.
- Remove Users – Button used to remove the selected user(s). Clicking this button moves the selected user(s) over to the Available Users section.
Saving Changes
Save any changes by clicking Save, or click Cancel to cancel the operation.

NOTE:
If canceling the operation, a Confirm Navigation panel displays. Click Leave Page to confirm canceling. To close the panel and return to the previous task, click Stay on Page.
