Topic Updated: April 01, 2025
Add or Remove Audio Groups
If a contact center supports a variety of departments within an organization, it may use many audio recordings. Audio Groups are available to manage the Audio Prompts used by the organization. They help to both organize and separate the many Audio Prompts.
Adding an Audio Group
To create a new Audio Group:
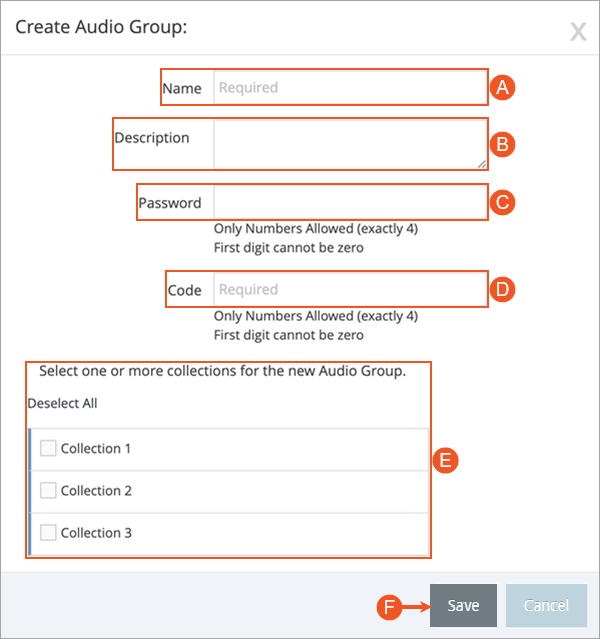
- From the Audio Manager page, click the Add Audio Group button. This opens the Create Audio Group dialog box.

- Complete all the Create Audio Group fields as directed below:
- Enter a name for the Audio Group into the Name field. (This is a required field.)
- Add a description to help describe the use or purpose of the Audio Group in the Description field. (This is an optional field.)
- Enter a password, using a maximum of four numbers, in the Password field. A password prevents unauthorized access to the Audio Group. (This is an optional field.)
- Each Audio Group requires a code. Enter a four-digit code into the Code field. (This is a required field.)
- Select any collections you would like to assign to the Audio Group. Options to quickly select or deselect all collections are available above the list.
- Deselect All – Removes the check from all collections listed below.
- Select All – Adds a check to all collections listed below.
- Click the Save button to create the new Audio Group, or click the Cancel button to cancel the operation.
An Audio Group Saved Successfully notification displays at the upper right side of the screen.

Removing an Audio Group
To remove an Audio Group:
- Locate the Audio Group to remove and click the Delete Audio Group task icon. This opens a Delete Audio Group confirmation dialog box.

- Click the Delete button to confirm the removal of the Audio Group, or click the Cancel button to cancel the operation.

An Audio Group Deleted Successfully notification displays at the upper right side of the screen.

See Also
Please let us know how we can improve this topic by clicking the link below:
© TTEC Digital 2025
![]()
![]()
![]()