Voice Outbound Campaign Synchronization
Voice Outbound Campaign Synchronization is a process of aligning and coordinating outbound interactions to provide a seamless experience. It ensures the data associated with a campaign is easily accessible.
Campaigns created or updated in Salesforce will be synchronized with Genesys Cloud Outbound. It helps to view the campaign status, track its progress, and review the call timing information along with other details.
When a Campaign is created in Salesforce, an outbound campaign is automatically generated in Genesys Cloud. The Salesforce Campaign Members are added as contacts in the Genesys Cloud outbound campaign, which is scheduled to run within the start and end dates of the Salesforce Campaign.
There are six types of Genesys Cloud outbound campaigns that OneView supports:
-
Agentless Dialing
-
External Dialing
-
Power Dialing
-
Predictive Dialing
-
Progressive Dialing
-
Preview Dialing
Important: An Outbound campaign must be maintained when utilizing outbound campaign sync in Salesforce. Any changes made in Genesys Cloud will not be reflected in Salesforce.
Prerequisites
-
Client Credentials are required for the outbound campaign settings to be configured. See Client Credentials.
-
OneView Admin permission set must be added to campaign administrators. See Add users to permission sets.
Install campaign sync package
URL: https://login.salesforce.com/packaging/installPackage.apexp?p0=04tOG0000016dMHYAY
Version: 1.3.0
Important:
-
Keep a copy of the package link for future reference to ensure the same version is installed in both your sandbox and production environments. The package link published on our OneView confirmation page is updated when a new version is released.
-
When installing the package into a sandbox, change the domain name of the link to the sandbox install URL (e.g., test.salesforce.com) and remove the symbol "~" at the end of the URL.
-
Upon clicking the link, the user is redirected to the Salesforce login page.
- Select Install for Admins Only (recommended) and the acknowledgment
statement to approve the install.
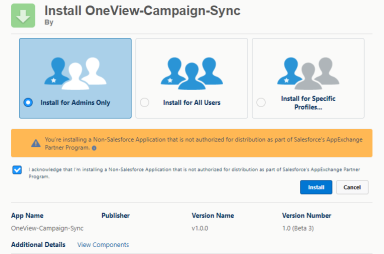
-
Click Install.
-
When installation is complete, click Done.