Topic Updated: April 01, 2025
Configure a New Text Control
The Text control allows a user to enter a phone number to forward calls to. It is commonly used for forwarding calls to a different phone number after hours.
This topic covers how to configure a new Text control after adding.
Adding a Text Control
To add a new Text control, refer to the Add a New Routing Control topic.
Configuring the New Text Control
To configure a new Text control:
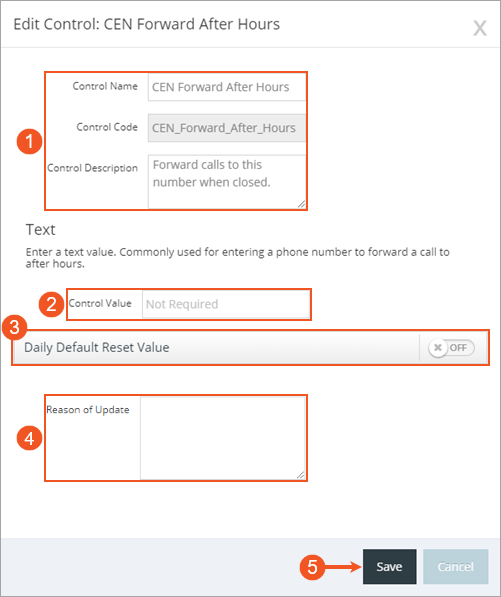
- Edit the Control Name and Control Description fields as needed.
NOTE:
The Control Code field can no longer be edited after initially adding the control.
- Enter text , such as a phone number, into the Control Value field.
- Refer to the Using the Daily Default Reset Value section below if the control value needs to reset to a different value on a daily basis.
- Click the Save button to save any changes made to the control, or click the Cancel button to cancel the operation.
A success confirmation displays in the upper right corner upon successfully creating a new control. The message disappears after a few seconds.
Using the Daily Default Reset Value
Based on the contact center's needs, a control value may need to reset to a different value at a specific time each day. This can be accomplished by using the Daily Default Reset Value. By default, this feature is disabled, and this section shows how to enable and configure.
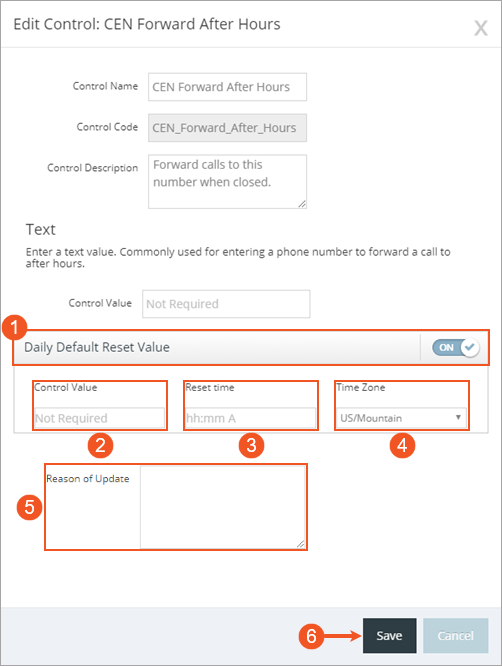
- Enable the Daily Default Reset Value by toggling the slider to the ON position
- Enter necessary text or another phone number into the Control Value field. This is the value the control resets to each day.
- Enter a time for the control to reset in the Reset Time field.
NOTE:
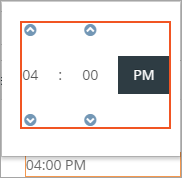
Alternatively, click on the Reset Time field to reveal a dialog that allows for the selection of the time. Click on the arrows to adjust the time, and click on AM or PM to swap between AM or PM.
- Select a time zone by clicking the drop-down menu located under Time Zone.
NOTE:
Make sure the time zone matches with your computer. This ensures the timestamps displayed in the audit log match up to the time on your computer.
- Click the Save button to save any changes made to the control or click the Cancel button to cancel the operation.
A success confirmation displays in the upper right corner upon successfully creating a new control. The message disappears after a few seconds.
See Also
Please let us know how we can improve this topic by clicking the link below:


