Topic Updated: April 01, 2025
Create New Non-Contact Center User
To create a new non-contact center user, use the Add New Non-Contact User option from the Portal Users grid menu. This process allows you to define key non-contact user details, assign roles, and configure necessary settings to ensure proper access and functionality within the system.
Adding a New Non-Contact User
To create a new non-contact user, do the following:
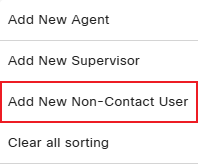
- Access the grid menu

- Select Add New Non-Contact User to create a new non-contact user.
Configuring the User Info Tab
Configure the settings and features under the User Info tab:
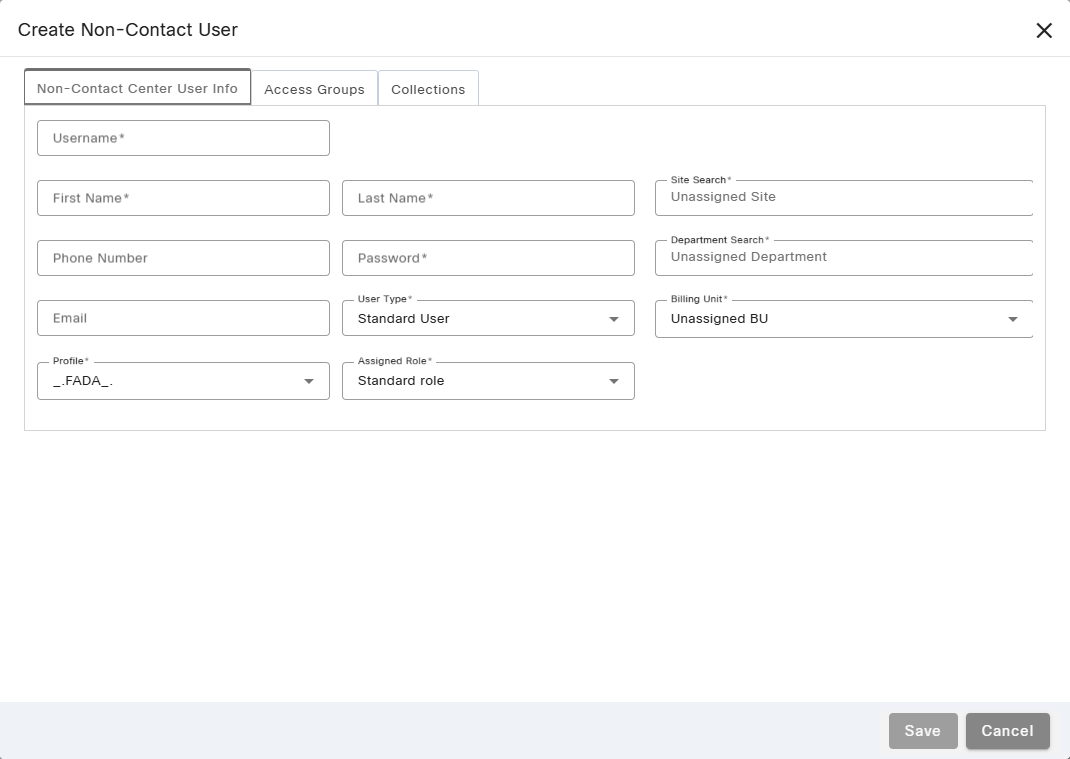
- Username – Required field. Username used for the new non-contact center user to sign into Portal or other related contact center applications. The username must be unique and is limited to 20 characters. When signing in, the username is in the form of username@tenant-suffix, in which the username is the name used in the Username field. The tenant-suffix is three characters used to identify the organization or contact center.
- First Name – Required field. New non-contact center user's first name.
- Last Name – Required field. New non-contact center user's last name.
- Phone Number – Required field. Non-business phone number used to contact the new non-contact center user. This field supports up to 15 digits and allows for entry of international phone numbers as well.
NOTE:
The Phone Number field is optional when using SSO and the AD service is set to read only.
- Password – Required field. Enter a password to assign to the new non-contact center user.
- Email – Optional field. Business email address assigned to the new non-contact center user. Webex CCE Administration Portal validates the email address entered across all tenants to ensure it is not currently in use. If the email address is currently in use by another user, an error message displays when trying to save the changes.
- User Type – Drop-down menu for selecting the user type for the user. The available user types are:
- Portal Administrator
- Callback Administrator
- Phone Administrator
- Campaign Administrator
- Route Control Administrator
- Contact Flow Administrator
- Route Control Manager
- Contact Flow Developer
- Standard User
- Site Search – Required. Search field used for finding and selecting the new non-contact center user's site location. The site is usually the city, state, or the name of the non-contact center user's physical location.
- Department Search – Required. Search field used for finding and selecting the new non-contact center user's department assignment.
- Billing Unit – Required. Drop-down menu for selecting the new non-contact center user's billing unit.
- Profile – Required. Drop-down menu for selecting a profile for the new non-contact center user. A profile is pre-selected by default.
- Assigned Role – Required. Drop-down menu for selecting a new non-contact center user's role assignment. For additional details about roles, see . To learn more about roles and how they affect user access, see Features for Standard Portal Roles.
Assigning Access Groups to the New Non-Contact Center User on the Access Groups Tab
Assign access groups to the new non-contact center user under the Access Groups tab:
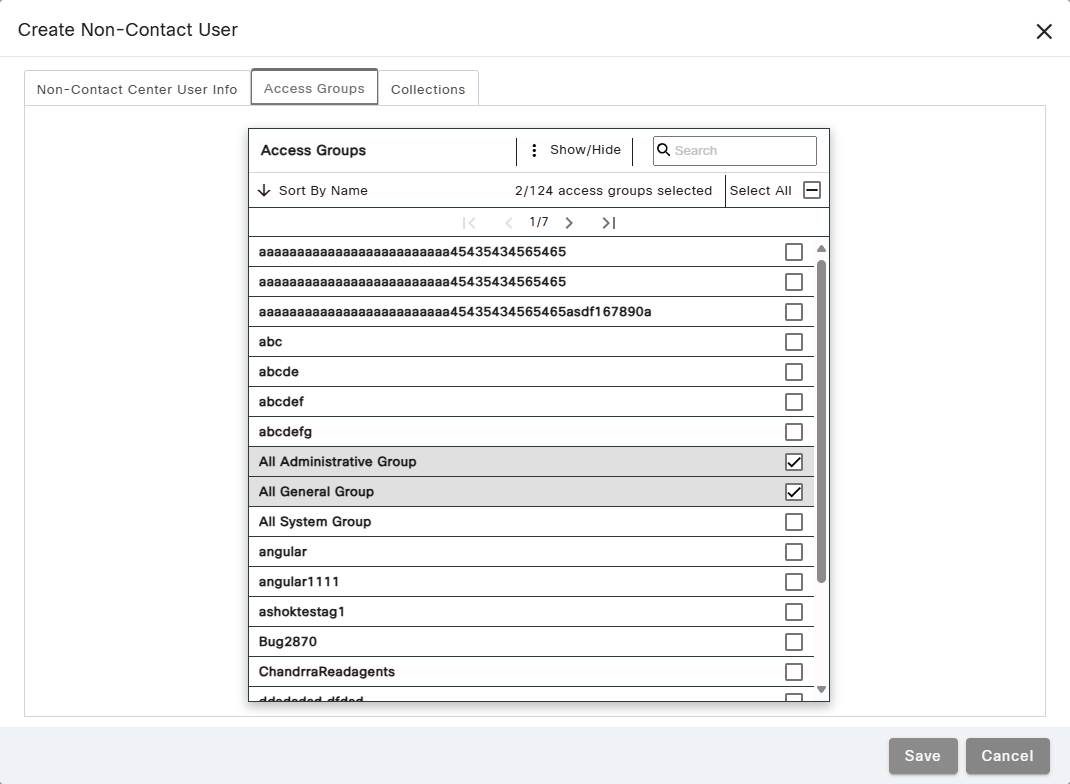
Assign access groups to the new non-contact center user by selecting any groups needed within the Access Groups assignment pane. See theAssignment Panes Interface topic for assistance.
Assigning Collections to the New Non-Contact Center User on the Collections Tab
Assign collections to the new non-contact center user under the Collections tab:
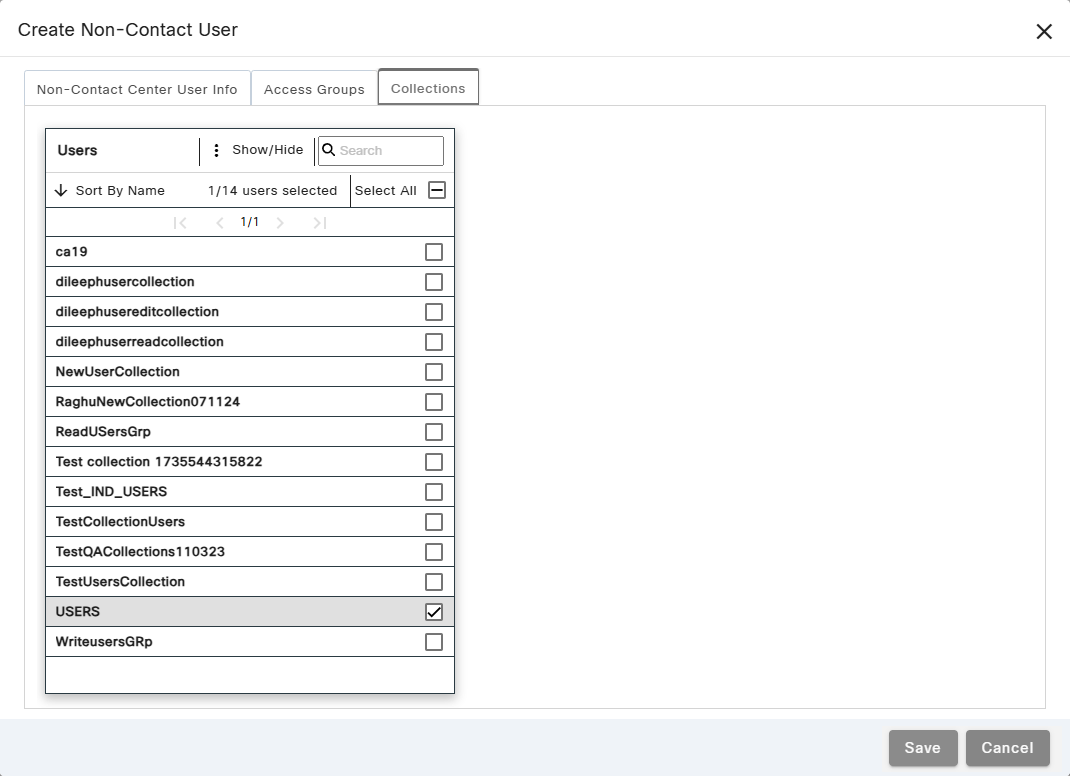
Assign users collections to the new non-contact center user by selecting any collections needed within the Users assignment pane. See theAssignment Panes Interface topic for assistance.
Saving the New Non-Contact Center User
Save the new non-contact center user by clicking the Save button, or Cancel the operation by clicking the Cancel button.
See Also
Copyright © 2025 Cisco. All rights reserved.
![]()
![]()
![]()