Topic Updated: April 01, 2025
Upload and Select Audio Prompts
Some settings within Webex CCE Administration Portal Callbacks allow you to add audio files to be used for a specific feature. The following icons are displayed for the settings where this function is needed:
 Select File – Opens a dialog allowing you to select and manage audio prompt files. See the Selecting an Audio Prompt File section below.
 Upload File – Opens a dialog allowing you to upload audio prompt files. See the Uploading an Audio Prompt File section below.
Selecting an Audio Prompt File
- Click the Select File icon to open the Prompt File Manager as shown below.

- Click
 to expand and view the available locations. Collapse a location by clicking
  .
. - Select the audio prompt you would like to use. The selected audio prompt is highlighted.


NOTE:
Click the Expand All button to quickly expand all available audio prompt locations, or the Collapse All button to quickly collapse all available audio prompt locations.


Use the Search field to find a specific audio prompt.

Click the Delete button if you want to remove the selected audio file.

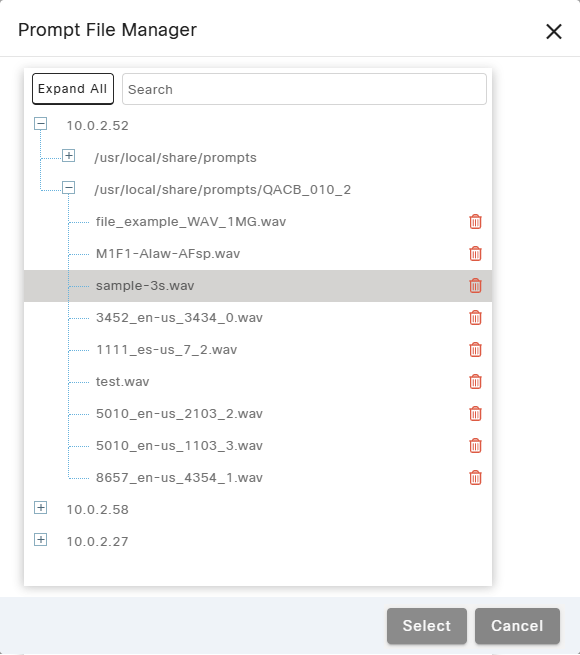
- Click the Select button to make the selection, or click the Cancel button to cancel the operation.

Uploading an Audio Prompt File
Upload an audio prompt file by doing the following:
- Click the Upload File icon to open the File Selection dialog.

- On the File Selection dialog, click the Select File button.
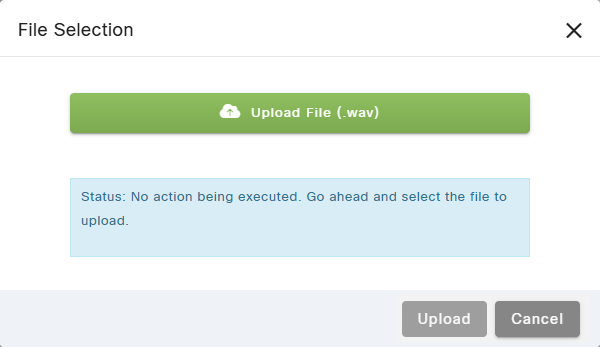
- Locate and select the audio file you wish to upload the dialog that displays.
NOTE:
This step may vary depending on which operating system and/or web browser you are using to access Portal.
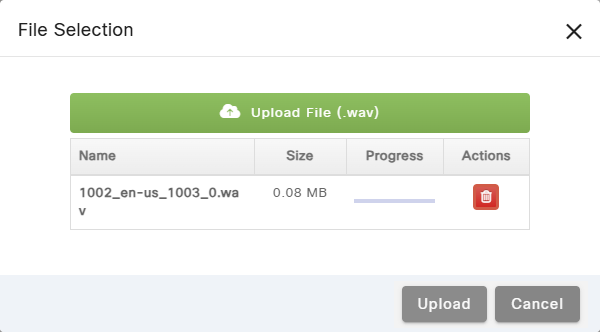
- If you are satisfied with the audio file selected, click the Upload button to upload the file, or click the Cancel button to cancel the operation.
NOTE:
Click the Delete button if you want to remove the recently selected audio file.

See Also
Copyright © 2025 Cisco. All rights reserved.
![]()
![]()
![]()