Topic Updated: April 01, 2025
Edit an Existing Reason Code
Over time, reason codes may need to have their name or description updated, or they may need to be made global in order to allow more agent teams to use them. To change a reason code, you must edit it.
Editing a Reason Code
Edit a reason code by doing the following:
- Locate the reason to edit.
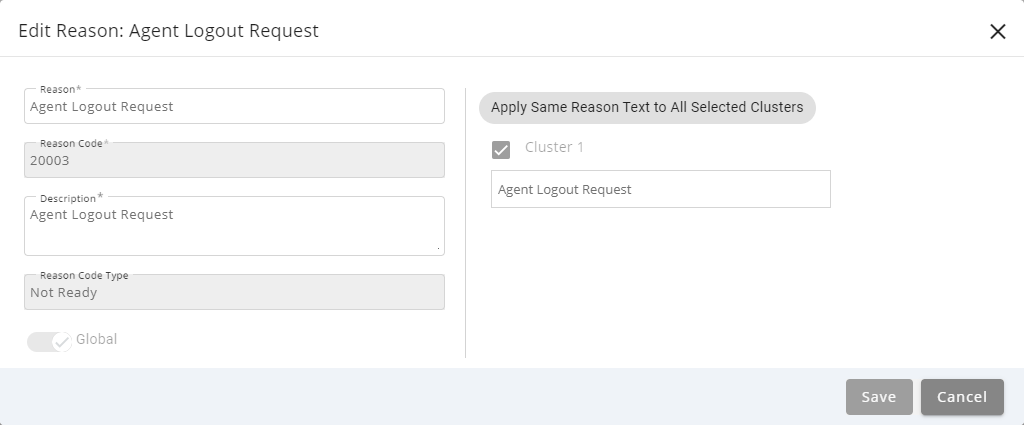
- Click the Edit Reason task icon located on the same row of the reason to edit. This opens the Edit Reason dialog box.
- Change the name of the reason by replacing text in the Name field.
- Change the description of the reason by replacing text in the Description field.
NOTE:
The Reason Code cannot be changed after initially creating the reason code.
- Enable or disable the Global option by setting the slider to the YES or NO position. When enabled, the reason code can be used by all agent teams.
NOTE:
If the Global slider is set to the NO position, the reason code must be assigned to at least one or more agent teams before it is usable. See Manage Reason Code Assignment for an Agent Team for more information.
- Click the Apply Same Reason Text to All Clusters button if you want to use the same reason text for all clusters.
- Select each cluster you want to enable the reason code for. You can also add custom reason text for each cluster in the text box provided below each cluster selection.
- Save any changes made to the reason code by clicking the Save button. Click the Cancel button to cancel the operation.
See Also
