Queue Configuration
The primary function of queues within the InteractionSync for Amazon Connect configuration is to associate the following features with the call queues used in Amazon Connect:
Accessing a Queue Configuration
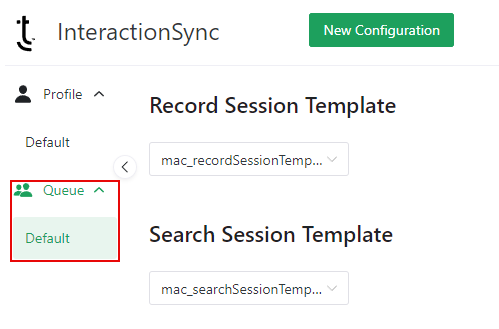
Settings can be configured for each queue found within the InteractionSync configuration under the Queue section of the menu. Select the queue you want to configure, or see the Adding a New Queue section below to add a new queue.
Refer to the InteractionSync Configuration topic for assistance with accessing the InteractionSync configuration.
Adding a New Queue
Add a new queue to the InteractionSync configuration by doing the following:
To associate a new queue created in this configuration with a queue used in Amazon Connect, they must have the same name.
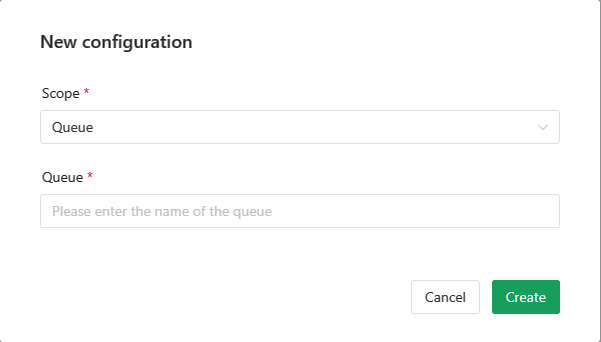
- Click the New Configuration button located at the top of the InteractionSync configuration.
- Select Queue from the Scope drop-down menu, found on the New configuration dialog.
- Enter the same name of the Amazon Connect queue into the Queue field.
- Click the Create button.
Selecting a Record Session Template
Use the Record Session Template drop-down selector to change the entity record that is opened upon an agent accepting an incoming call.

Selecting a Search Session Template
Use the Search Session Template drop-down to select the search window to open upon an agent accepting an incoming call.

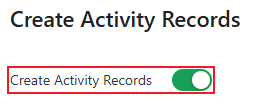
Enabling Create Activity Records
This setting controls whether InteractionSync creates activity records in Dynamics 365 when interactions occur.
When enabled:
- InteractionSync creates an activity record for supported interactions.
- The activity record is associated with the screen‑popped entity when available.
When disabled:
- InteractionSync does not create activity records.
- The following settings are automatically disabled:
- Enable Activity Pop
- Enable Wrap Up Button
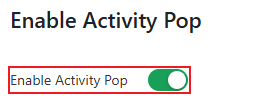
Enabling Activity Pops
This setting controls whether activity records automatically open in the agent interface after creation.
When enabled:
- The activity record automatically opens after the interaction ends.
When disabled:
- InteractionSync creates the activity record but does not automatically open it.
- Agents can still access the record from the related Contact, Account, or other associated entity.
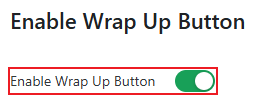
Enabling the Wrap Up Button
The Wrapup feature allows agents to enter notes and select wrapup codes to define the outcome of an interaction.
Administrators can enable or disable Wrapup based on business requirements.
When enabled:
- The Wrap Up dialog appears after the interaction ends.
- Agents can enter notes and select wrapup codes.
- A Wrapup button is available during the interaction..
When disabled:
- The Wrap Up dialog does not appear after the interaction ends.
- The Wrapup button is not available during the interaction.
- Agents are not prompted to enter wrapup notes or codes.
- Activity records are still created when Wrapup is disabled.
- If a screen pop occurs during the interaction, the Activity record is automatically associated with the displayed entity.
- If no screen pop occurs, the Activity record is created without Regarding or Who associations.
Configuring Search and Screen Pops for a Queue
Screen pops display entities to an agent before or during a customer call and allows them to view and/or collect information that is relative to that call and contact. InteractionSync automatically displays the screen pops to an agent based on a search for entities that match with the records and information stored within the Dynamics 365 customer relationship management (CRM).
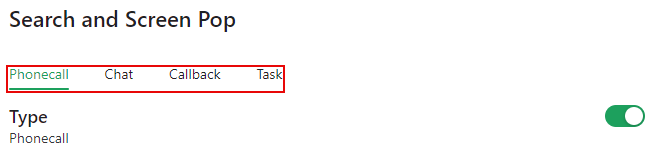
Selecting an Interaction Type to Configure
Separate Search and Screen Pop configurations are available for each of the following interaction types:
- Phonecall
- Chat
- Callback
- Task
Click on a tab to select the interaction type you want to configure..
Enable or Disable Search and Screen Pop for Interaction Types
With the interaction type selected, enable or disable the Search and Screen Pop feature by toggling the slider to the on or off position. This feature must be enabled to configure screen pops.
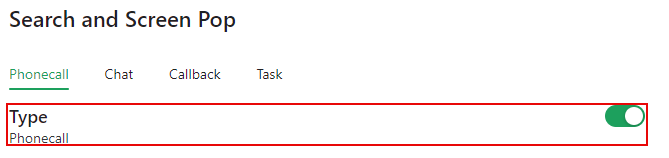
Search and Screen Pop "Enabled" for Phonecall Interactions
Selecting a Screen Pop Trigger
Triggers are used to determine when a screen pop displays an entity or entities to the agent. Incoming interactions are first placed into a queue and then transferred to an available agent assigned to that specific queue in Amazon Connect. Depending on the trigger configuration, entities are then displayed to the agent upon receiving or accepting the call. To change how screen pops are triggered, do the following:
- Click on the Trigger drop-down menu.
- Select one of the following trigger options:
- Connected – Screen pop displays when an agent accepts an incoming interaction.
- Connecting – Screen pop displays before an agent accepts the incoming interaction.
- Incoming – Screen pop displays during the incoming interaction before the agent accepts. (This trigger is only available in the Callback interaction configuration.)
- Pending – Screen pop displays after the callback interaction is accepted. (This trigger is only available in the Callback interaction configuration.)
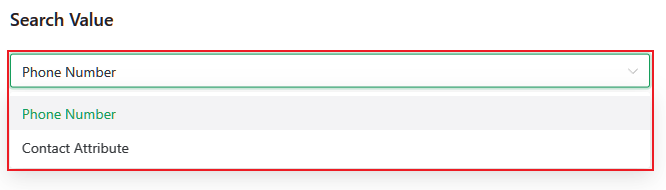
Selecting a Search Value
Under the Search Value section, administrators can select either a phone number or contact attribute to specify which value is used to query the CRM. Select one of the following options to define the search value:
- Phone Number – Selecting this option will use the caller's phone number as the search value.

- Contact Attribute – Selecting this option displays a text box allowing you to enter the name for a contact attribute to use as the search value. The contact attribute name is not case sensitive, but it must match the name used in Amazon Connect.
Configuring Searched Entities
When a screen pop is triggered, InteractionSync searches the CRM for matching records based on the entities defined in the screen pop configuration.
This search determines which records are displayed to the agent during the interaction. If a match is found, the corresponding record is opened. If no match is found, behavior depends on the configured screen pop settings.
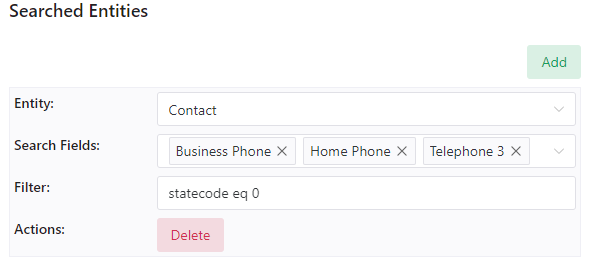
Searched Entity Configuration
A searched entity defines how InteractionSync searches for matching records during a screen pop. Configure the following fields to control which records are returned:
- Add – Click to add a new row and configure an additional entity search.
- Entity – Select the entity type to search (for example, Contact, Account, or Case). This determines which records can be returned and displayed to the agent.
- Search Fields – Specify the fields InteractionSync uses to search for matching records. These fields are evaluated when the interaction is triggered, based on the configured screen pop trigger.
- Filter – Limits the search results based on record status (for example, Active or Inactive) in Dynamics 365. For more information, refer to the Query Options documentation.
- Delete – Click to remove the selected entity search configuration row.
Screen Pop Behavior
The Screen Pop Behavior section allows you to configure how screen pops behave based on the outcome of the entity search.
If No Entity is Found
Choose from one of the following options to determine what happens if the entity search returns no results:
- Do nothing – No screen pop is displayed.
- Show search page – Displays a search page, allowing the agent to manually search for a record.
- Create an entity – Creates a new record. When selected, additional configuration options appear to define which entity is created and how it is populated.
Entity Created
This section appears only when Create an entity is selected under If No Entity Is Found. Use these settings to define which entity is created and how it is populated.
- Entity Created – Select the type of entity to create and display to the agent as a screen pop.
- Add – Click to add a new row and configure additional field mappings.
- Entity Field – Select the field in the created entity that you want to populate.
- Contact Field – Select the data source used to populate the selected Entity Field. Options include:
- Phone Number – Maps the incoming call phone number to the selected Entity Field.
- Queue – Maps the name of the queue that handled the interaction to the selected Entity Field.
- Contact Attribute – Maps a custom contact attribute to the selected Entity Field. Enter the attribute key in the field displayed next to the Contact Attribute option.
- Delete – Click to remove the selected mapping row.
Contact attribute keys may be case-sensitive. Enter them exactly as defined in the source system.
If a Single Entity is Found
Select one of the following options to define what happens when a single matching record is found:
- Do nothing – No screen pop is displayed.
- Display entity – Opens the matching record for the agent.
If Multiple Entities are Found
Select one of the following options to define what happens when multiple matching records are found:
- Do nothing – No screen pop is displayed.
- Show search page – Displays a search page, allowing the agent to select the appropriate record.
Example Screen Pop Scenario
The following example demonstrates how screen pop behavior works in a typical interaction:
- A customer places a call and is routed to a queue.
- The call is assigned to an available agent.
- When the agent accepts the call, InteractionSync searches the CRM using the customer’s phone number.
- Based on the search results, one of the following occurs:
- No results found – A new Contact record is created and displayed.
- One result found – The matching Contact record is displayed.
- Multiple results found – A search results page is displayed, allowing the agent to select the appropriate record.
Configuring Wrapup Codes
Wrapup codes allow agents to define the outcome of an interaction. Use the Wrapup Codes section of the queue configuration to specify the codes available to agents.
Wrapup codes are available only when the Wrapup feature is enabled in the InteractionSync configuration. If Wrapup is disabled, agents will not see wrapup options during or after an interaction.
Adding Wrapup Codes
To add a wrapup code:
- Click the + button.
- Enter the wrapup code in the field that appears.
Wrapup codes may be case-sensitive. Enter each code exactly as it is defined in the CRM.

Deleting Wrapup Codes
Delete a wrapup code by clicking the X icon next to the code you want to remove.

Configuring Contact Attributes
Amazon Connect uses contact attributes to store temporary information about a contact during an interaction. These attributes help drive routing, automation, and post-contact workflows. Common use cases include::
- Providing a customer phone number for scheduling a callback
- Identifying which agent handled the interaction for post-call surveys
- Assigning queues based on caller data or conditions
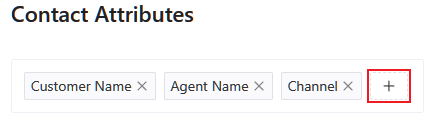
Adding Contact Attributes
Add a contact attribute by clicking the + icon, then enter the attribute name in the field that appears. The name is not case-sensitive, but it must match the attribute name configured in Amazon Connect.
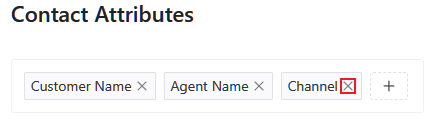
Deleting Contact Attributes
Delete a contact attribute by clicking the X icon next to the attribute you want to remove.
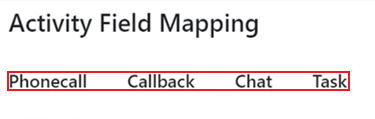
Configuring Activity Field Mapping
Activity field mapping synchronizes activities that occur during agent interactions and maps them to Microsoft Dynamics 365. You can configure mappings for the following activity types::
- Phone Call
- Callback
- Chat
- Task
Enable or Disable Activity Field Mapping
Enable or disable Activity Field Mapping by toggling the On/Off switch.
Selecting an Activity
Select an activity tab to configure mappings for that activity type.
You can navigate between tabs without losing changes. The system saves updates only when you click the Save button at the bottom of the page.
GenAI Transcript Summary
Controls whether AI-generated summaries are created for call transcripts within a queue.
When enabled:
- InteractionSync generates a summary after each interaction.
- Agents can view the summary as part of the interaction details.
When disabled:
- No transcript summaries are generated.
Transcript Summary must be enabled for the profile associated with the queue. Refer to Transcript Summary for assistance.
Configure an Activity
Configure activity field mappings using the options below:
- Add – Click to add a new row for additional Entity Field and Contact Field mappings.
- Entity Field – Select the entity field to include in the mapping.
- Contact Field – Select the contact field to map the entity field to.
- Delete – Click to remove the selected Entity Field and Contact Field mapping row.
Saving the Queue Configuration Changes
Save any additions or changes to the queue configuration by clicking the Save button at the bottom of the page.
